Roughing out the Biped Tutorial
Getting started with Biped Modeling
CS22 -- Loeb
A video demonstration by Drew Hill of character design process.
Keep your character design simple!
Think about your character in terms of simple primitive shapes (cubes, spheres, cylinders).
Getting started
Set up a new project. (File>Project Window)
Save your scene. (File>Save Scene As)
Set up your UI:
Hide your Time Slider, Range Slider, Command Line, and even the Tool Box (go to Windows>UI Elements and uncheck these.
Be sure your Front and Side Image planes are set up for those cameras. If not, do that now.
Be sure your Image planes are out of the way in the Perspective camera or are hidden.
Hide your Cameras in the perspective view (Show>Cameras, uncheck)
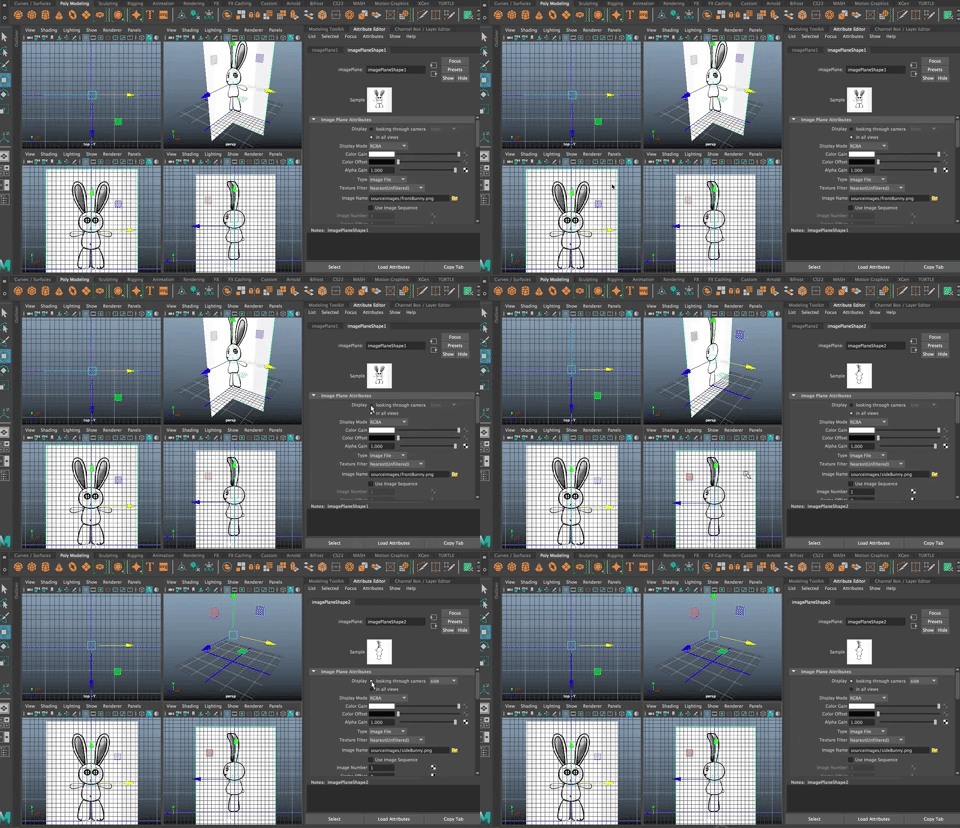
Make sure Incremental Saves (File>Save Scene) and Auto Save (Windows>Settings and Preferences>Preferences>Files/Projects) are set up.

I like to turn up the time interval to at least 20 minutes.
There are, of course, lots of approaches to building a biped. The most common one is to start with a cube and extrude out, shaping as you go. I used this technique for the hyper-realistic woman I made several years ago when I was first planning this course. A simple cube that was cut in half

Turned into this...
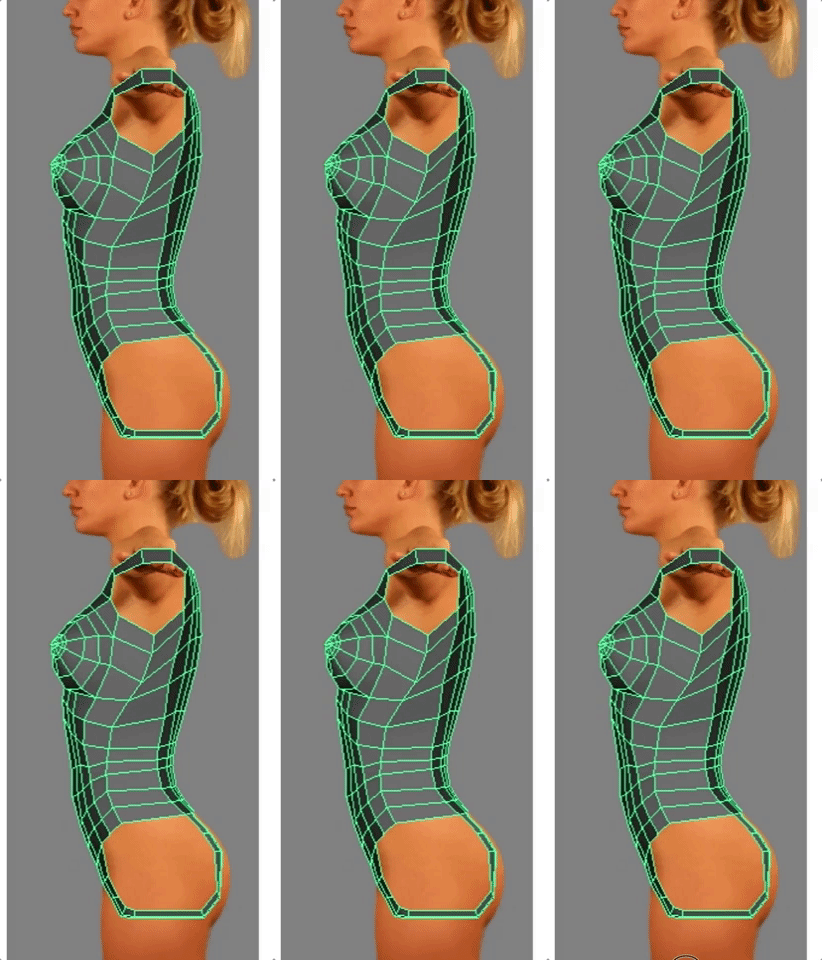
And then this
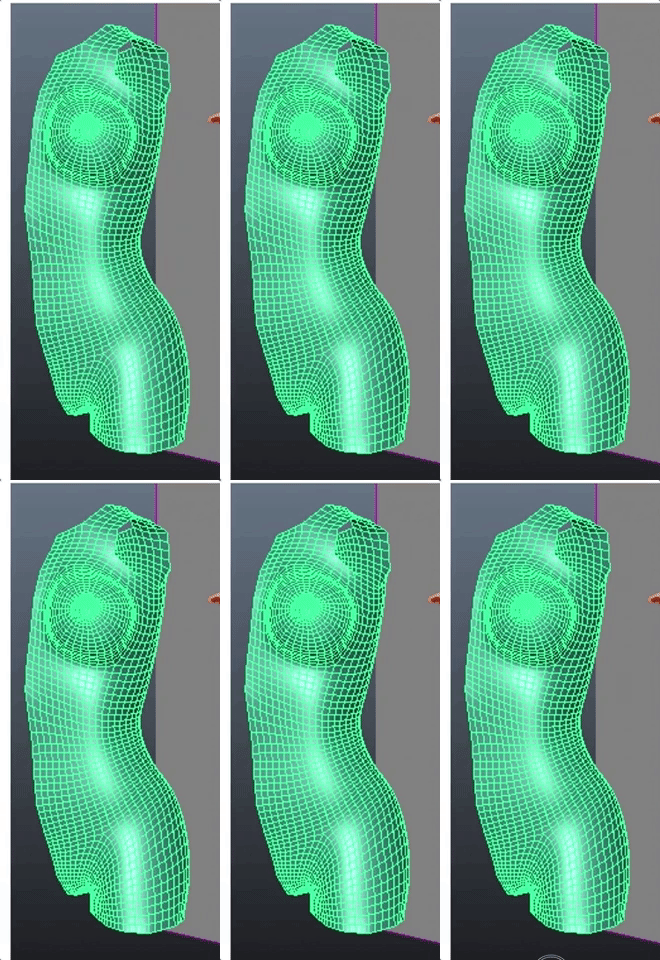
And this
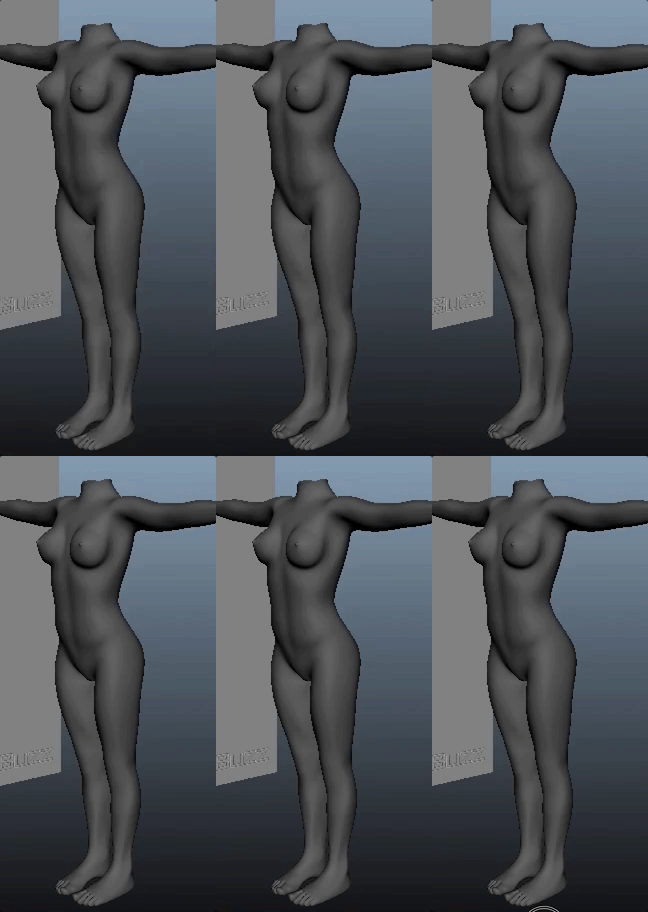
The simpler male biped here is also done that way, but it uses cylindars for the arms and legs.


I will give you a tutorial you can use to follow that method (see the tutorial for method #2), but I've discovered a new way that, I believe, has some big advantages.
We are going to try a fast workflow that builds on what you do in the Quick Model competitions. In fact, you should be able to roughly block out your character in an hour or two! You do this by using primitives and building your character in parts and then worry about joining it all together and smoothing things out later on.
In other words, treat your biped model as you did your snowman--make small parts out of primitives that are placed on the character and even overlap, to get the basic shape right first.
You can build the head, too, or you can wait to do the head later. We'll build a rough character and then use some retopology tools to make a smoother version.
My belief is that if we can start simple, you will be happier with the results and learn more. You may be able to actually model more than one character during this class if you wanted to, which would give you an opportunity to practice more. And that is a good thing!
Some Handy Tools and Tricks
Grab Tool
The grab tool is one of the sculpting tools in Maya that were part of a separate software package called Mudbox but now are standard in Maya. It is somewhat like soft select, in that it grabs a collection of verts that are within a brush area. Try it--
Create a plane.
Go to the Scupting Shelf and Selec the Grab Tool.
Hold the b key and drag to the left until you can see the circle that is the brush size. It may be very big when you first open the tool.
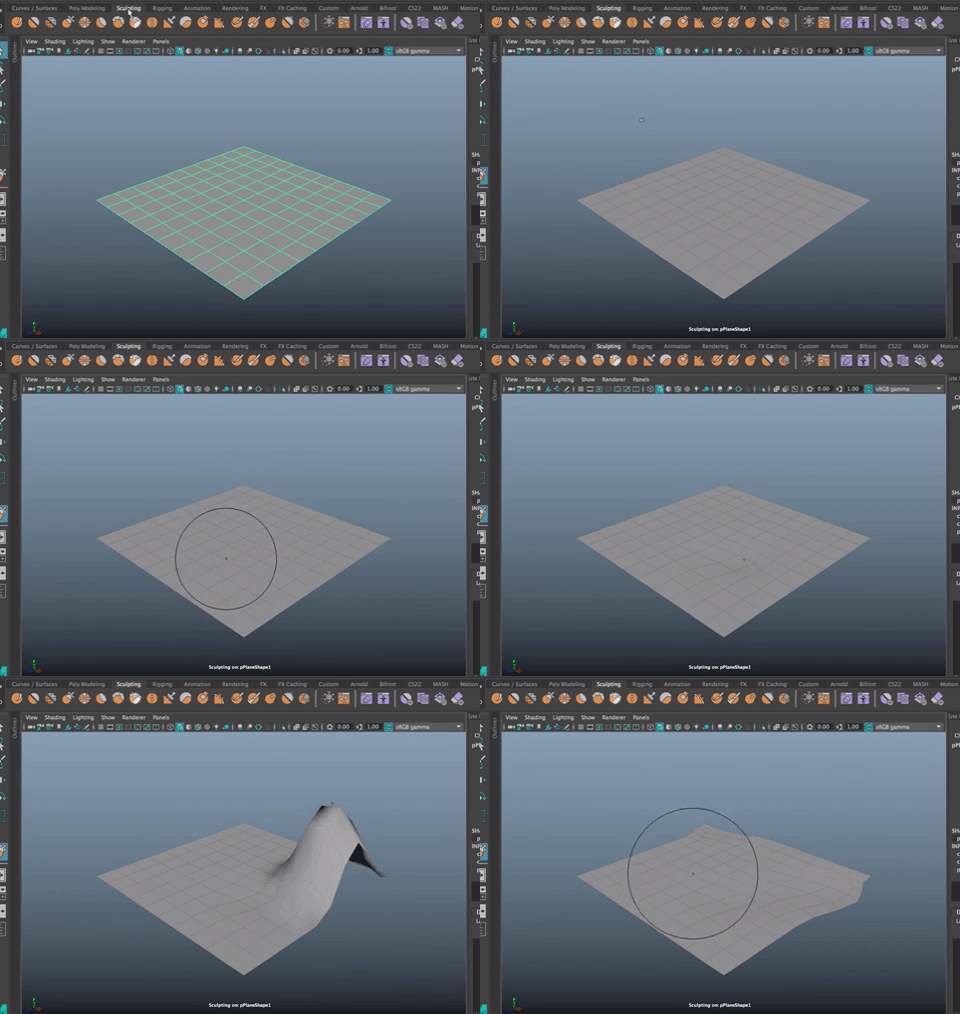
You can also click on the tool icon to open the Options Box for the Grab Tool and play with some settings there.
Symmetry
As I've said many times, there are some big improvements in Maya 2018. Symmetry and Mirroring are two of these improvements.
You can access Symmetry in the Modeling Toolkit.
Symmetry in Object mode uses the Object space, so no matter where the object is or how it is positioned, or how the camera is positioned, the symmetry is across the object's X axis
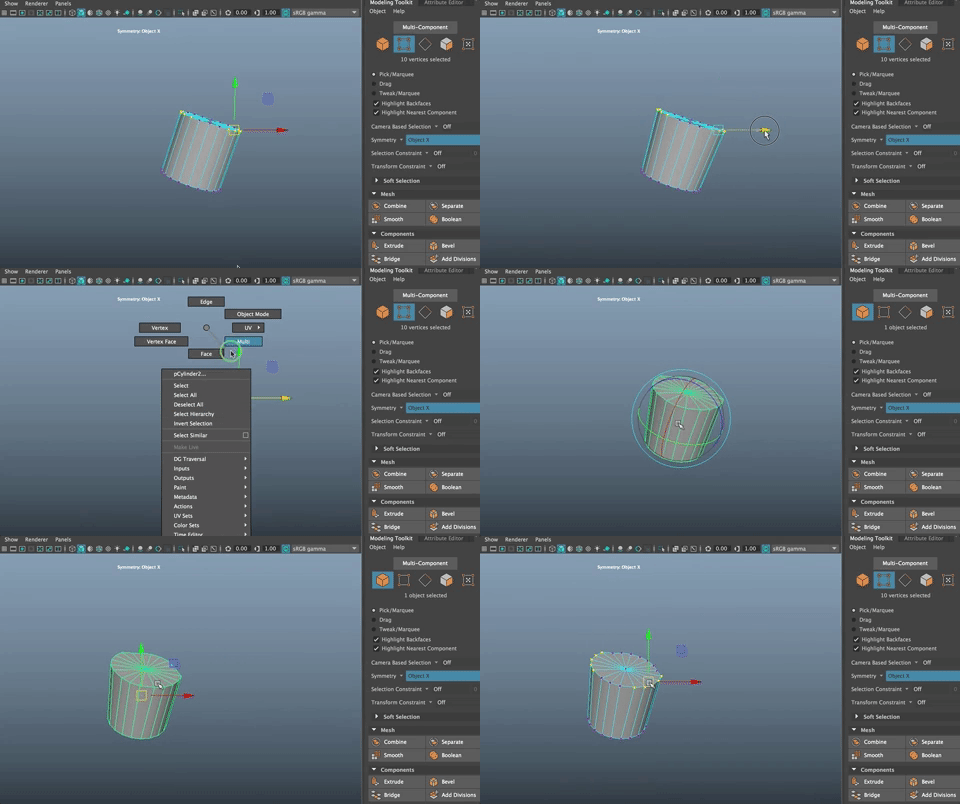
You can also see that Symmetry Object X shows in the Viewport as an extra way to remind you.
The same is true for Object Y and Object Z.
Symmetry across World Modes uses the World axis for mirroring motions.
The Grab tool has a symmetry mode that can be turned on by right clicking when in the tool and choosing the symmetry setting you want to use.
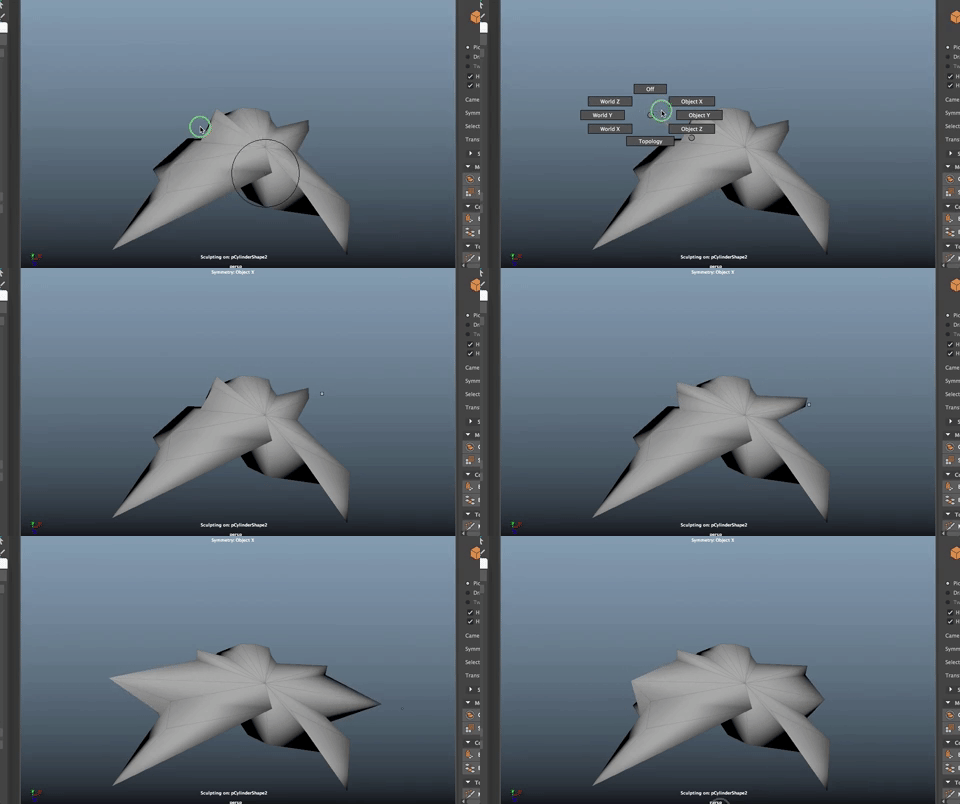
##Creating Custom Hot Keys
In this modeling process, it is super handy to have some new hotkeys. You can create your own, but let's create some we will all use. For example, we will mirror a lot. Let's set it to Shift + m which is currently being used to hide a toolbar and not super intuitive.
Go to Windows>Settings and Preferences>HotKey Editor
Search your function. Assign the hotkey by entering Shift + m on your keyboard. The action is shown on the on-screen keyboard, too.
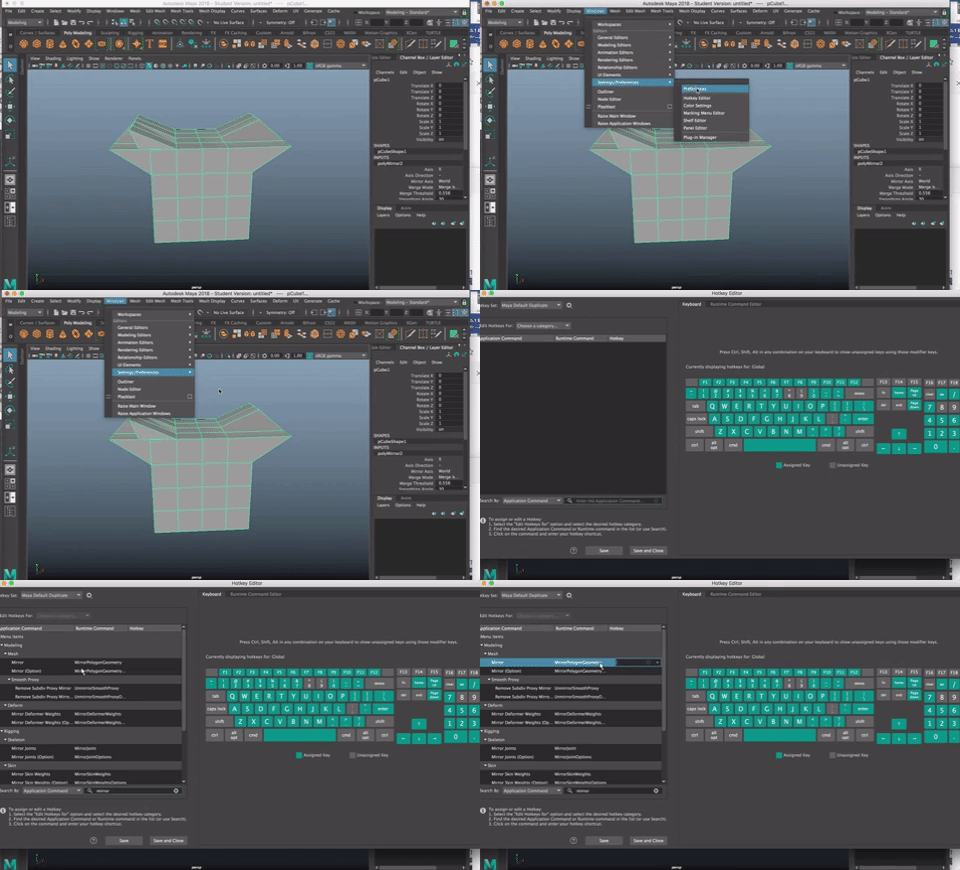
And create a hotkey for opening the Options Box for Mirroring (Command + Shift + m)
Mirroring
Mirroring is super handy when making a symmetrical object, like a character. As long as the center line is lined up at the Y axis (at 0 in the X axis) you can easily mirror actions or geometry.
If I select and delete the -x faces on an object, I can model one side and then just mirror them over to the other side, to give me half the amount of work. Here is a simple object. Select it in Object Mode and hit shift + m
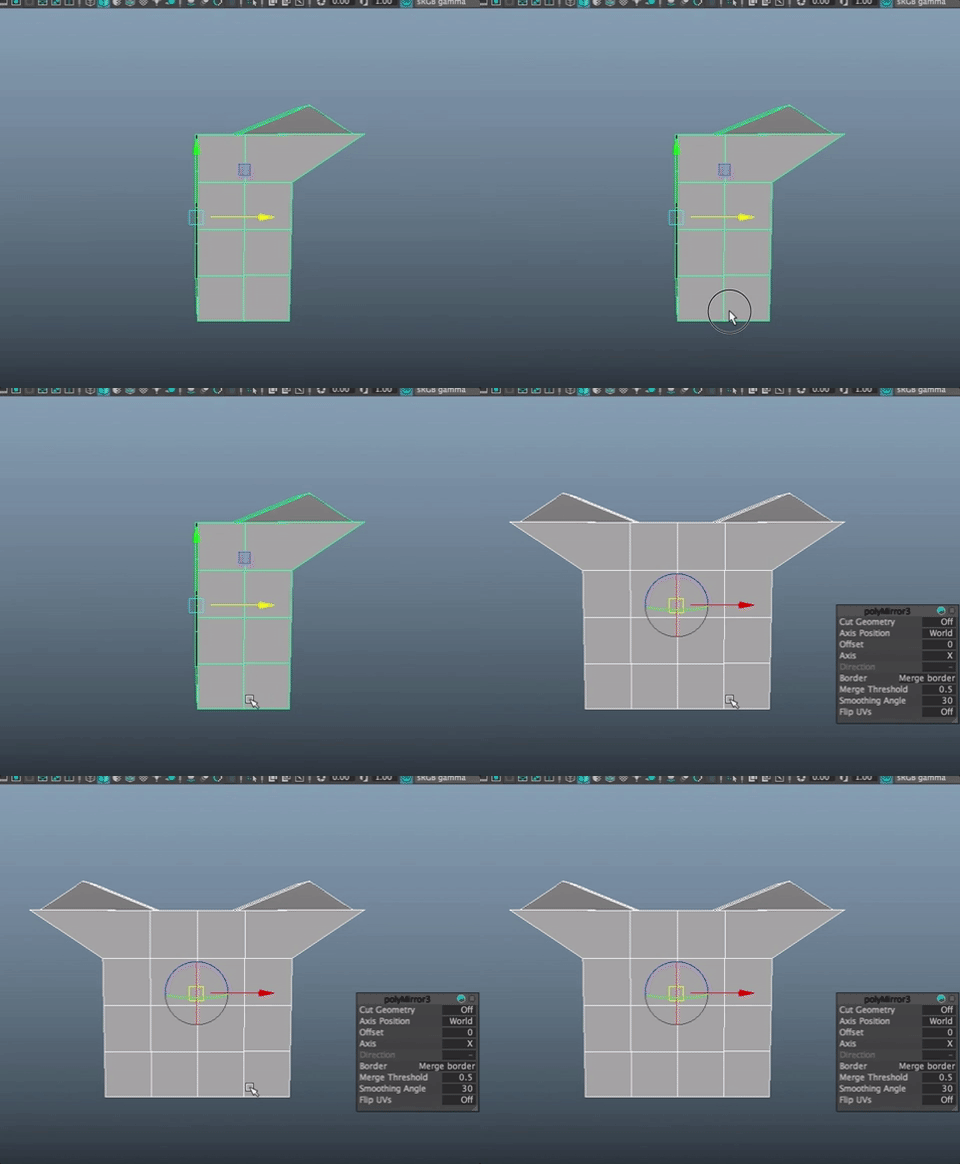
Options come up for the mirroring that can be changed. Pay Particular attention to the axis you are mirroring across!
Extracting
It is sometimes useful to extrude out some geometry and then extract it to make it a separate object (as we did with the window). Make a hotkey for extracting. COMMAND + e
Deleting Caps on an object.
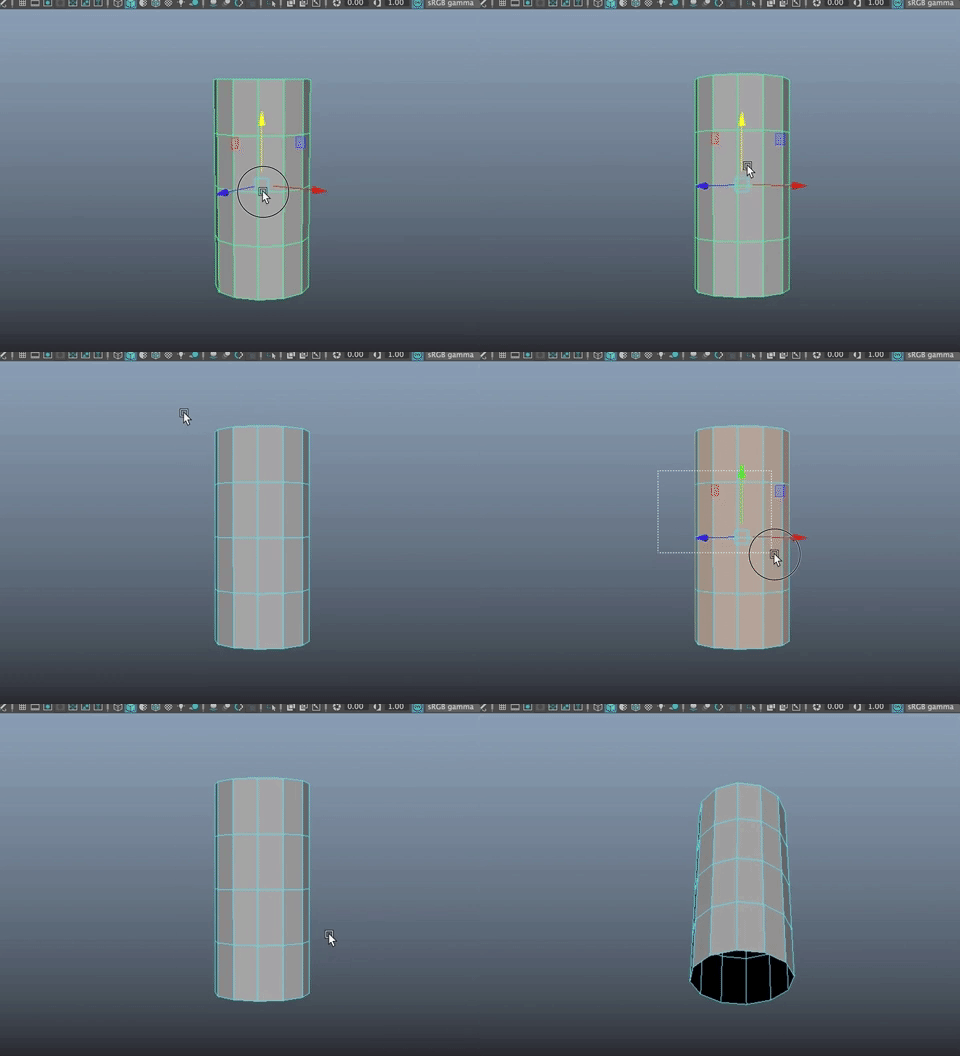
You will probably work with cylinders when building a biped but you don't always want to keep the caps on. A simple way to fix this is to
- go into Face component Mode
- Select all the faces (Marquee select)
- Shift select the faces on on the shaft of the cylinder
- Hit Delete
Multi-Cut Tool
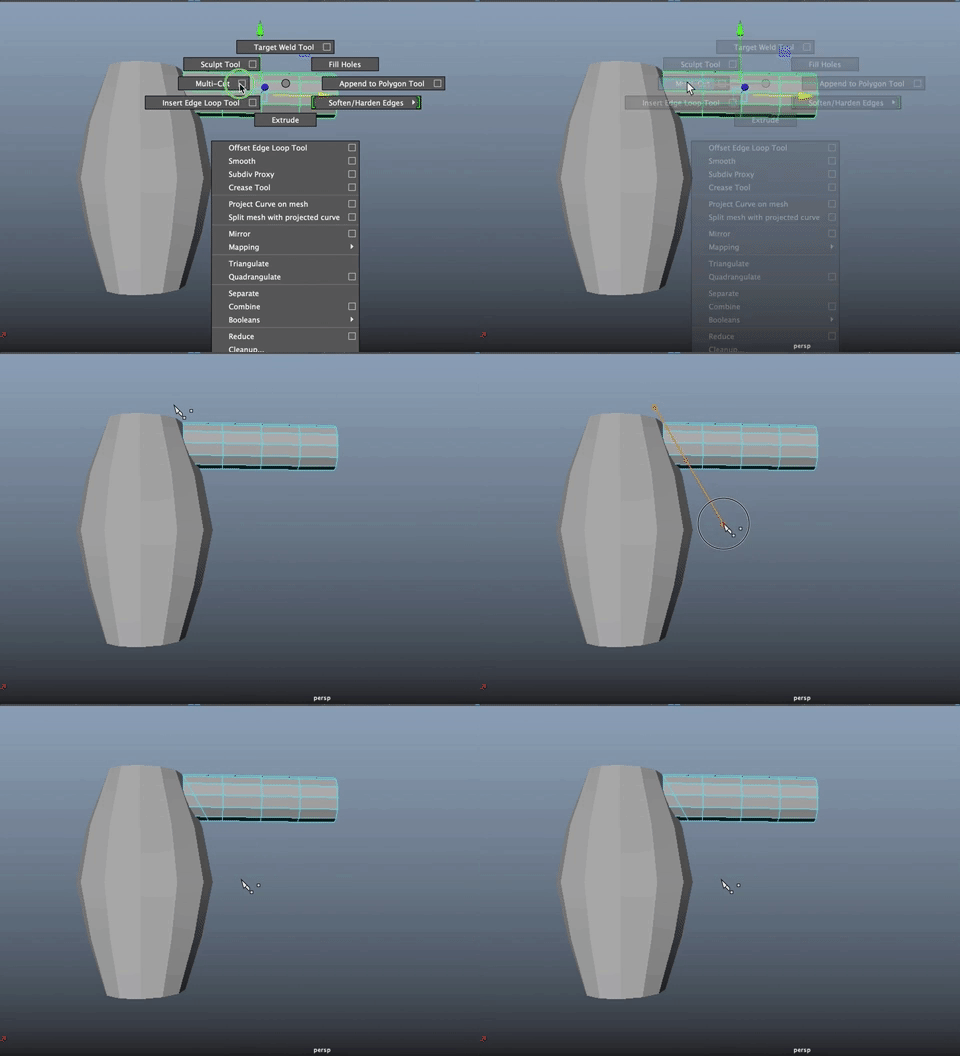
The Multi-Cut Tool is familiar to you all. It is super hand for biped modeling because it allows you to make cuts to geometry quickly by adding edges. In the past, this was the Interactive Split Tool. Now it is merged into Multi-Cut.
In Object Mode
- Shift Right Click to Select Multi-Cut Tool (or choose it from the Modeling ToolKit or the Menu)
- Drag to mark the angle of the cut you want to make
- Hit Enter
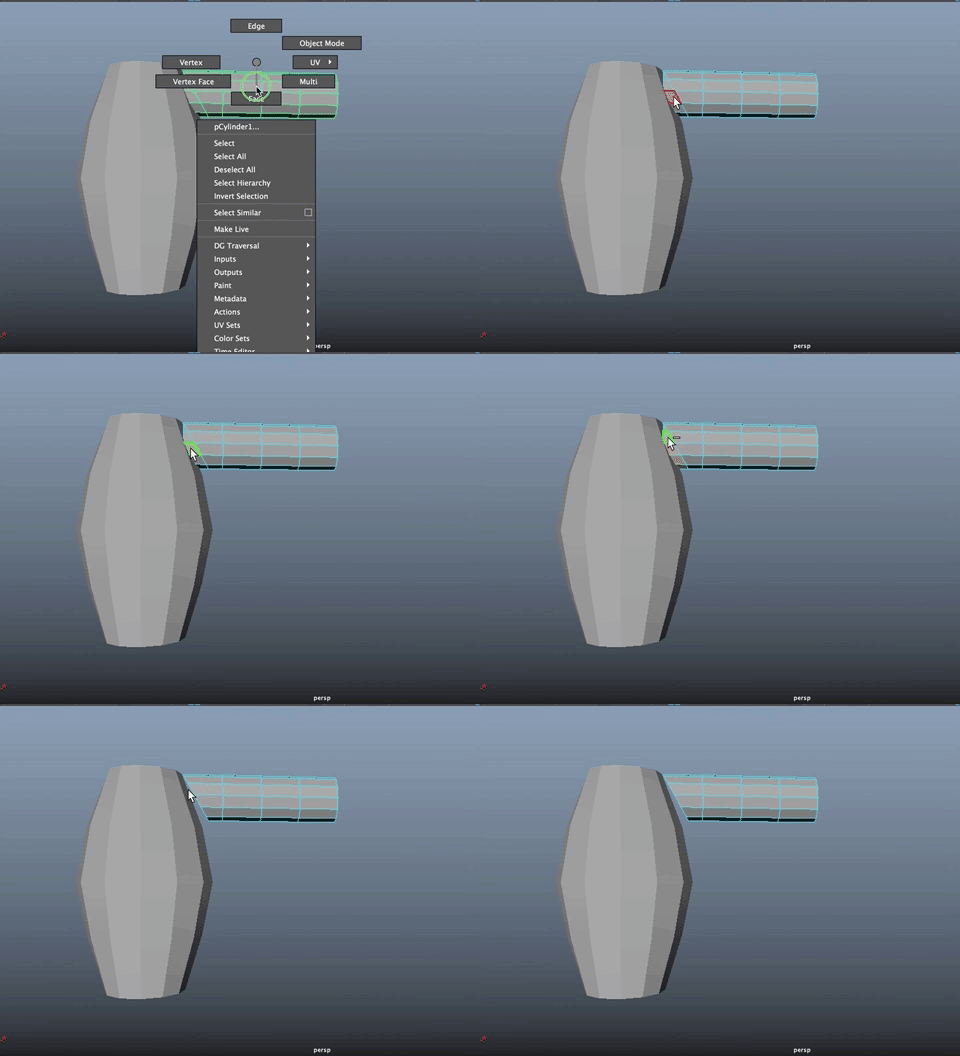
- Then, in Face Component Mode
- Select a face you want to delete
- Shift Double click the face next to it to select the face ring
- Delete
Let's get started:
Modeling the Rough Character
We'll start by working in the Orthographic Front View.
Make sure your Image Plane is showing and nice and big in the View Port, with the feet touching the X Axis and the center of the character centered on the Y Axis.

Start by creating your first primitive for the head or the arm. I'll start with a sphere for the head.
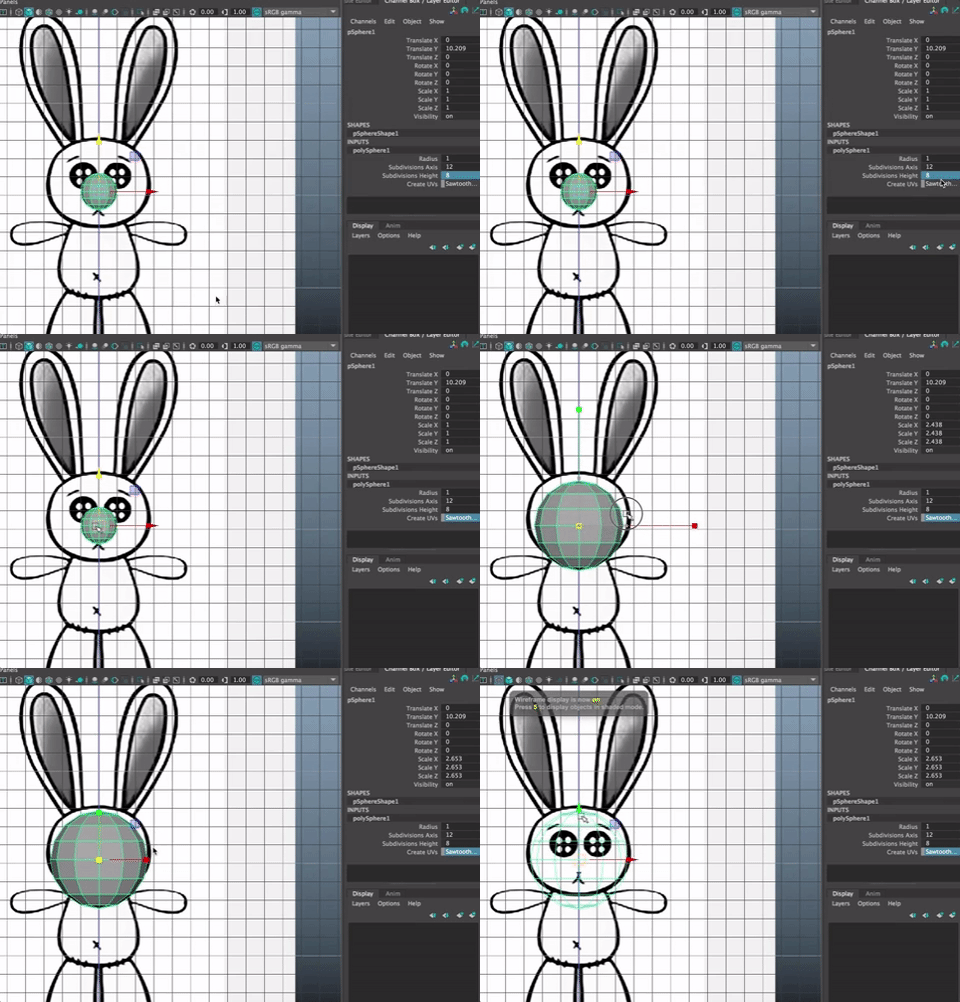
Good to work with subdivision levels that are multiples of four (4, 8, 12). Keep it rough to start! The smaller the object, the small the number of subdivisions.
In the INPUTS node, I put the Subdivisions Width to 12 and Height to 8
Make choices based on your character. Use the primitives that best fit your character (cube, cylindar, sphere).
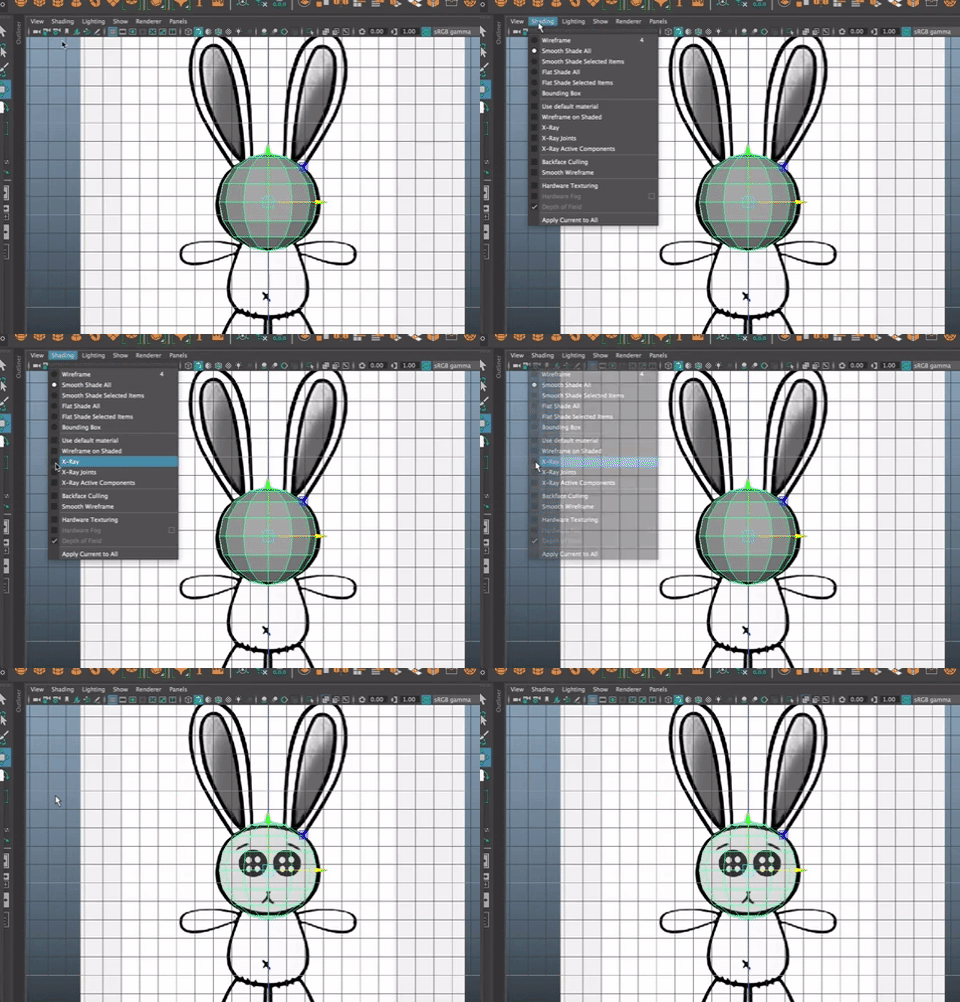
Good to go into X-Ray mode in the Viewport Shading Menu.
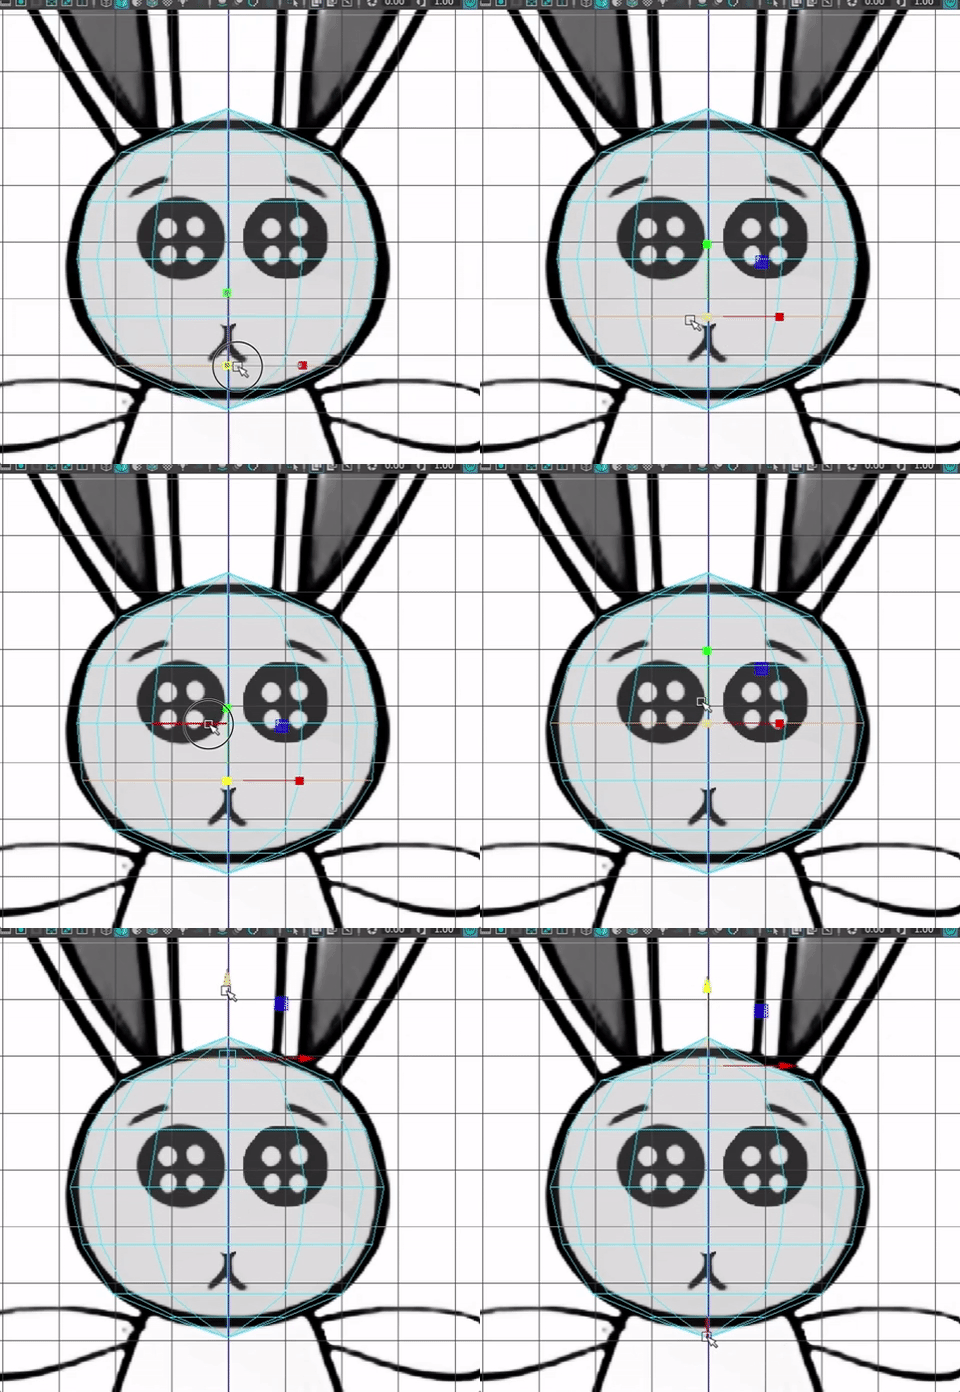
Scale and move EDGES to fit the basic shape of the character (avoid using verts except at the poles for now, to keep the edges nice and shape smooth).
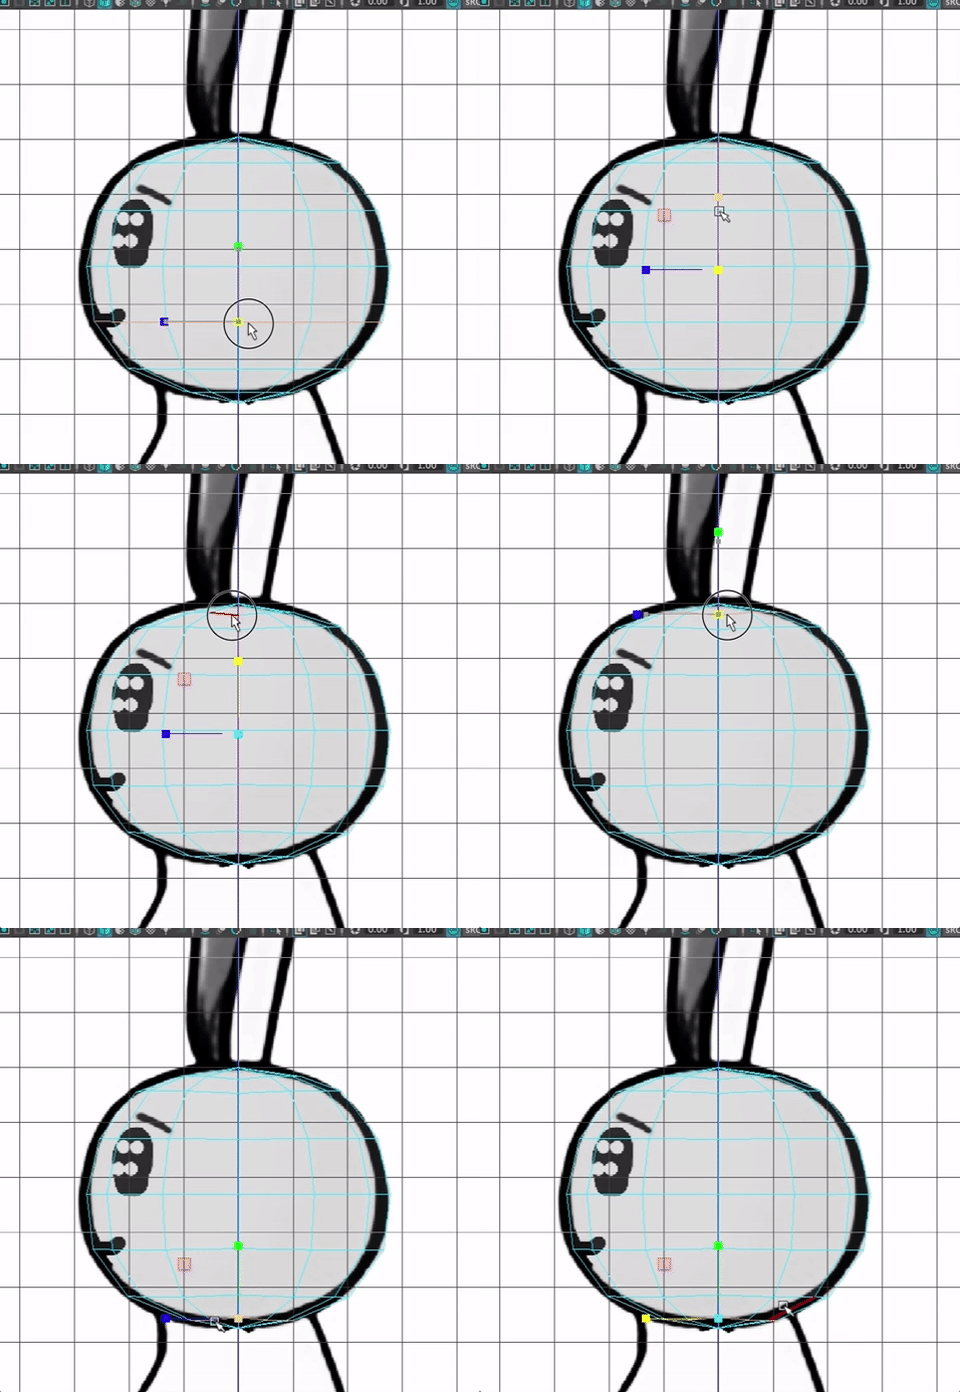
Work in both the front and side orthographic views to line up the shape.
I'll use a cylindar for the body with 12 Subdivision Axis.
A hotkey for Insert Edge Loop is Control + 3
I added three edge loops horizontally to shape the body.
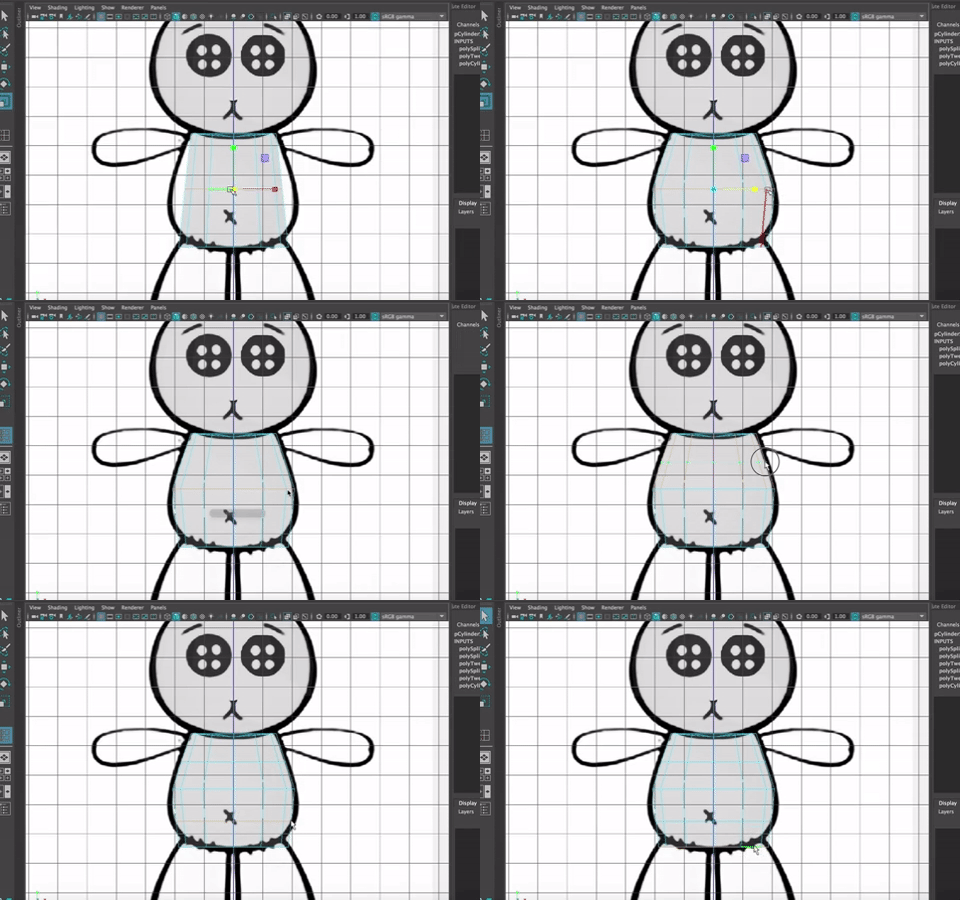
Again, work from the front and side views.
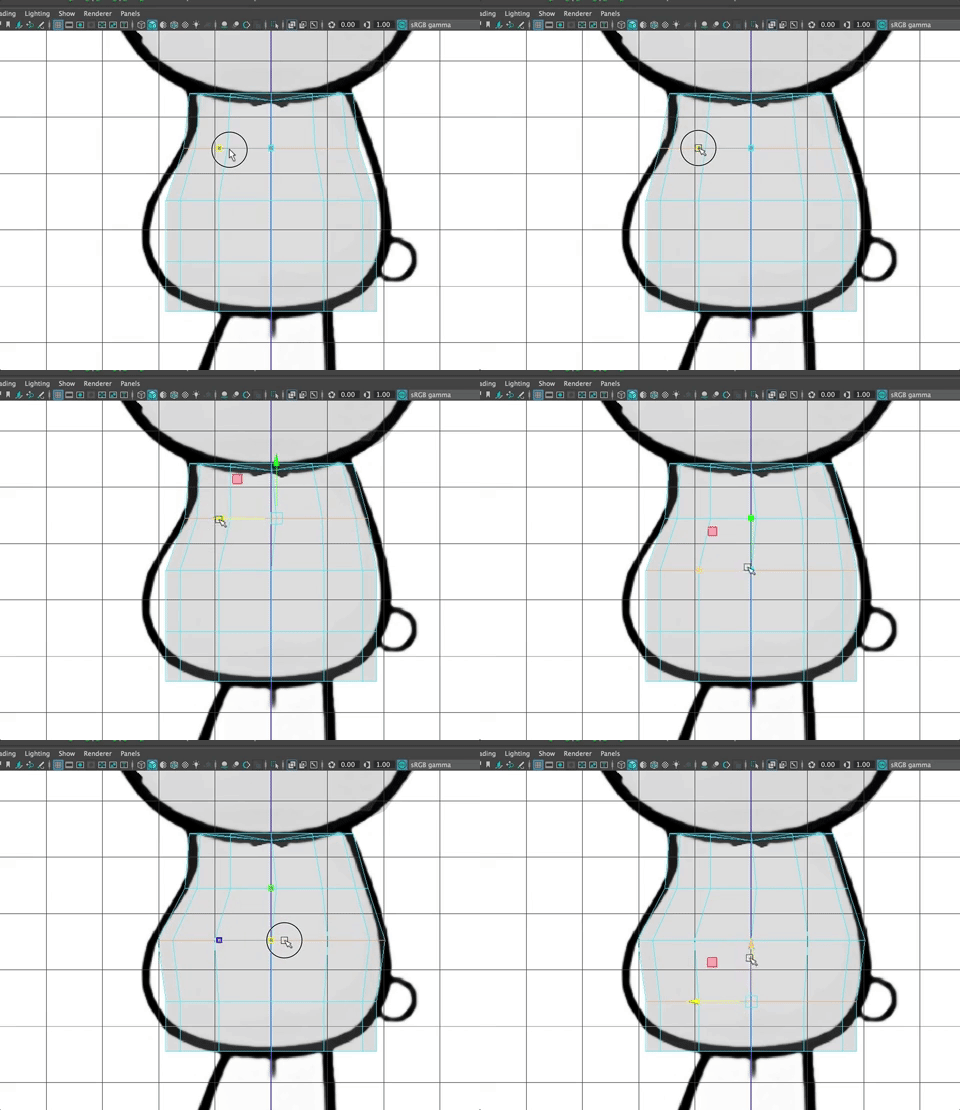
CTRL + e is extrude
You want to make a bunch of individual objects that you will combine together later.
Even though my character doesn't have much of a neck, it is still important to make a neck for movement later on.
For the neck, select the top faces (easiest way is to marquee select and then use shift to deselect and just get the faces on the upper cap.
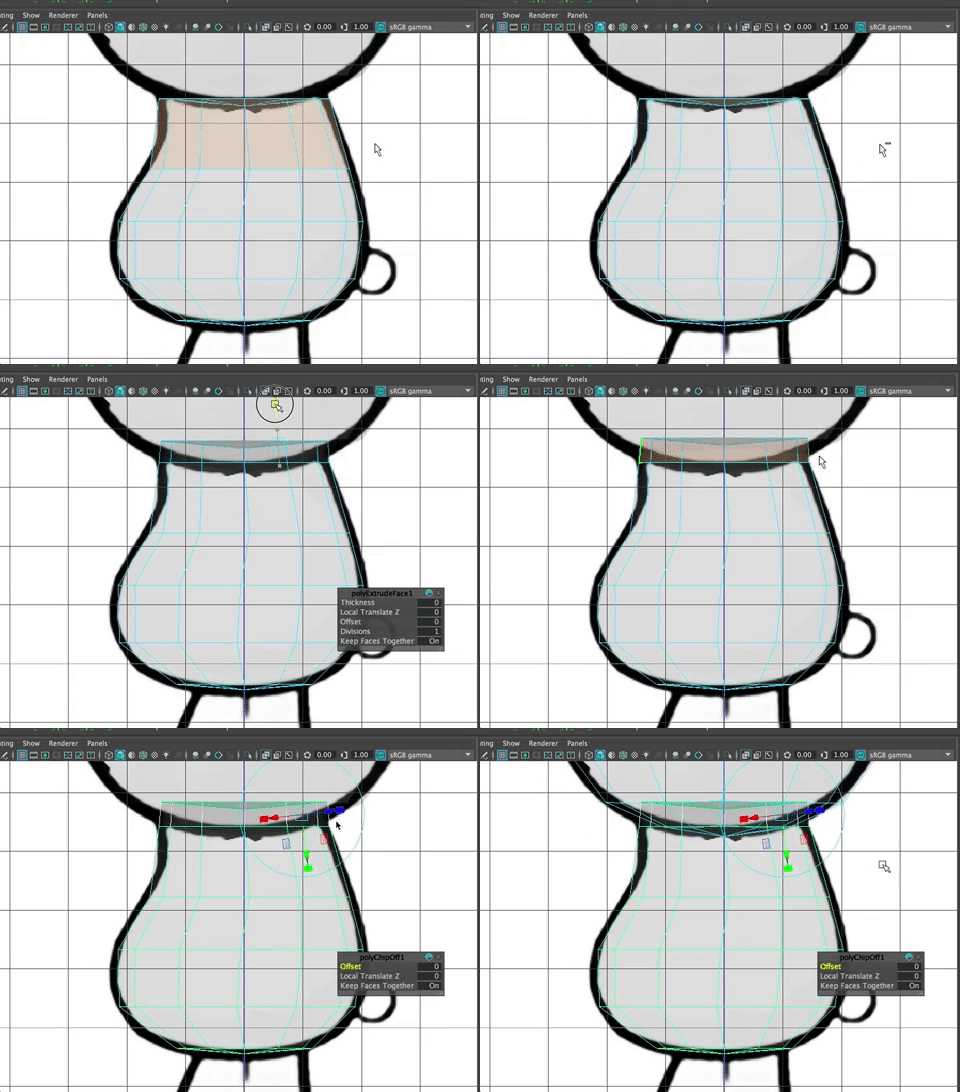
Then scale down the neck, put into place.
Delete the caps on the cylindar.
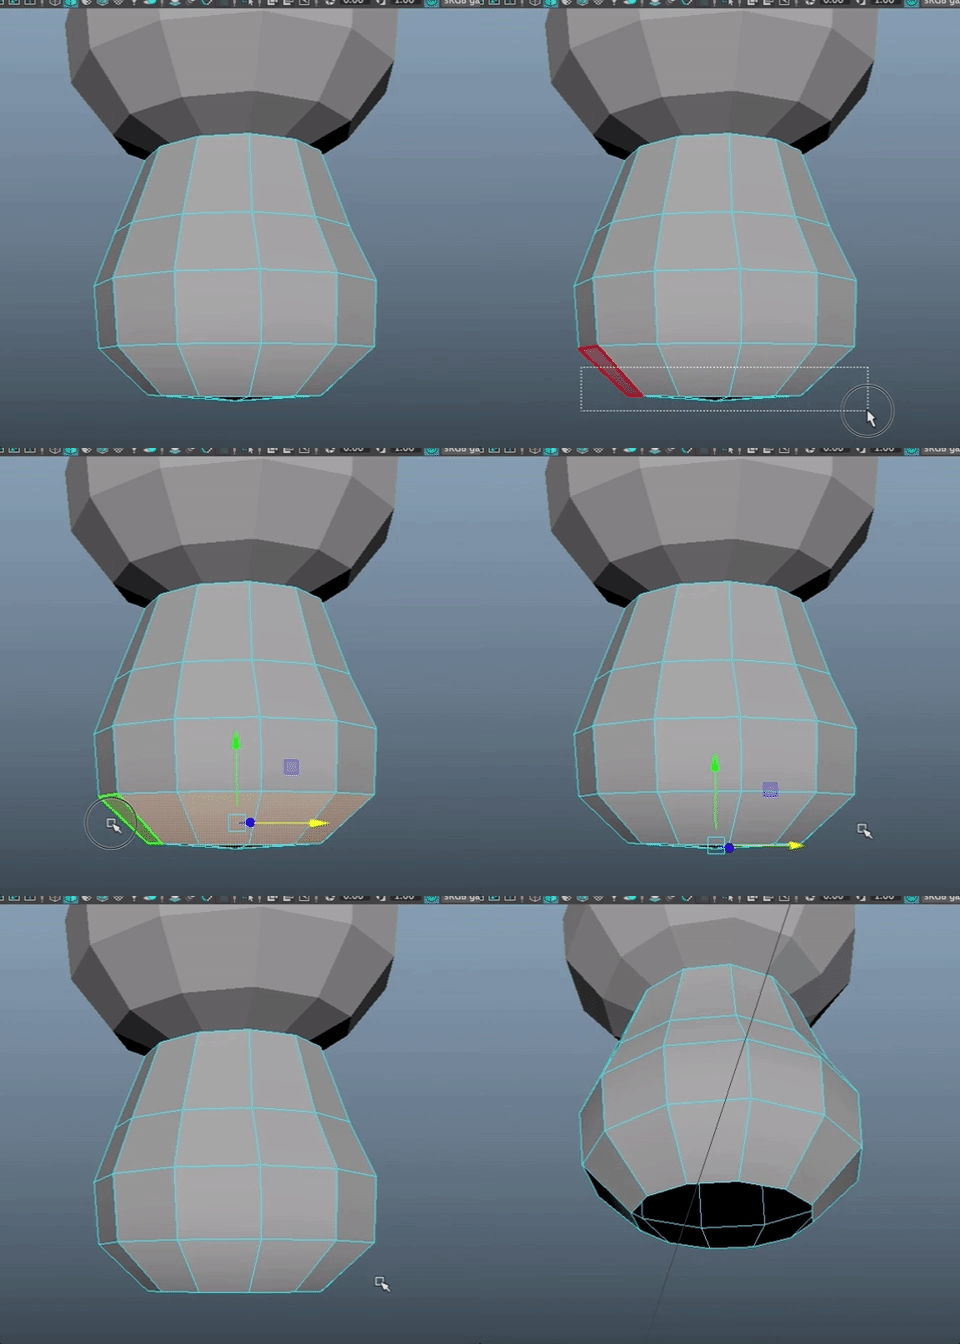
Make an arm. Set the subdivisions to 4, 8, or 12 depending on the character. Smaller is better if you can get away with it.
Delete the inner cap.
Mirror.
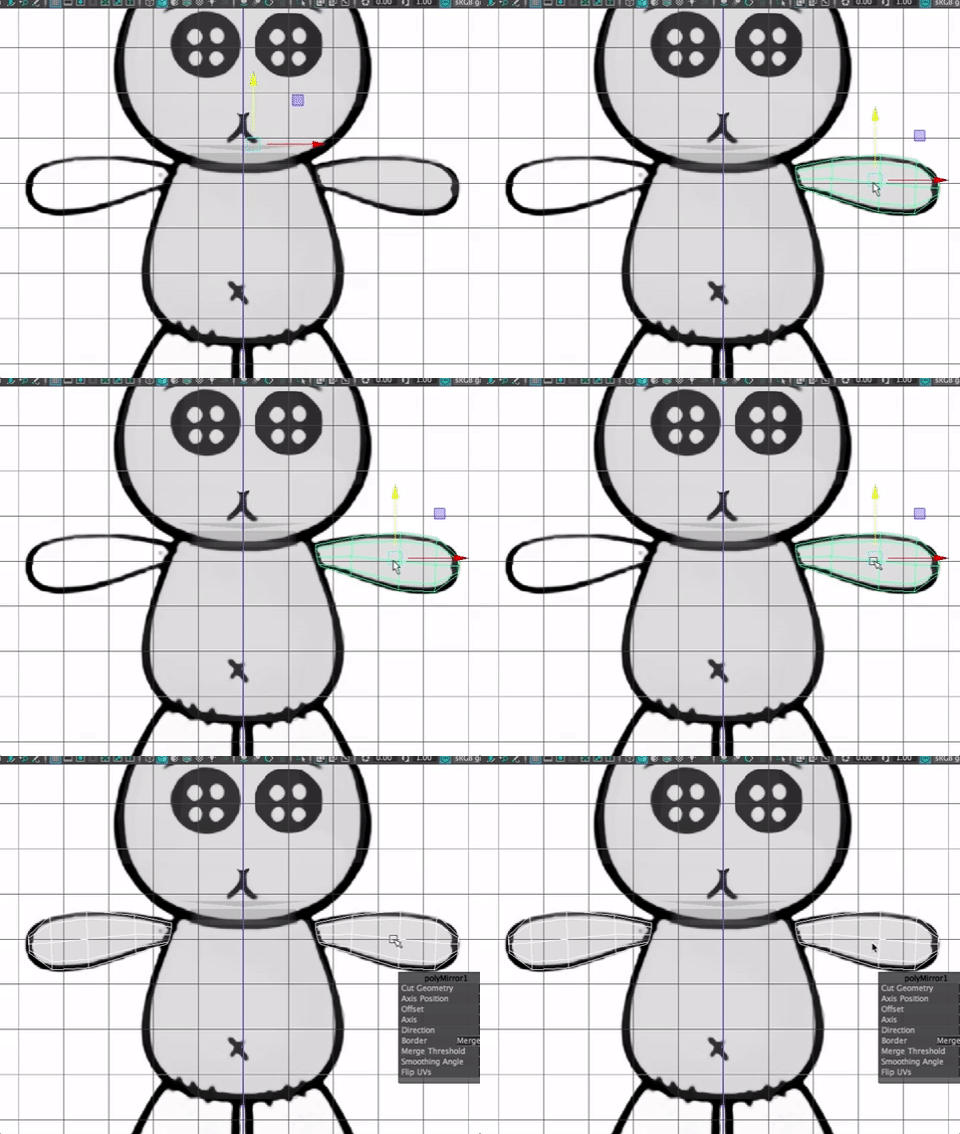
- Make a leg,
- Set the Subdivisions.
- Delete the upper cap.
- Add edge loops.
- Shape.
- Mirror.
If you make changes now, you can use Symmetry to change both sides if your character is symmetrical.
Important: Be sure you are thinking, as you model, about how your character will move. Put edges wherever you want a bend, multiple edges if there is a big bend, and if you are doing a robot and there are rotations, consider that motion as well.
Keep going in this way, creating separate objects for each of the parts of your character, including any clothes or accessories. Keeping everything in super low poly mode, shaping as needed with extrusions.
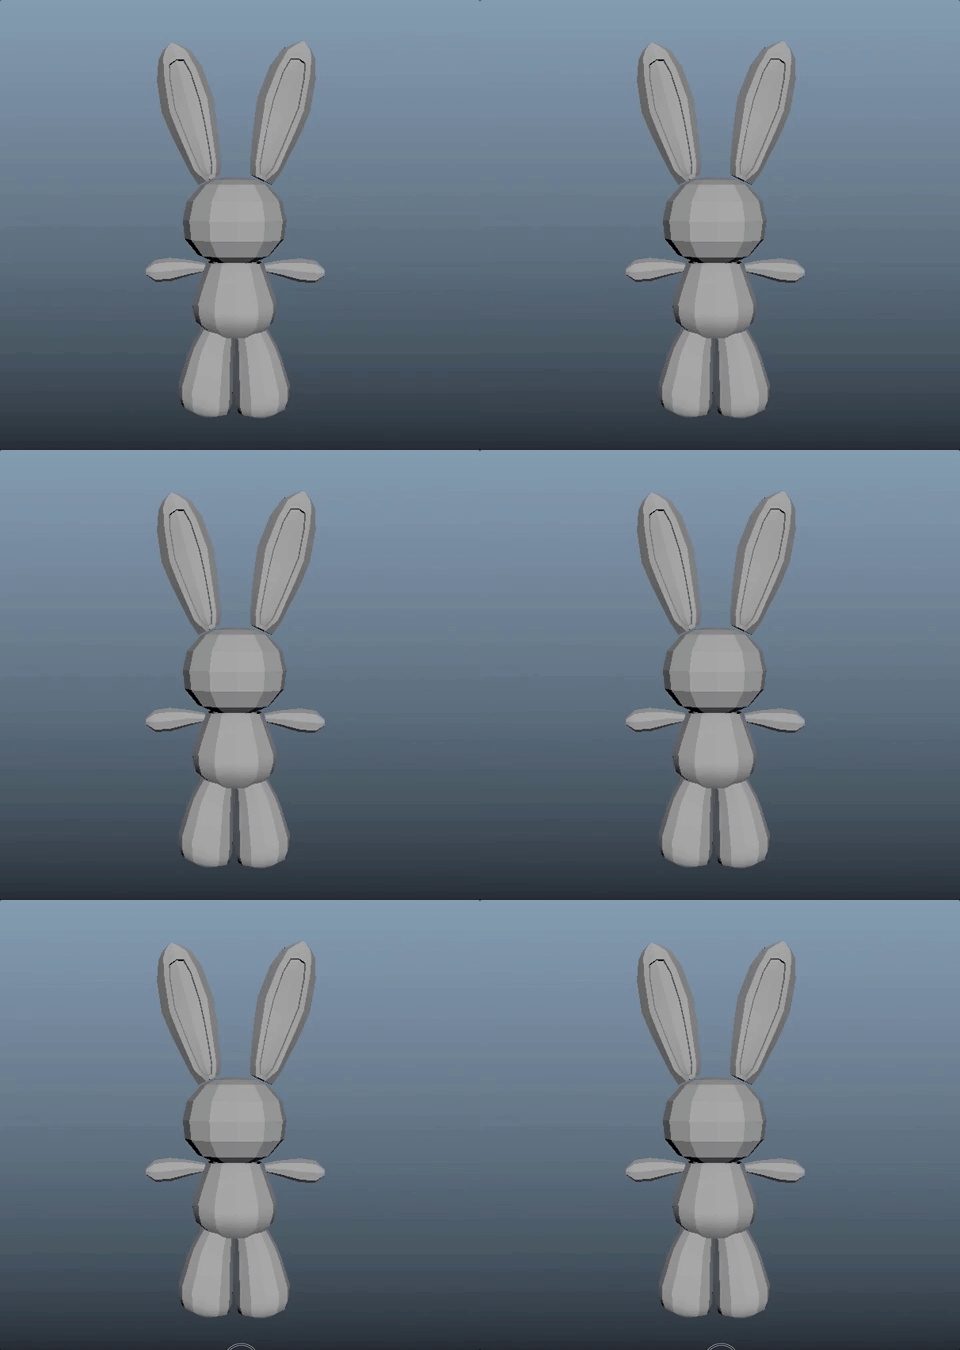
Once you get it somewhat into place, try smoothing, add edges to create nice creases in clothing or edges.
You can add eyes or other parts of the body that are external. We will make a mouth that opens and closes or eye sockets later. For now, just add those things that are the shape of the character and anything sticking out from the character.
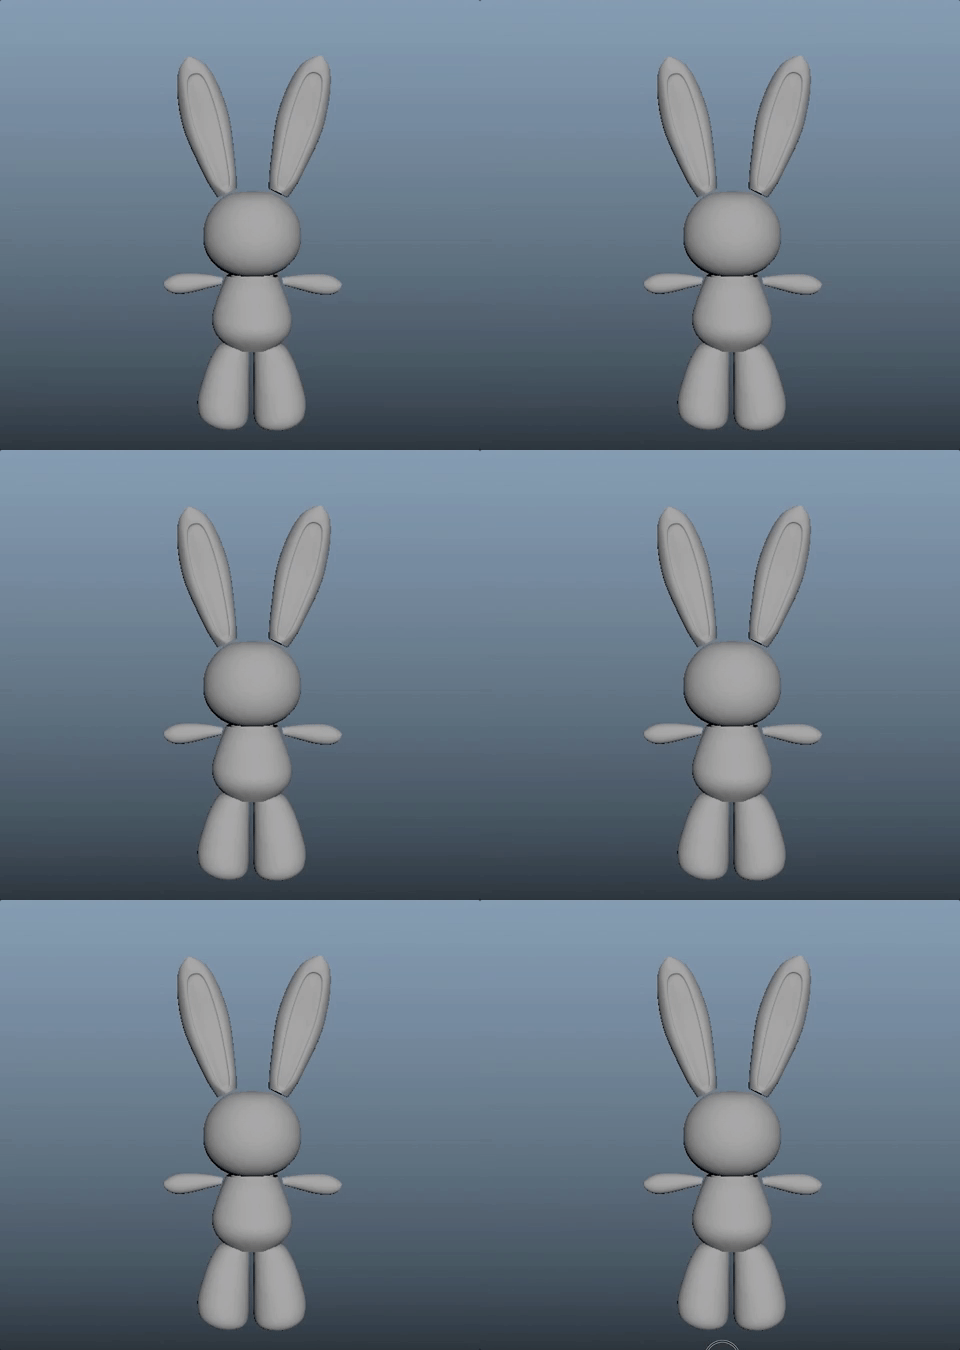
In my model, I'll add the eyes, nose, eyebrows. The mouth will open and close so that will come later. I might add a few other details to make it a bit more interesting than the image planes and because it is fun. I'll also go in and get the intersections between body parts a bit more precise.
If you are doing something as simple a antanae, you can use simple cubes that are then smoothed in 3 mode to make them rounded.
For feet, if you have simple shoes, you can use a cylindar, set to 12 subdivisions, that is cut in half and rotated 90 degrees in x.
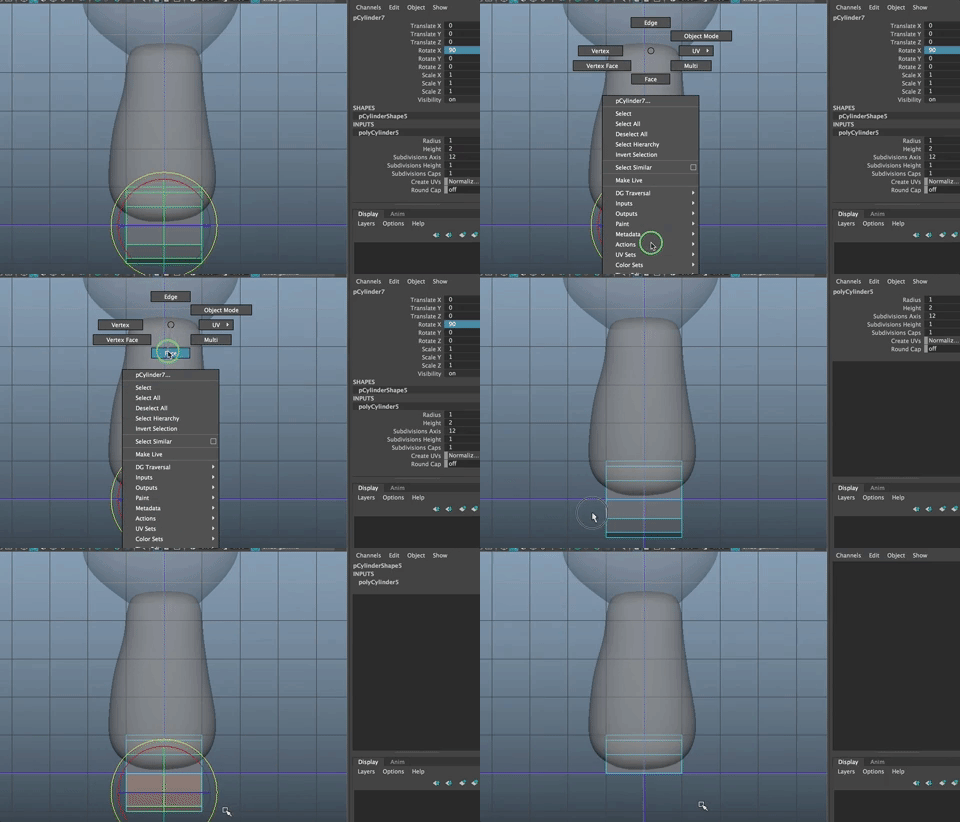
Move it into place and shape it, adding edge loops where the foot would bend (at the ball of the foot, for example).
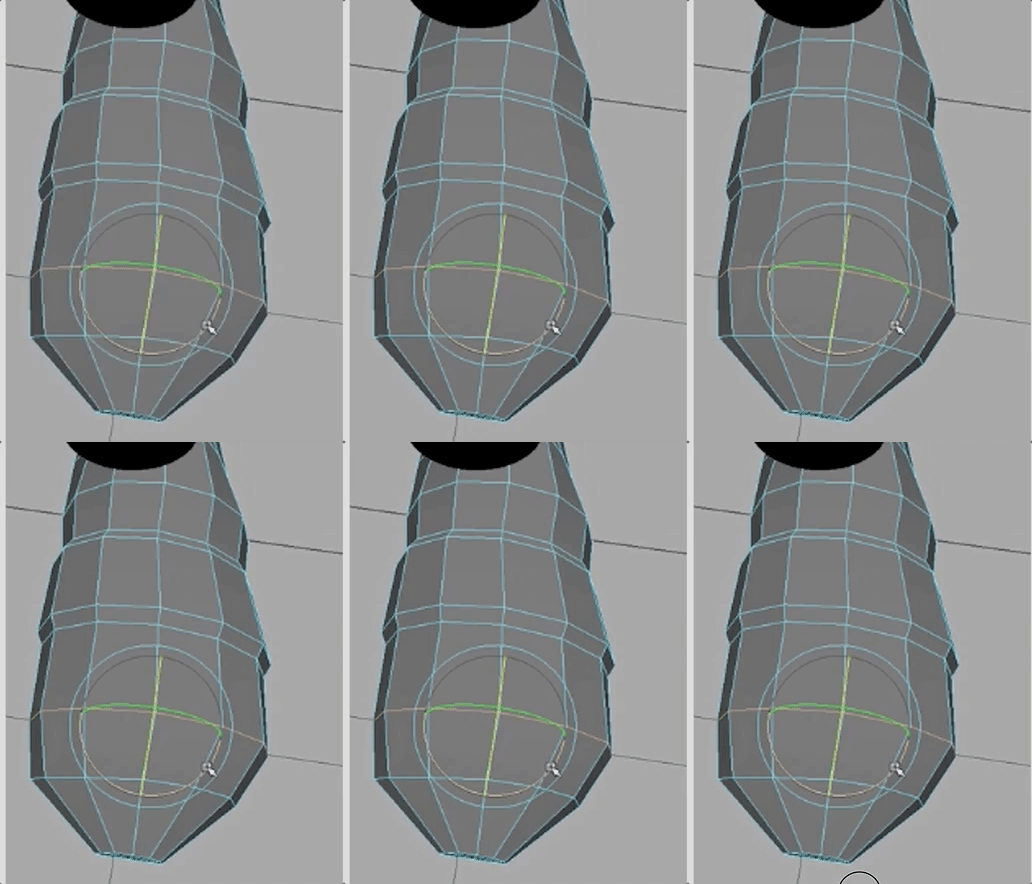
Make the caps of the cylindars have be just one face (no triangles). You can either do that in the INPUTS node or delete the faces and then Fill the Hole. You will need to add in edges to create quads as needed.
Otherwise, a trick is to delete every other edge on the cap to turn the triangles into quads. But always try for quads if you can. This is a rough model, but still keep it clean.
You can use your Grab Tool to move more verts at once, or Use Soft Select.
If you have wings, start with a plane, extrude and add edges as needed.
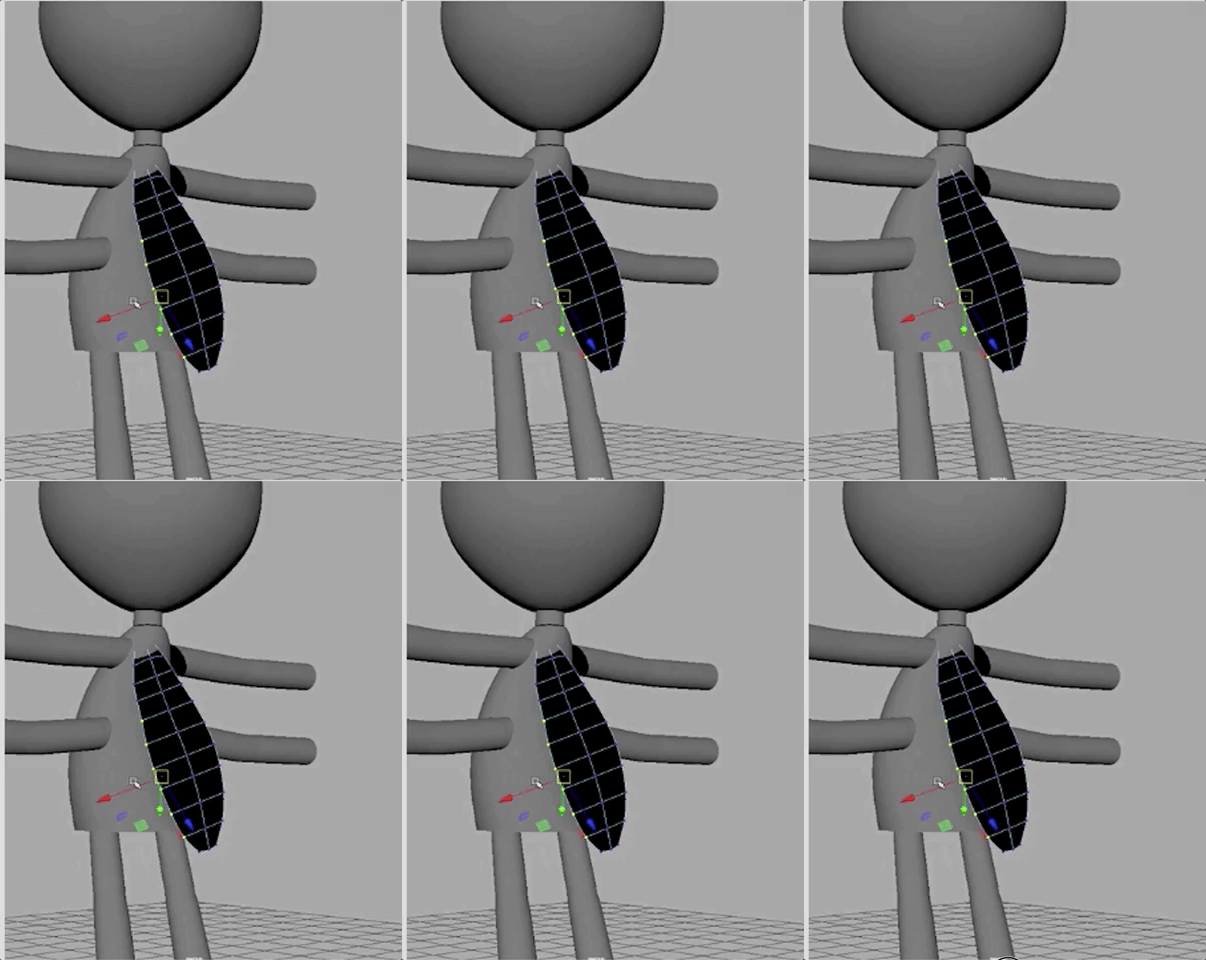
(Zanzi is by Andrew Silke)
Move your pivot point (hold down the d key) to make the pivot be at the pivot for the wing (by the body) before mirroring, to help place the wings.
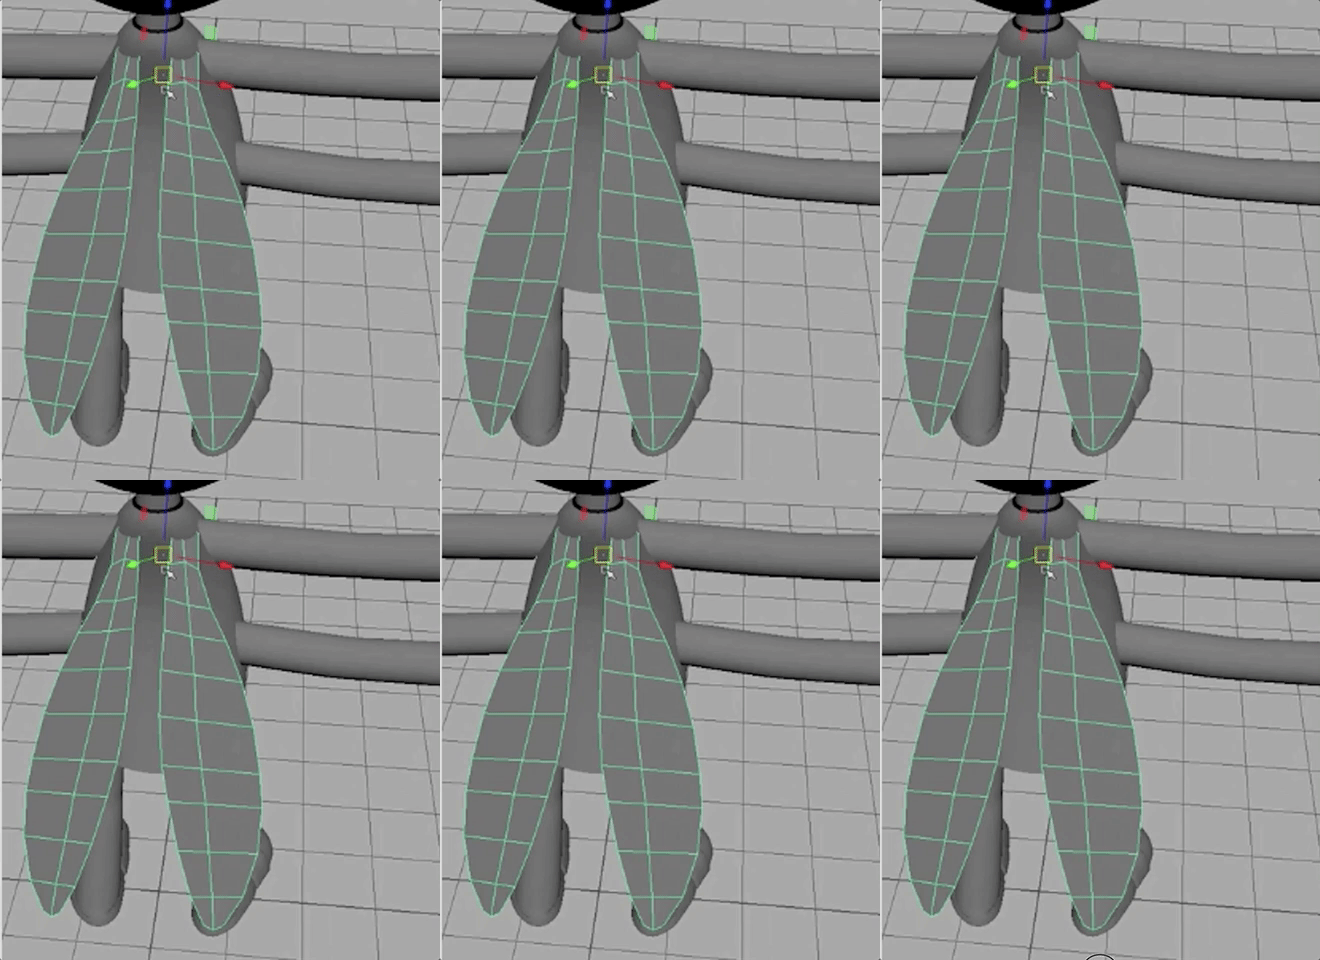
(Create3dCharacters)
Eyebrows, again, can be cubes that are shaped into place.
Eyes
For eyes, I'll start with a cylindar because my eyes are flat-ish buttons.
Delete the edges on the cap to make one big n-sided face.
Scale and move it into approximate place, keeping it orthoganal in the front view to make ite easier to work with.
Start extruding the edges to create your shape.
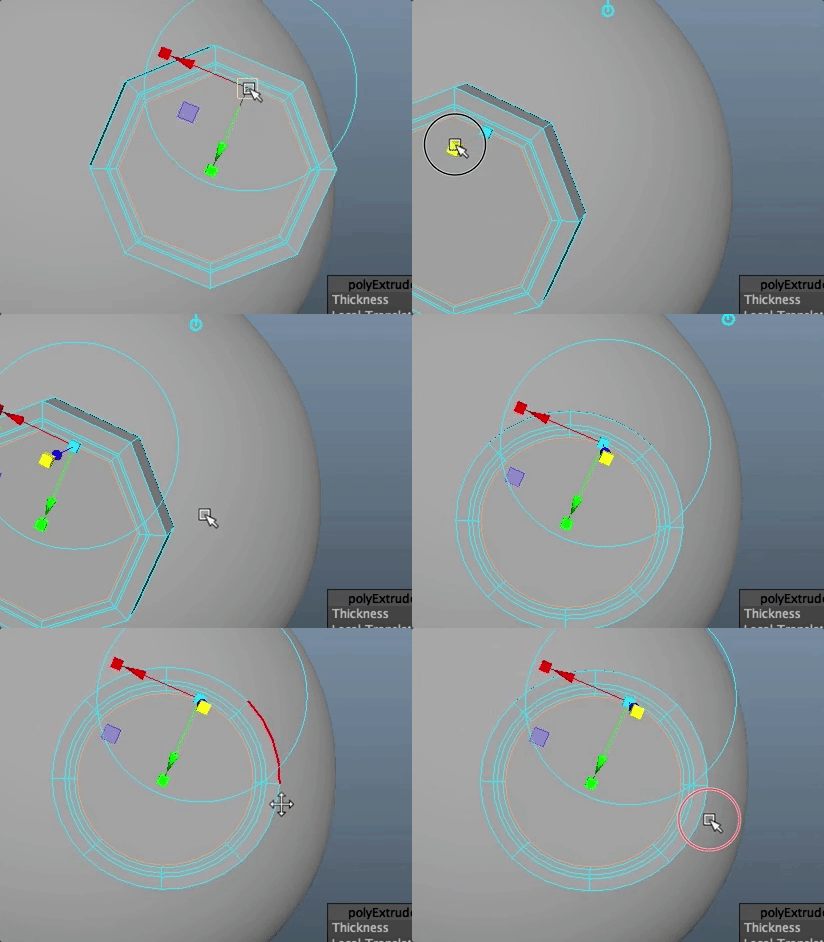
In 3 mode, the eye is nice and round. Keep shaping as needed and mirror.
For clothes or hair that has depth, be sure to either work with primitives like cubes or cylindars, or, what might be easier is to work with a plane and extrude out the faces to get depth.
Here is a tie being shaped (from Create3dCharacters.com)
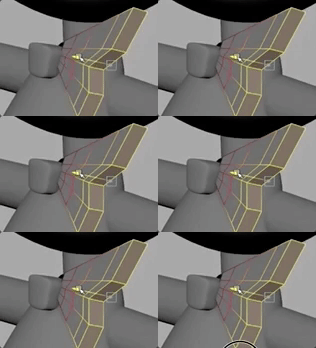
For complex shapes, like a shirt with a collar, feel free to make the shirt and then make the collar as a separate plane that is shaped. It is much easier that way. Use soft select and rotation to get the clothing shape to match the shaping of the character.
Extrude to get depth.
Hands and Fingers:
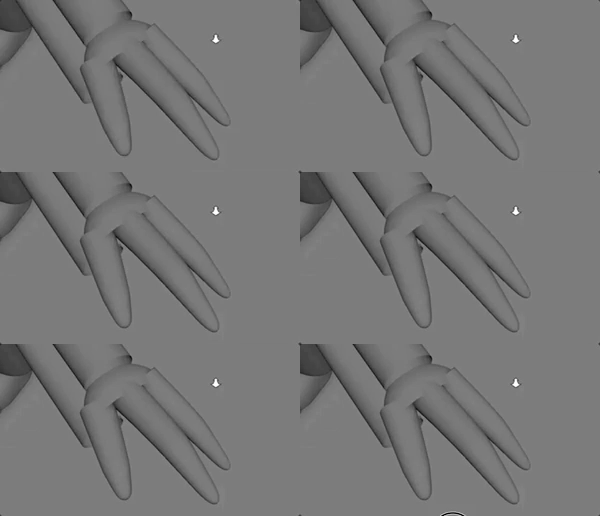
You can make fingers using 6-sided cylindars.
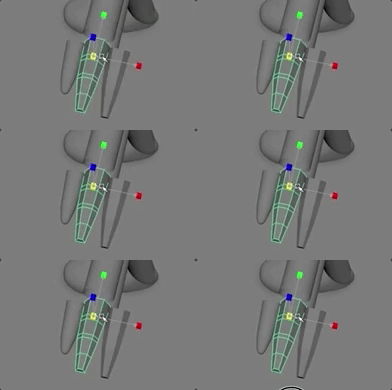
Add edge loops close together near the knuckles and other joints to make them shape better and also bend better.
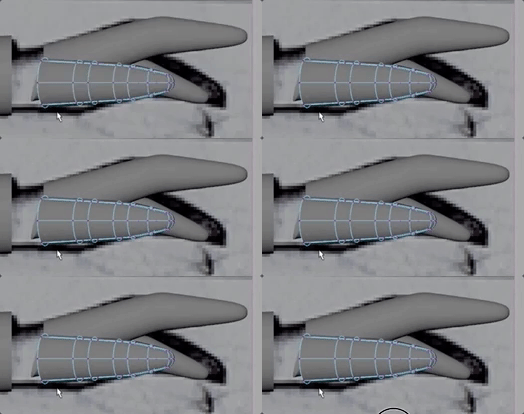
The wrist is just the end of the arm, you extract the faces and scale. This is especially true if your character has long sleeves and you are making the wrist that pokes out from the sleeve.
The palm of the hand can be a cylindar, half a sphere or a cube. Using the end of the cylindar (without faces at the cap) you can scale the shape to form the palm.
More on Clothing
You can use the body shape and duplicate it to build out clothing that is tight against the skin, then alter as needed, deleting faces, adding edges, shaping and extruding.
Finishing up the rough
At the end of this rough phase just check your shapes to make sure they look good in 3 mode. Make sure all the shapes are touching or even overlapping for now.
We will join things together and shape the mouth next.
.
