Creating a Pillow with nCloth
Based on a tutorial by Mike Hermes
Here is a quick and easy way to make a pillow using Maya and pressure created using nCloth (a dynamics engine in Maya)
- Make sure you are in your practice project
Open a new Scene and name it name_magicPillow
Download the magic pillow exercise folder in the Files to Download for Class Google Folder
- Move the image files into the Source Images Folder for your Practice Project.
Make the Pillow
Create a poly cube (CTRL + Shift + u)
Use the Scale tool (r) to make the basic shape of a very flat pillow.
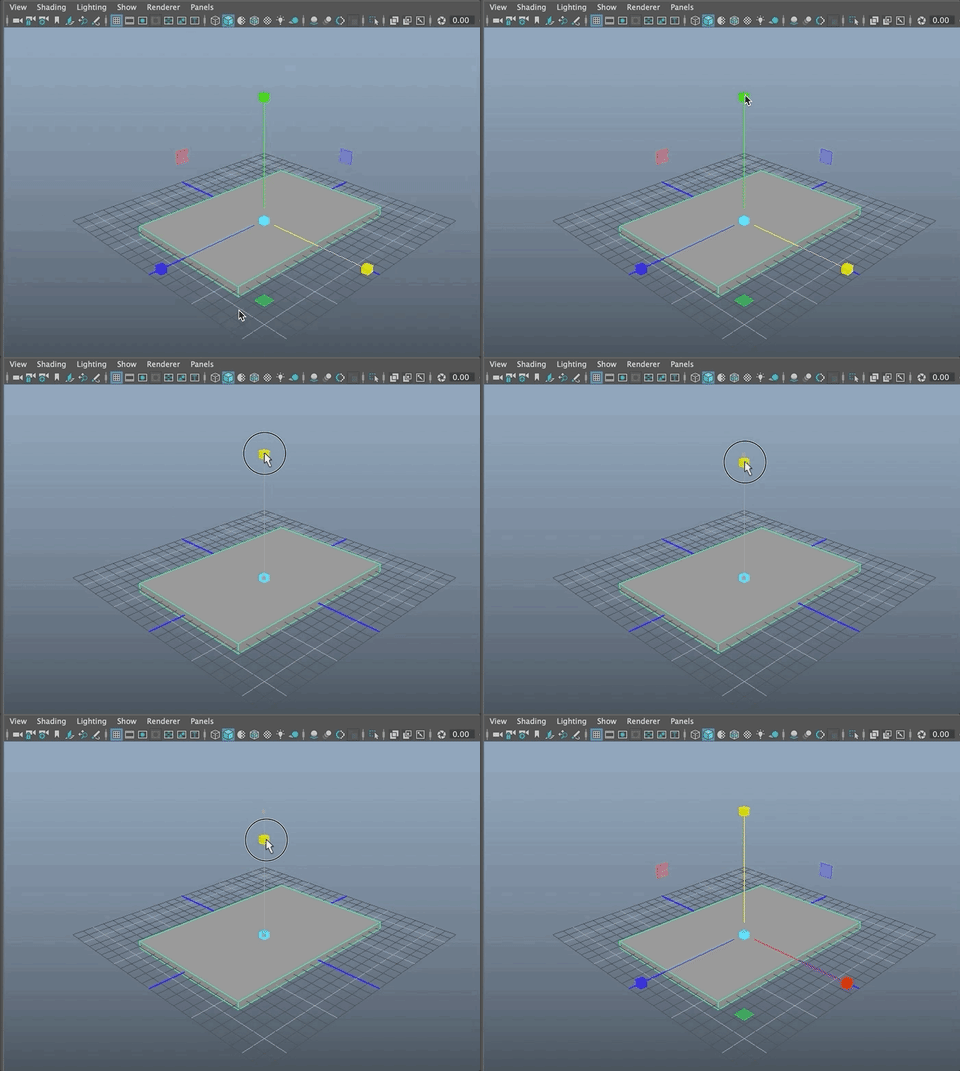
Rename the pCube to magicPillow
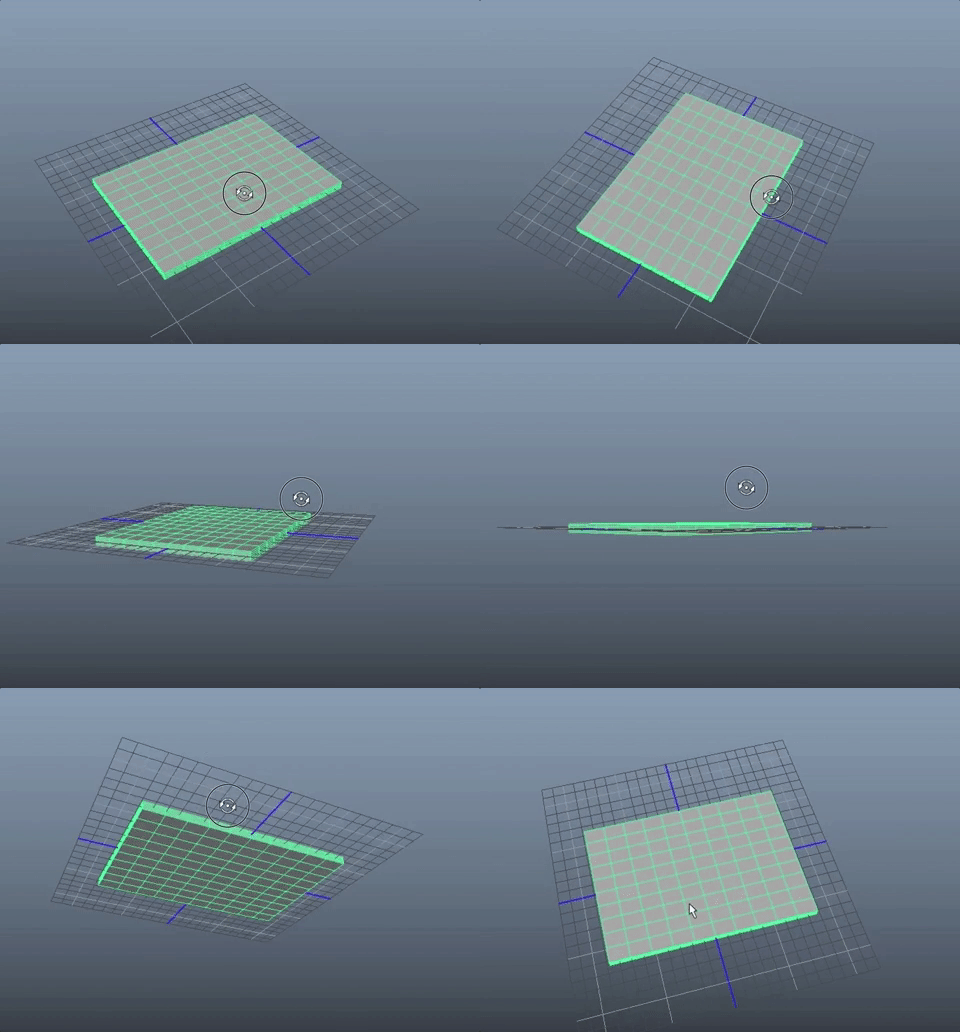
To create a pillow shape with that is billowy, you need to add more subdivisions to the shape.
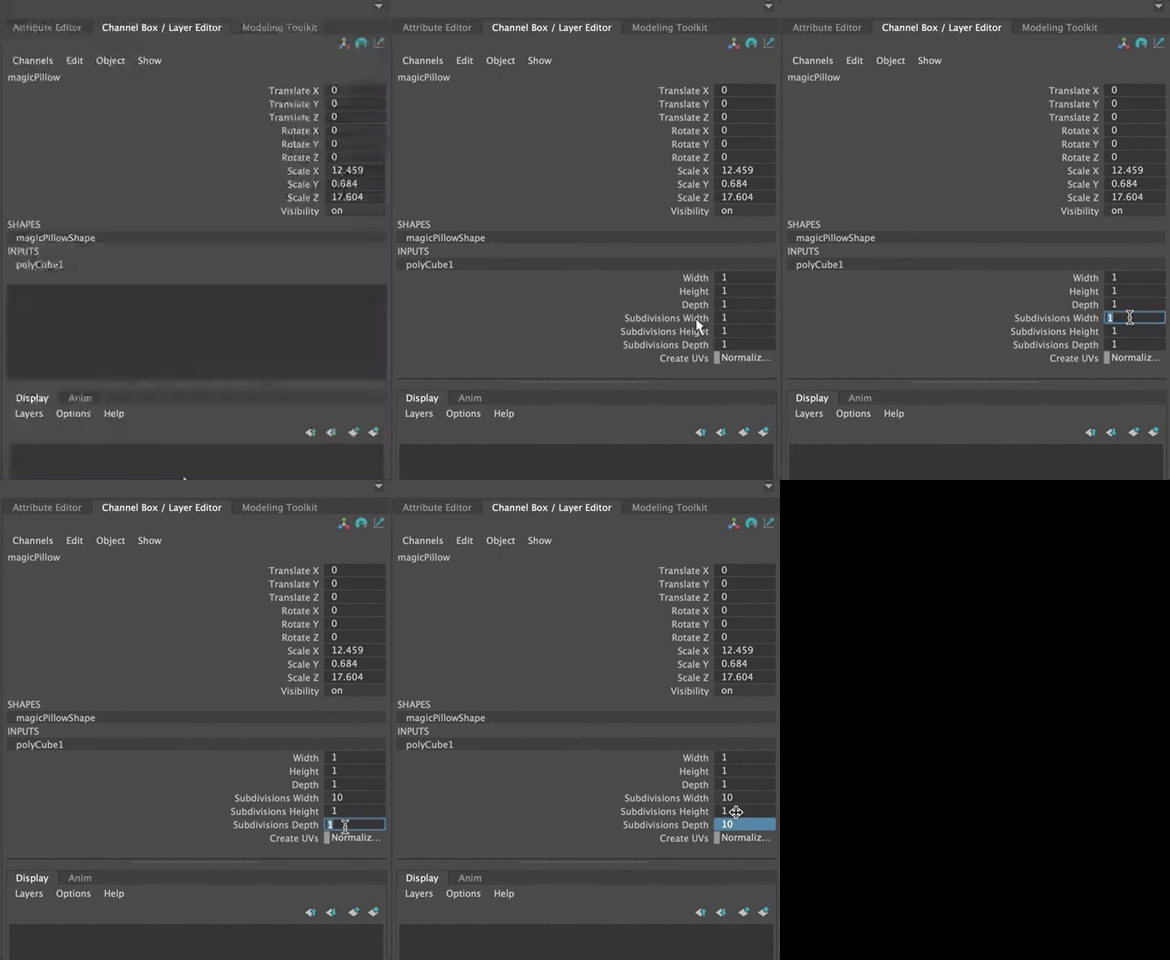
Open the INPUTS node for the magicPillow (in the Channel Box or Attribute Editor)
Change Subdivision Width and Depth to 10
- Change Subdivision Height to 5
- Open the FX Module from the drop down on the upper left of the Maya Interface
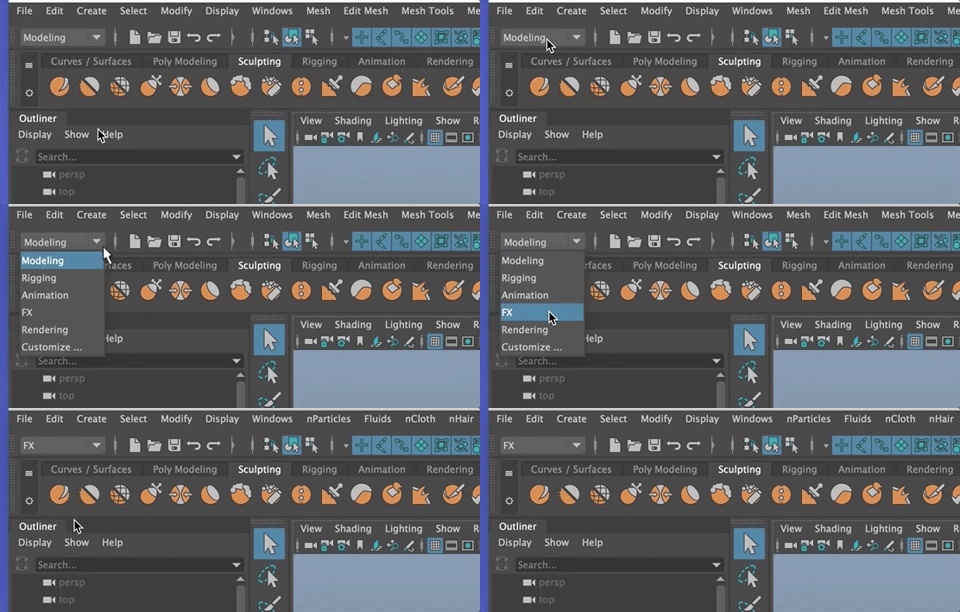
The Main Menu items change to show functions and tools withing the effects module.
- With the magicPillow selected
- Go to nCloth>Create nCloth
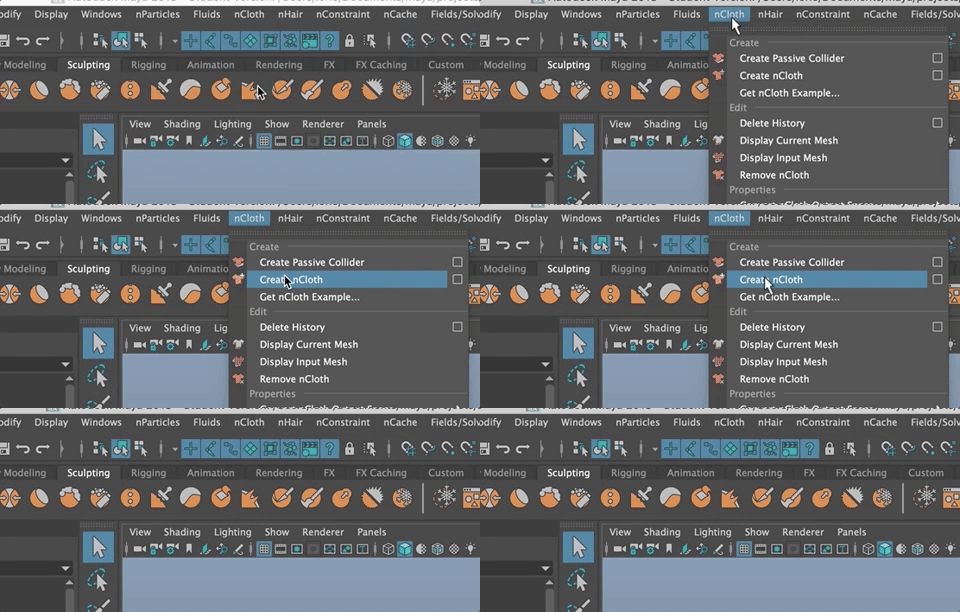
You will notice that your Outliner has two new objects: nCloth1 and nuclues1 and your Pillow geometry is no longer selected.

- Select the geometry again
- Open the Attribute Editor (CTRL + a)
- Open the nCloth1 Shape node
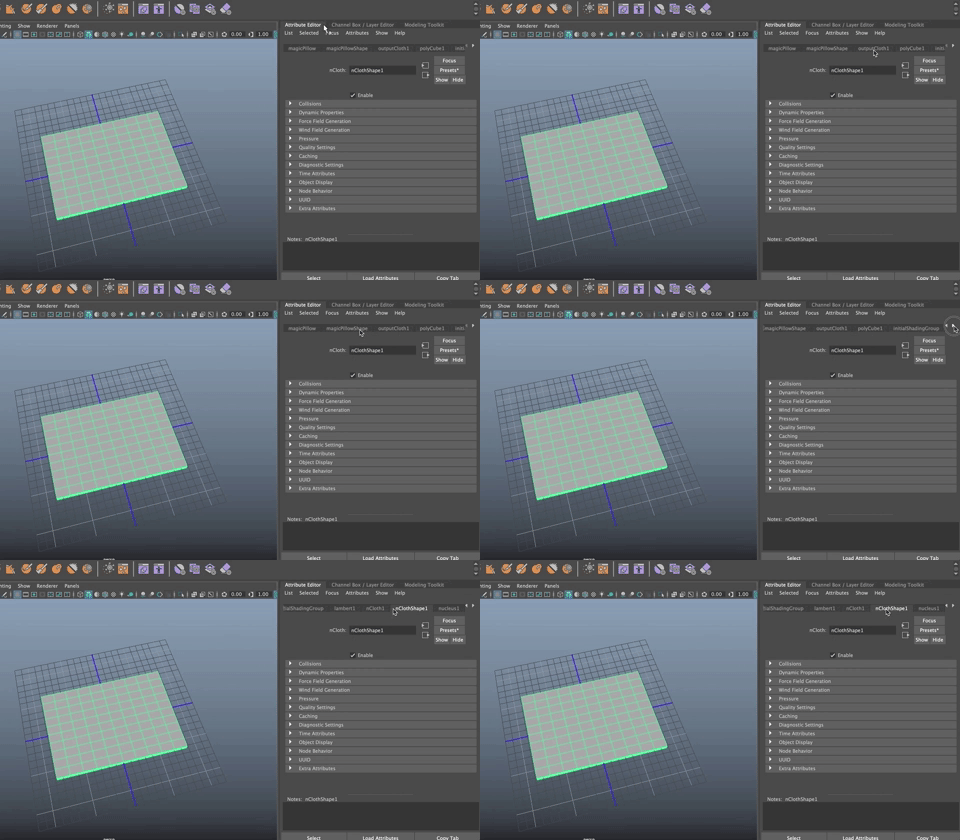
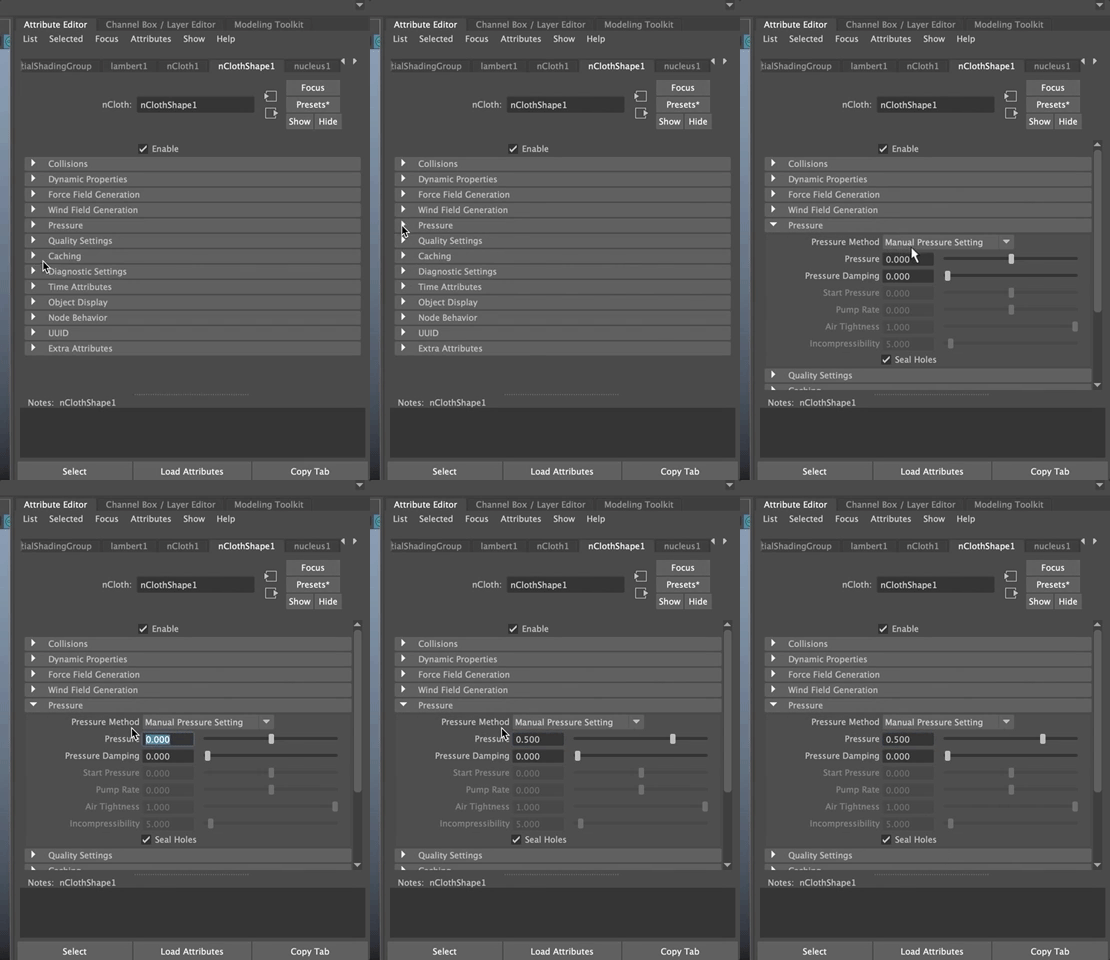
- Open the Pressure Tab
- Set pressure to 0.5 to start
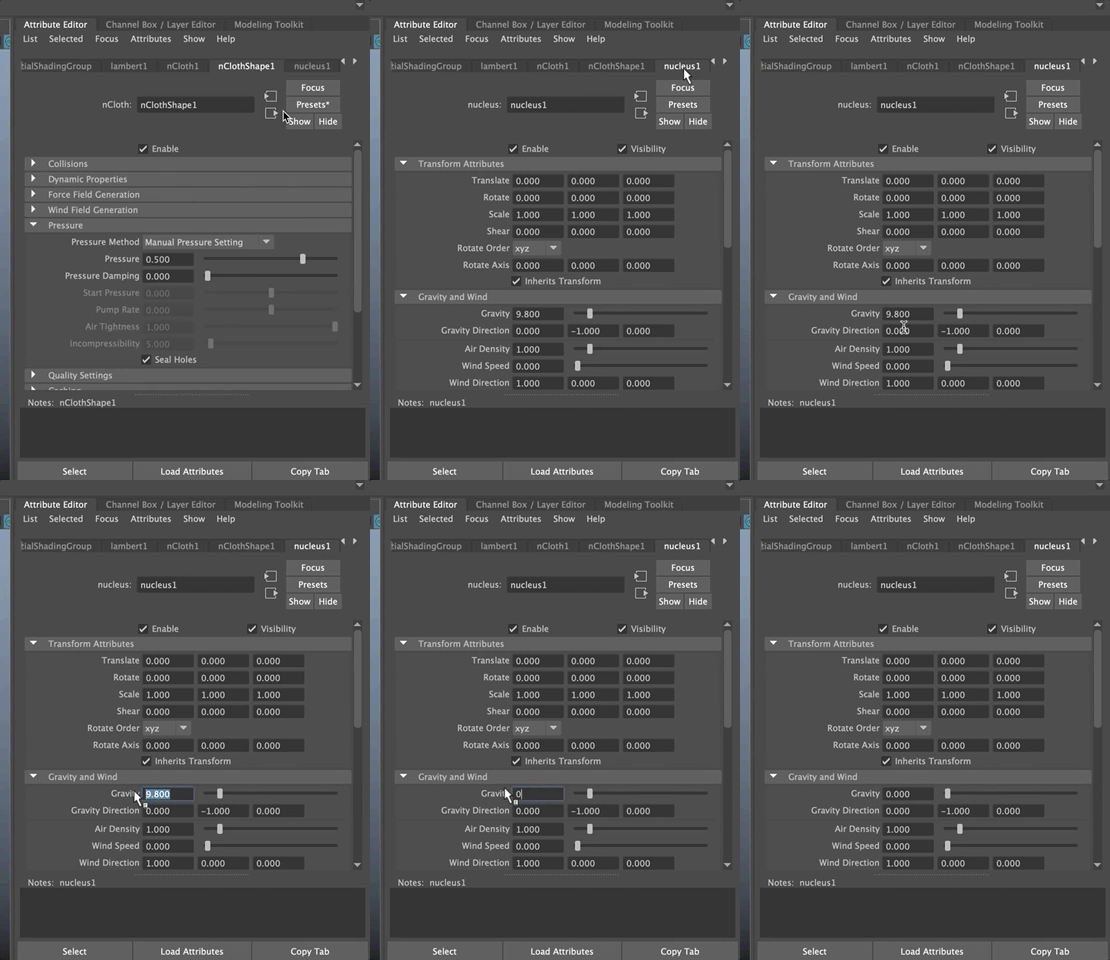
You also need to eliminate any gravity that would put force on your object and make it fall down in z.
- Go to the nucleus1 node/tab in the Attribute Editor
- Set the Gravity to 0
nCloth creates an animation using some sort of dynamics. In this case, pressure.
- Make sure your Timeline and Range slider are showing. If not, go to Windows>UI Elements and check on Time Slider and Range Slider
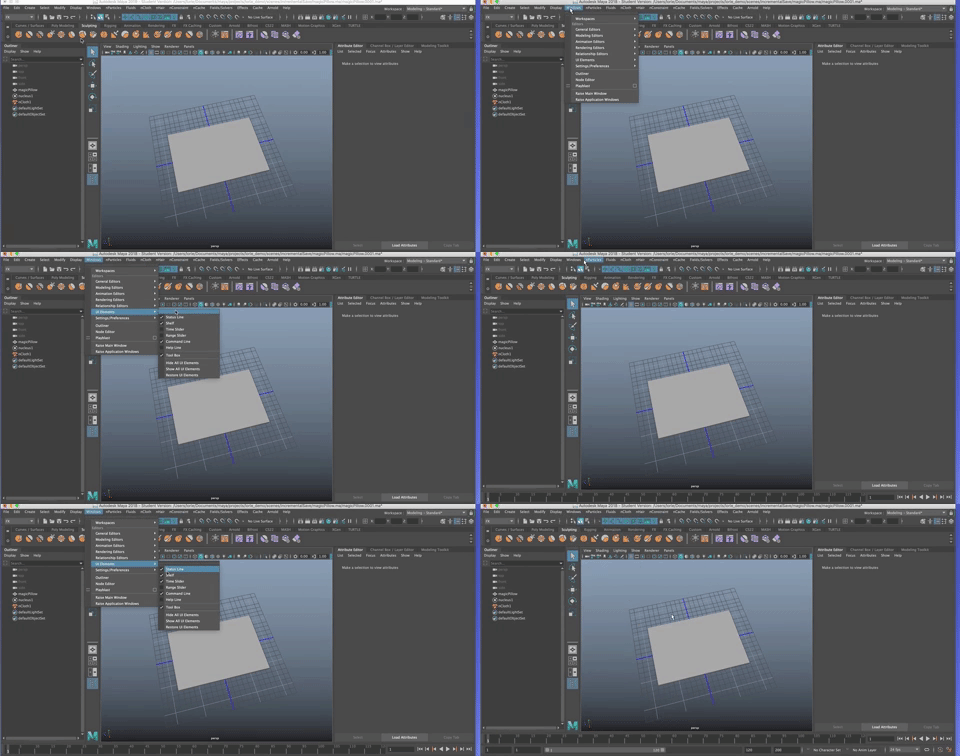
- Right click in the Time Slider and Choose a Playback Speed of Play Every Frame Max Real Time
- Make sure you have at least 100 frames in your playback range
- Make sure you are at frame 1 in the Time Slider
- Hit Play
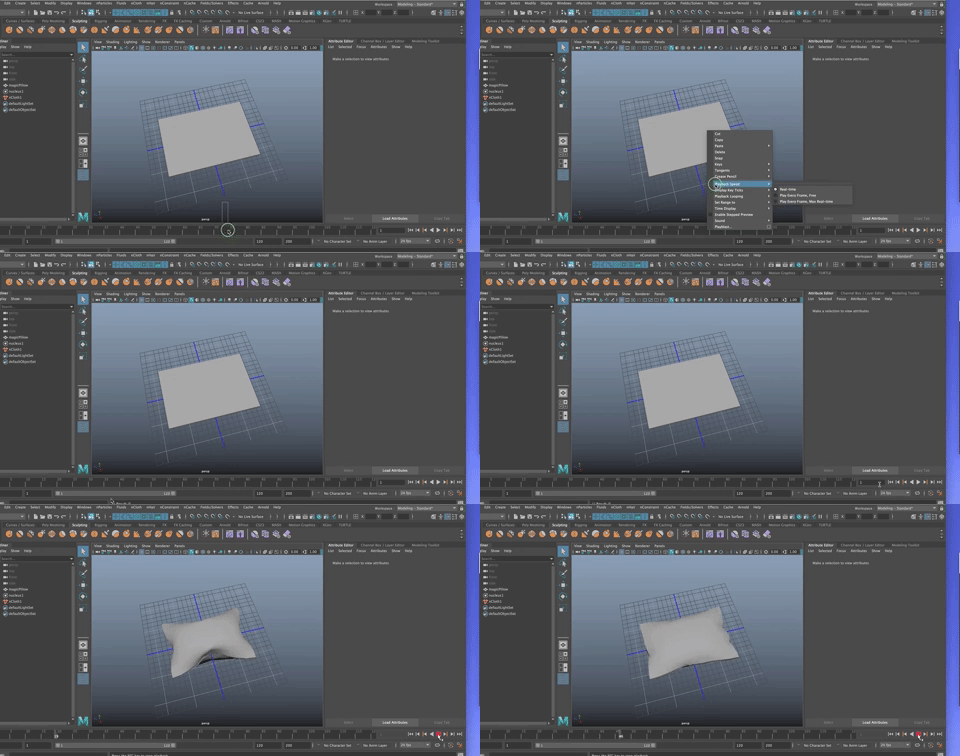
Magic, right?
If it seems super slow, it is probably because nCloth thinks you are working at a 1/100th scale but you may be working in real world scale for your room.
- Go to the nucleus tab/node in the Attribute Editor
- In the Scale Attributes Tab
- Change the Space Scale to .010

Adjusting the pressure in the nCloth Shape node changes the way the pillow inflates. Try a bigger number such as 5.0. (Make sure you are at frame 1 and hit Play)
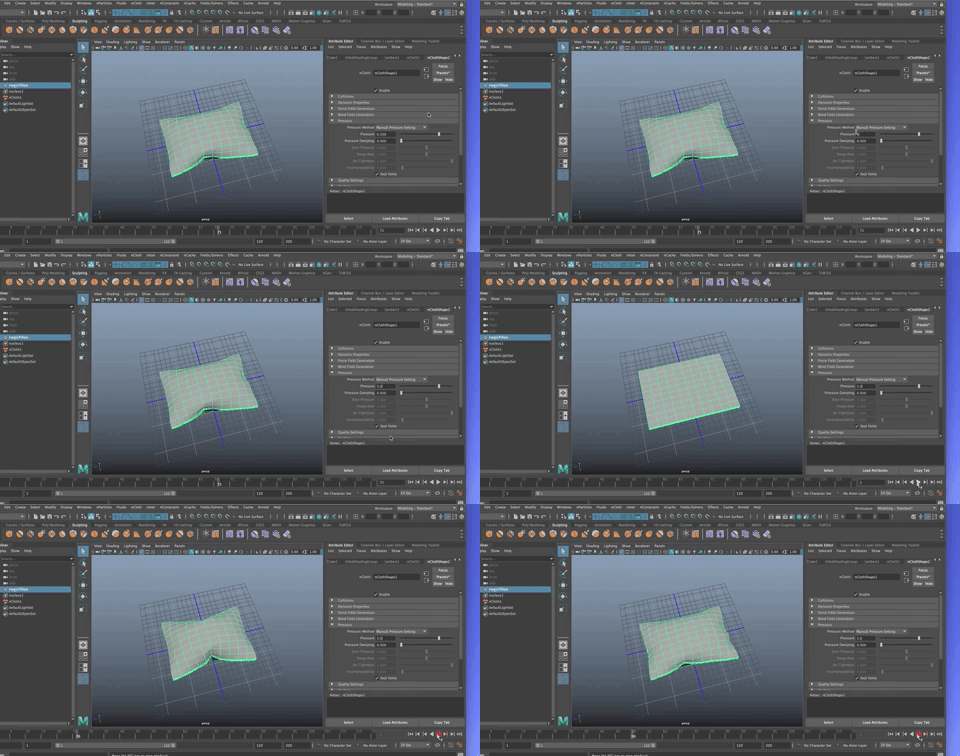
To get your Pillow Shape for your room
- Stop the animation at any frame you want to get a shape you like.
- Delete History (Option + Shift + d)
- Now if you play it, there is no change because you've deleted the connection between time and the shape

Node Editor showing inputs and outputs for the pillow before deleting history:
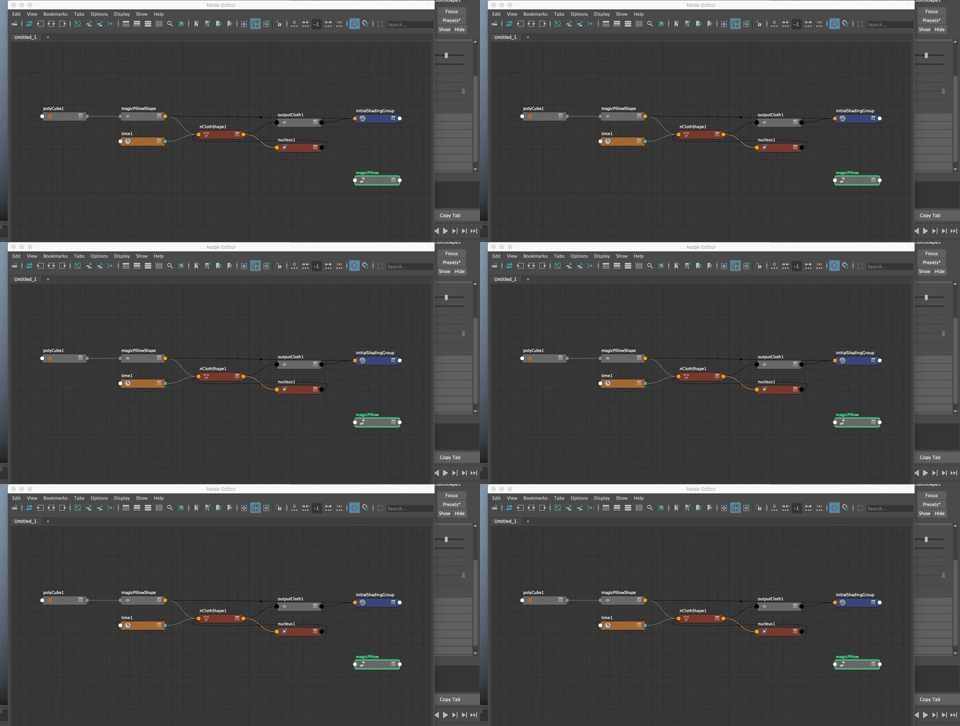
Node Editor showing inputs and outputs for the pillow after deleting history:

notice that Time is no longer adding to the nClothShape node.
Details - Piping and Texture
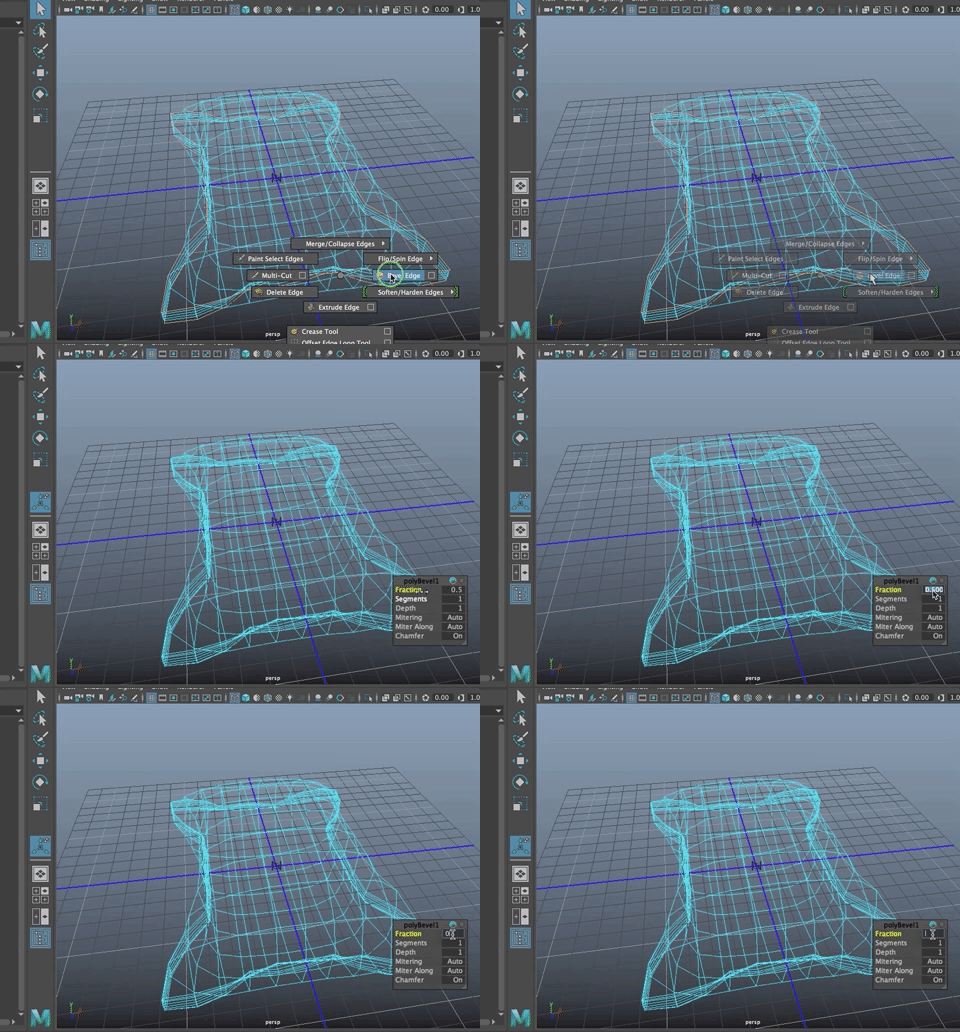
If we bevel some edges, it will help create piping around the pillow.
- Select the top edges around the edge of the pillow, double clicking on an edge then rotating the pillow, shift + double clicking on the next edge and continuing until you have all four sides of the pillow selected

- Add all four bottom edges around the side of the pillow to the selection set.

Hit the 4 key to go into wireframe mode so you can see that you selected them all correctly

Shift Right Click and Choose Bevel
- Change the fraction. It probably needs to be something like 0.2
- Select the faces all around the pillow edge that were created by the bevel (on top and bottom of the edge)
- Trick for selecting all the faces in a face loop is to select a face and shift double click on the face next to it.
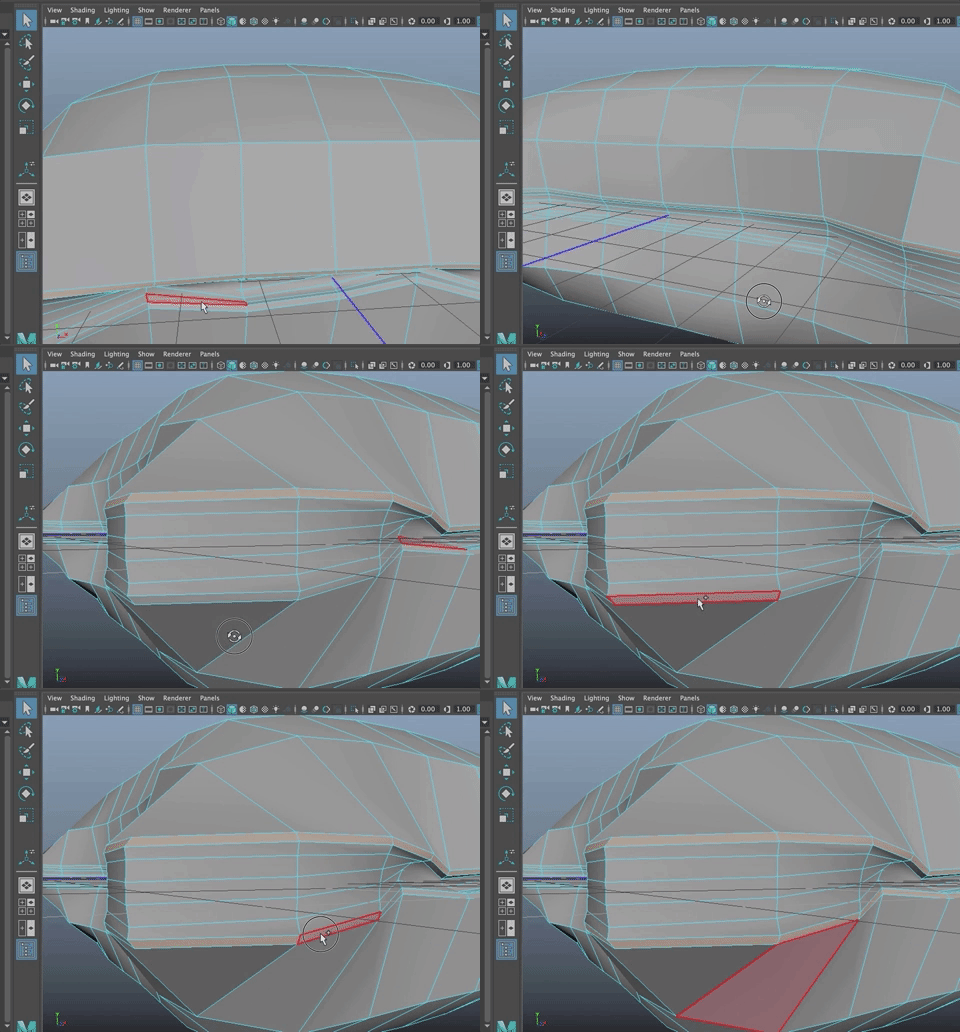
- Check in wireframe mode (4) to be sure you selected all the face rings.
- Hit CTRL + e tp extrude those faces.
- Set the thickness to a depth that looks good as piping. On mine, I chose around 0.05

Look at it in smooth preview (3)
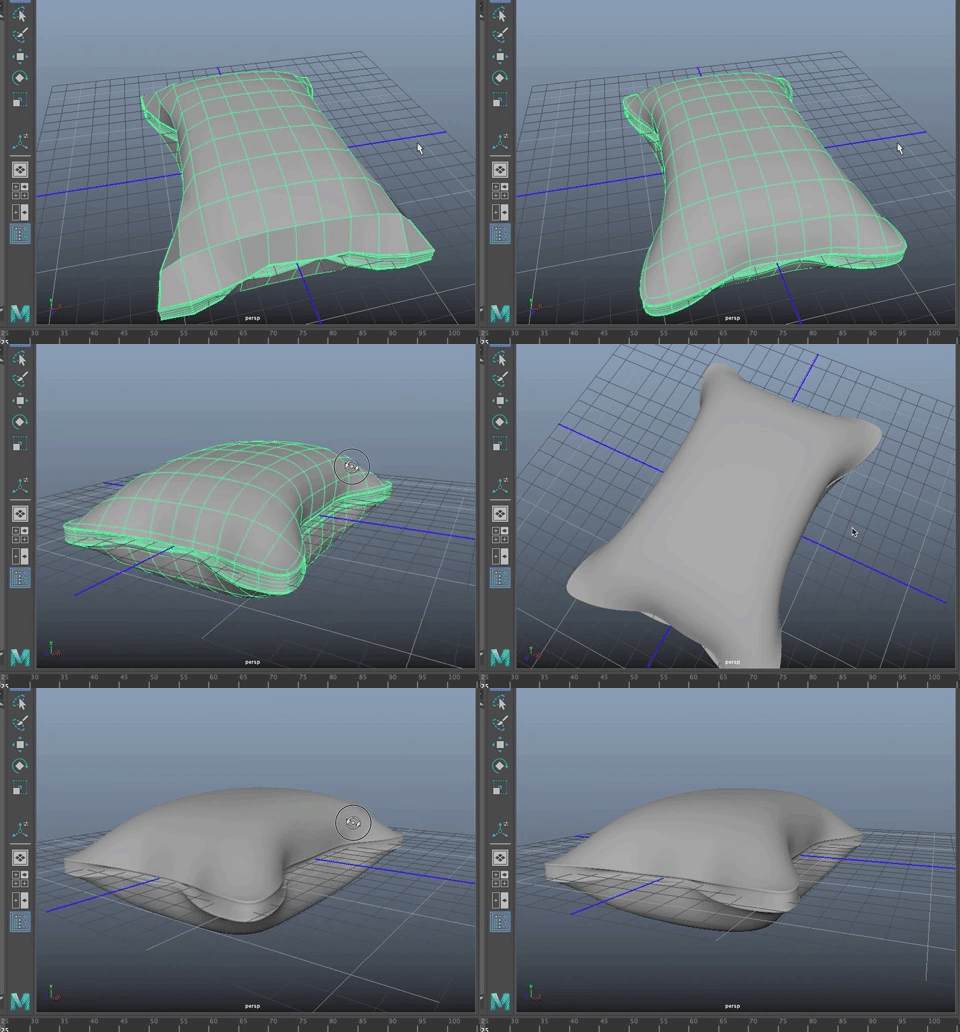
Smooth
There are a few ways to smooth an object. One way is to hit subd preview (3) but to actually smooth a polygon, you add more resolution to it.
- Select the pillow
- Shift Right Click and choose Smooth

You can increase the amount of additional edges but in most cases 1 is adequate.
- SAVE (Command + s)
- Delete History (OPtion + shift + d)
- Freeze Transforms (with object selected, hit Option + f)
- Save (Command + s)
Adding Textures
To finish this out, let's add a texture to this.
YOU NEVER CHANGE THE DEFAULT MATERIAL (LAMBERT 1) because if you do, all your objects, when created, will have new material.
You all know how to add a new material to an object.
Do that. Add an aiStandardSurface material to the pillow.
The Hypershade
The Hypershade is the window used to manipulate materials and textures. To open it, you can either go to Windows>Rendering Editors>Hypershade or you can click on the Hypershade icon

The Hypershade Window Opens
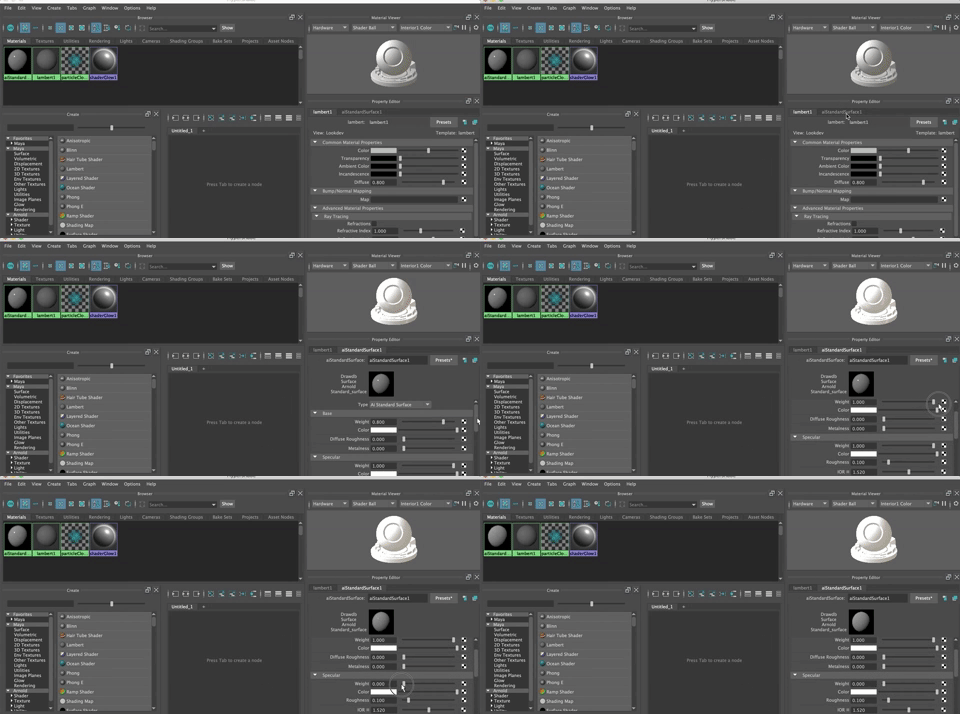
Lorie will tell you more about the Hypershade, but you will notice your materials in the mini Attribute editor.
- Turn up the base weight and turn off specular.
- We want to add one of the materials you downloaded into your source images folder.
- Here is a fast way to do that.
- Click on the Textures Tab at the top left
- Open your Source Images folder for this project and select the pillow textures you downloaded.
Drag and drop them into the Textures window as shown.

Now, if you want to add the pillowFabric.png material, for example, Go back to the Materials Tab, select the aiStandardSurface (which should be renamed to M_pillow, by the way. M_ is a good naming convention for all your materials.)
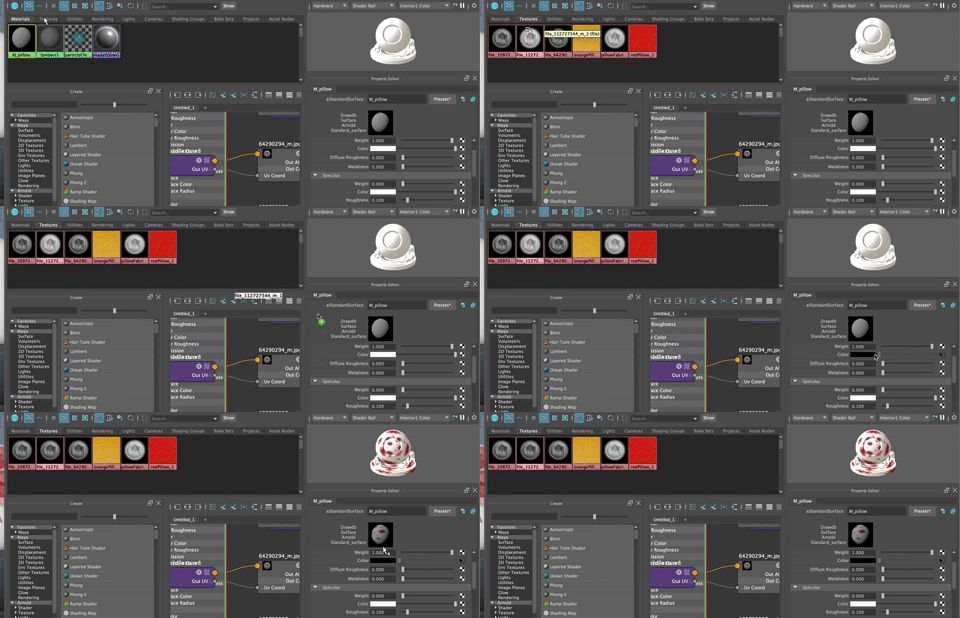
MMB click and drag the material into the Color of the Base Material Properties.
Hit the 6 key to see the textures
- Go to the attribute editor and change the Repeat UV value to make it larger so the texture doesn't look so stretched.
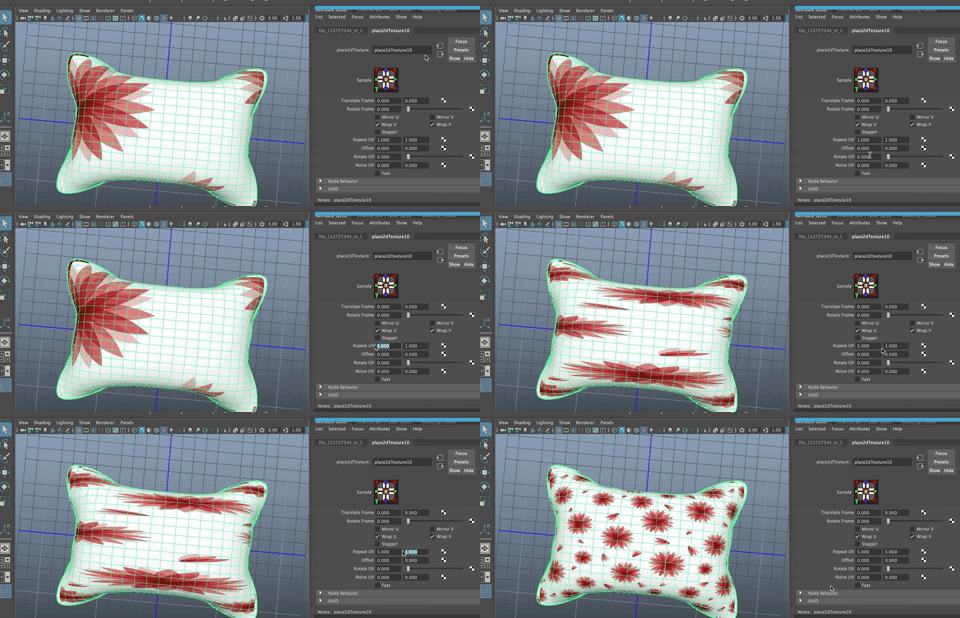
You will still notice stretching around the side of the pillow. This is a UV Layout problem that we will be getting into soon.
Try some of the other textures if you'd like.