Tutorial: Lighting
In order to render, you need to have lights in your scene.
This tutorial will go through some basics of lighting, how to creating lights and control their settings, and some tips for lighting your rooms.
Lights and what they do:
Lighting helps create a sense of a 3 dimensional space. Lighting defines the shape of objects by controlling contrasts in light levels, shadows, reflections, and color. Shadows contribute to the composition and mood of a scene.
These elements help the viewer focus on a desired object while understanding location, time of day, mood.
You can tell a lot about a light source by focusing on the shadows.
- Are there shadows in the scene?
- What direction are they falling in?
- Are they sharp or soft?
- Are they natural (from the sun) or artificial?
- Is there something between the light source and the object that creates shadow areas and patterns?
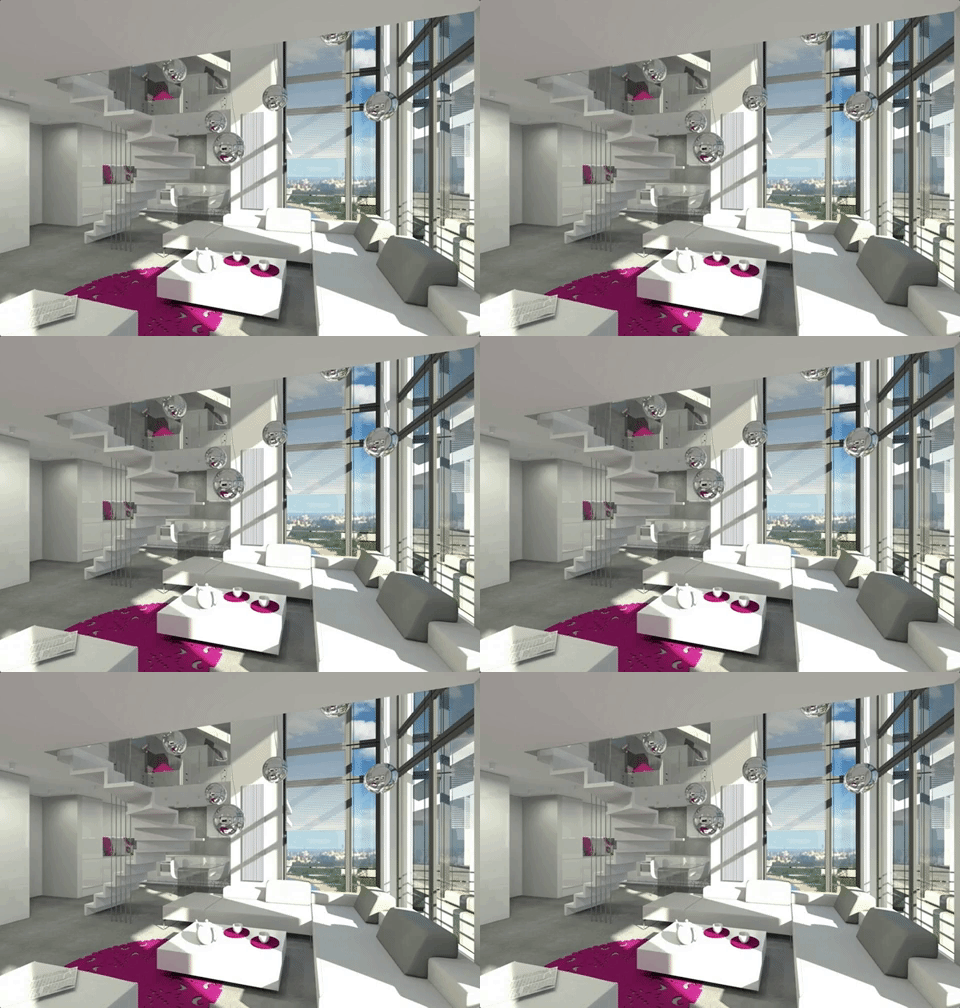
- How does the natural lighting and the incidental lighting (lighting inside the room, such as lamps and overhead lights) define the space?

The best way to learn about light is to observe it closely.

Shadows and Three Point Lighting
Three point lighting is a classic lighting set-up that includes a key light, a fill light and a back or rim light.
The key light, casts the main shadows and is the primary lighting source.
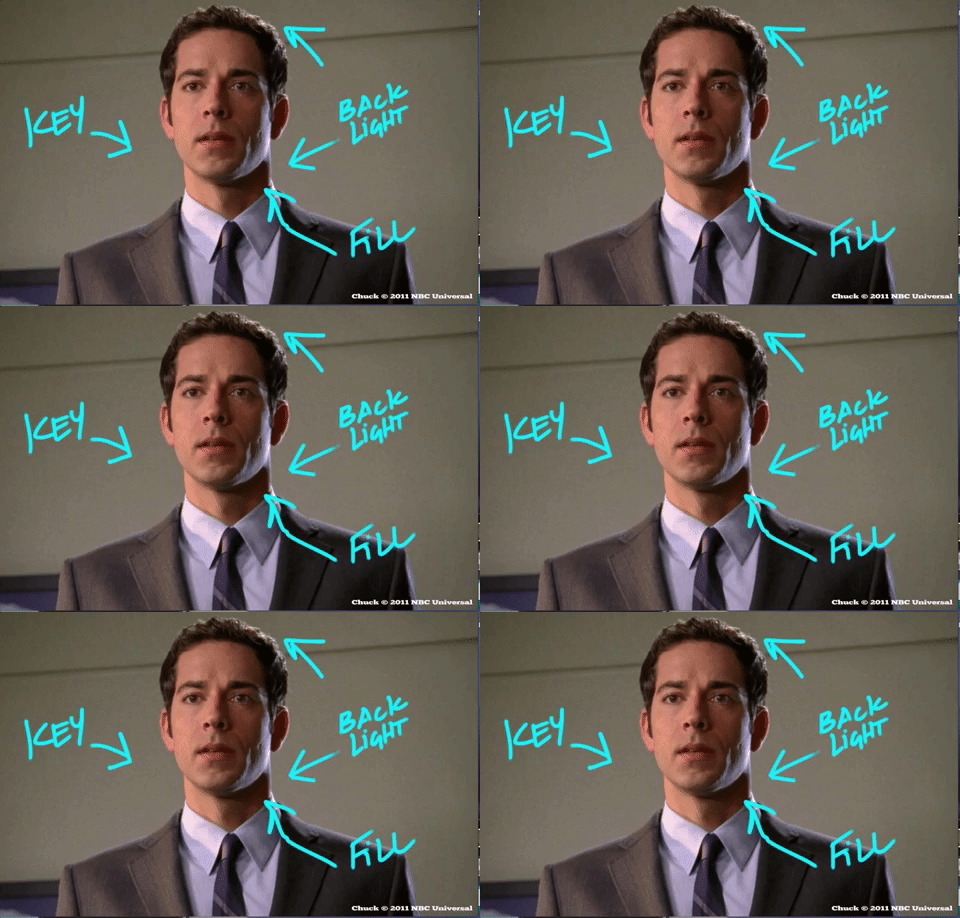 from: https://vmp.com.au/2015/12/3-point-lighting/
To control the contrast, a fill light is used. The fill light "fills" in the shadow area to lessen the contrast in a scene.
You will work with fill through bounced lighting created with ray-traced lighting, and through Ambient Occlusion.
Radiosity is a method of calculating each light as it bounces around a room from surface to surface. Arnold is an advanced Monte Carlo ray tracing renderer. Arnold uses this to track how light bounces from a light source onto an object, and then, depending on the material of the object, reflects the light onto another object, which bounces onto another, etc.
Ambient Occlusion is a way to help deepen the contrast in some shadow areas to create more of a feeling of depth.
Back or Rim light is a light that helps separate the subject from the background and add to the sense of depth in the scene.
Back Lights are often overlooked but when it is used, it has enormous impact.
The nice thing about working in computer graphics, is that you can control the shadows and turn them on or off as needed so that every light doesn't need to cast a shadow.
You can use Maya lights in Arnold, but you need to adjust some settings quite a bit.
Maya lights you will use are:
Directional Light -- Parallel light rays that wash light across the scene in one specific direction. Similar to sunlight or moonlight.
Point Light -- Radiates light out from its center in all directions. The farther an object is from this light, the less it is illuminated. Similar to a light bulb, LED or torch.
Spot Light -- Lights an area within a cone shape. The light comes from the center point and travels in a specified direction. Similar to a flashlight, street lamp, headlights, spotlights.
Maya lights are different from Arnold lights because Arnold lights and the Arnold renderer are set up for physically accurate lighting. That is one reason I feel more comfortable with Arnold--it is more like lighting in a real physical space.
In the real world, light has fall-off or decay. This means that the amount of light close to the light is much less than the light farther away. The intensity or brightness of light is a function of the distance from the light source and follows an inverse square relationship.
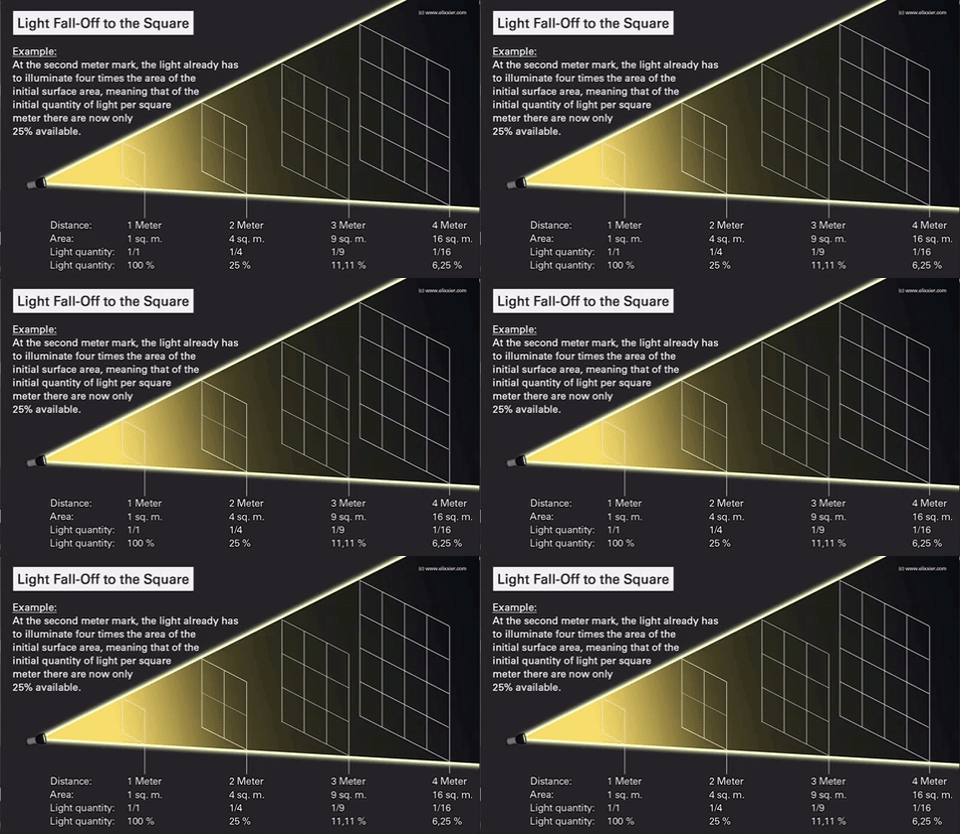
Maya lights, by contrast, have no decay. The result is that when you use Maya lights with the Arnold renderer, you have to turn the intensity way up to see anything.
Arnold Lights:
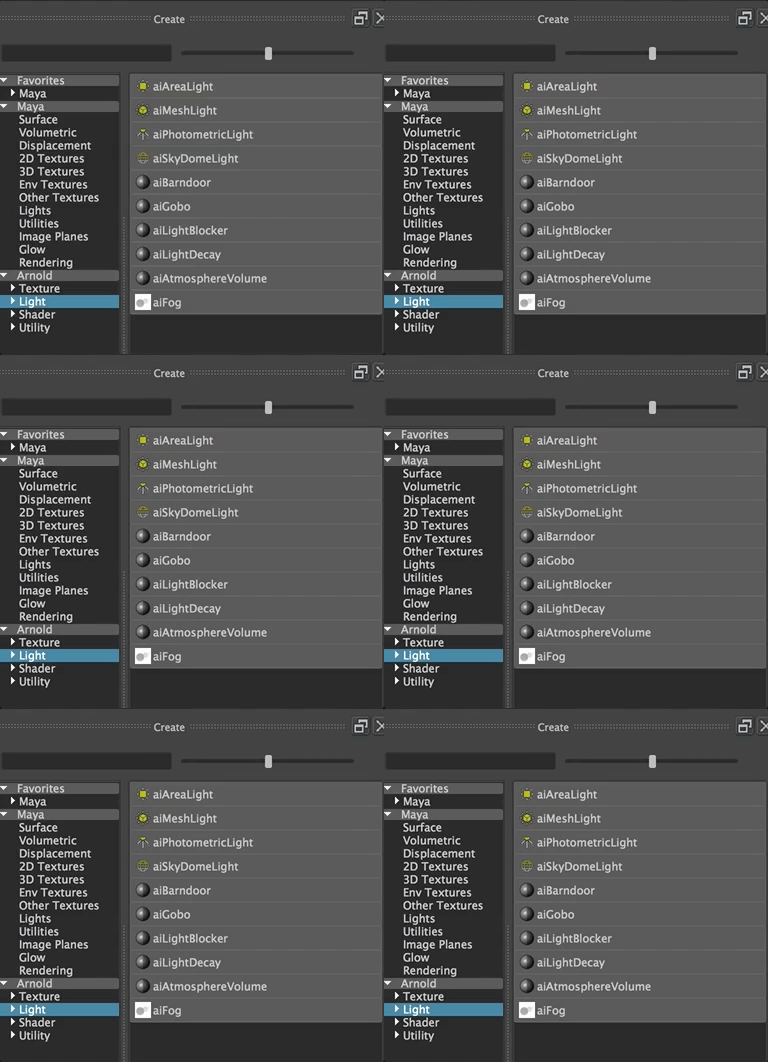
Arnold's light nodes begin with ai- aiArea, aiMesh, aiPhotometricLight, aiSkyDomeLight, aiBarndoor, aiGobo, aiLightBlocker, aiLightDecay, aiAtmosphericVolume, aiFog
Arnold Renderer
For a detailed guide to using Arnold in Maya, see the SolidAngle User Guide
It is difficult to separate lighting from rendering in computer graphics and modeling, so let's step back and look at some of the Arnold Render Settings. Open the Render Settings Window (The Film Clapboard Icon with the Settings Gear, just under the main menu),

or go to Windows>Rendering Editors>Render Settings in the Menu using the Marking Menu you get by holding down the space bar.
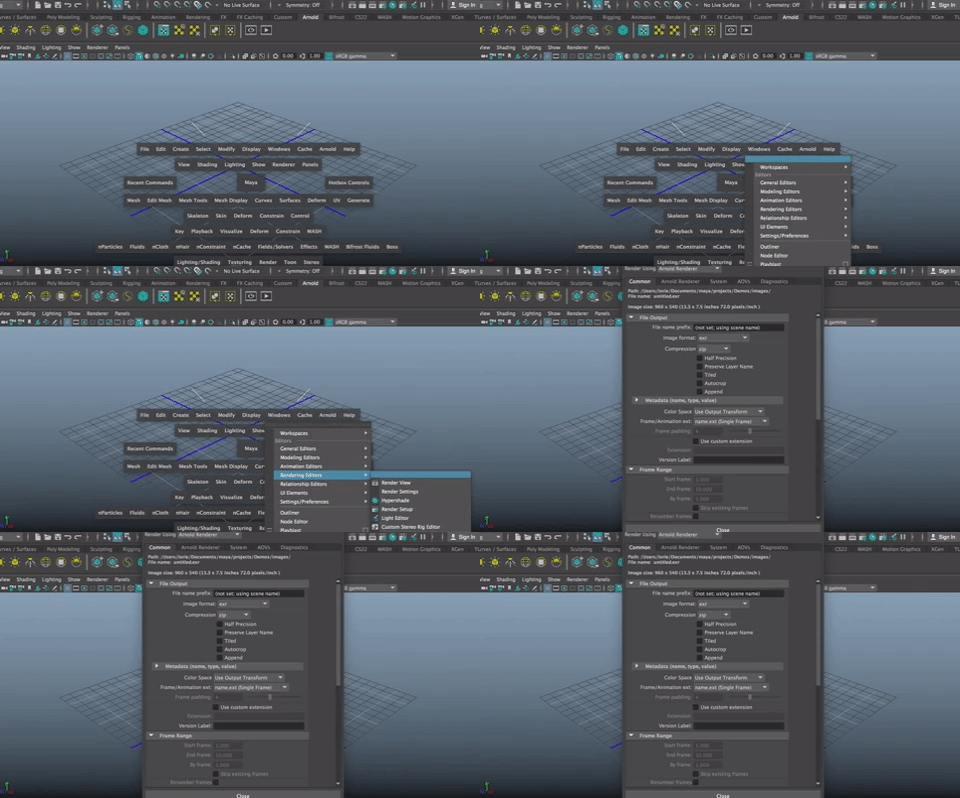
This opens the Render Setting Window
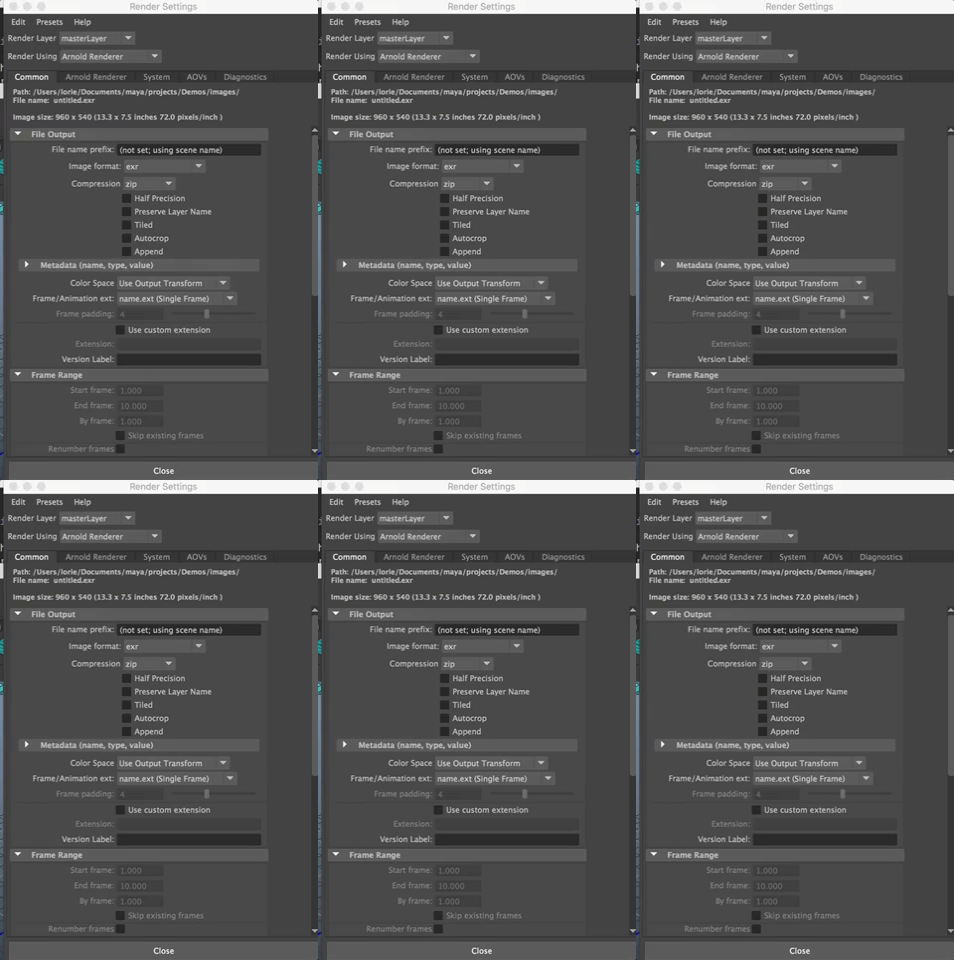
Make sure Arnold Renderer is showing in the Dropdown at the top for Render Using. If you don't see Arnold there, you probably don't have it loading and need to go to the Plug In Manager.
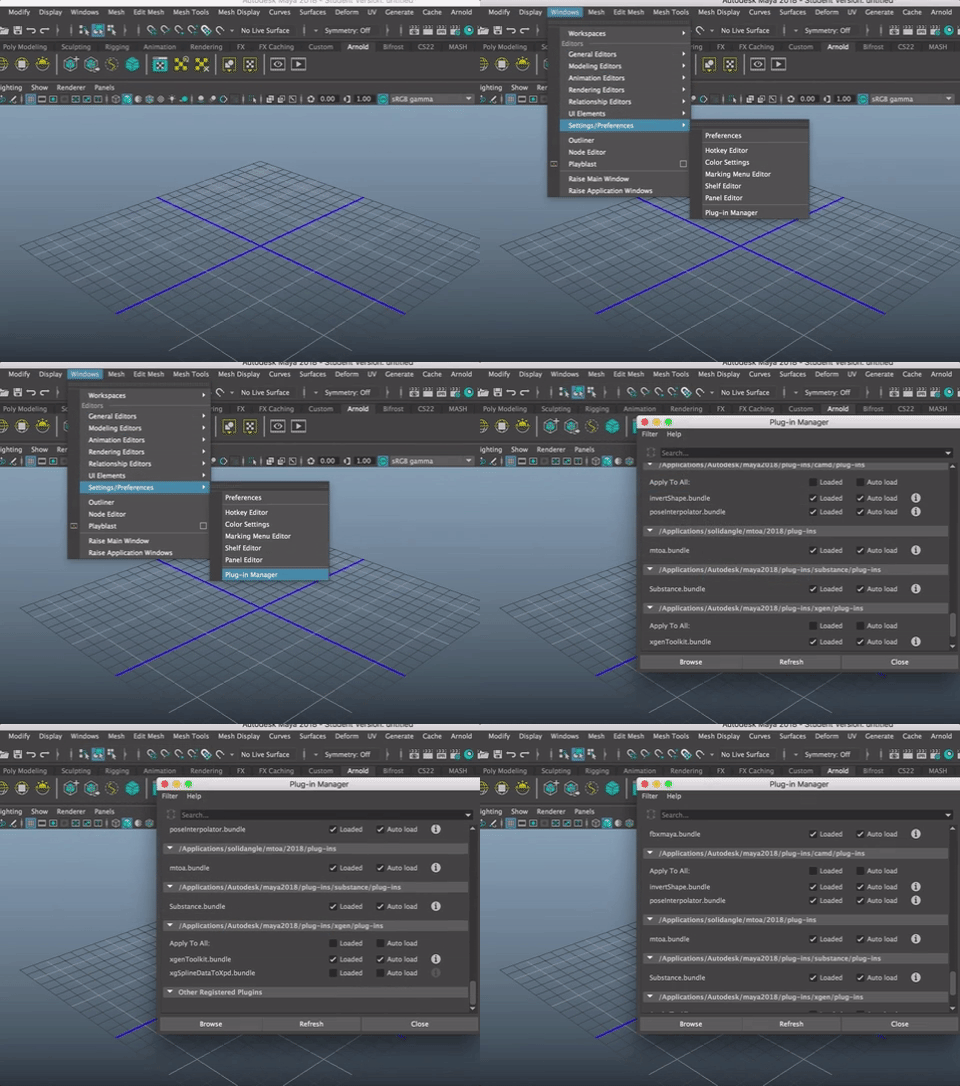
Make sure the mtoabundle is checked ON for load and autoload

You will notice several tabs, one Common Tab that works for any rendering software, and the other tabs are distinct for Arnold.

In the Commons Tab, the default settings are fine for now, but it is here that you set the type of image (exr is a great one to use), the camera you are rendering from (perspective camera by default), the image size, and a few other things we'll circle back to later. You will want to render out your final room images at a higher image size (HD1080 is good) and the EXR (OpenEXR) format, developed by Industrial Light and Magic, is a high dynamic raster file format.
The default settings are fine for our initial purposes, but you will probably want to adjust them later on.

Other tabs include Environment where you can upload atmosphere maps,
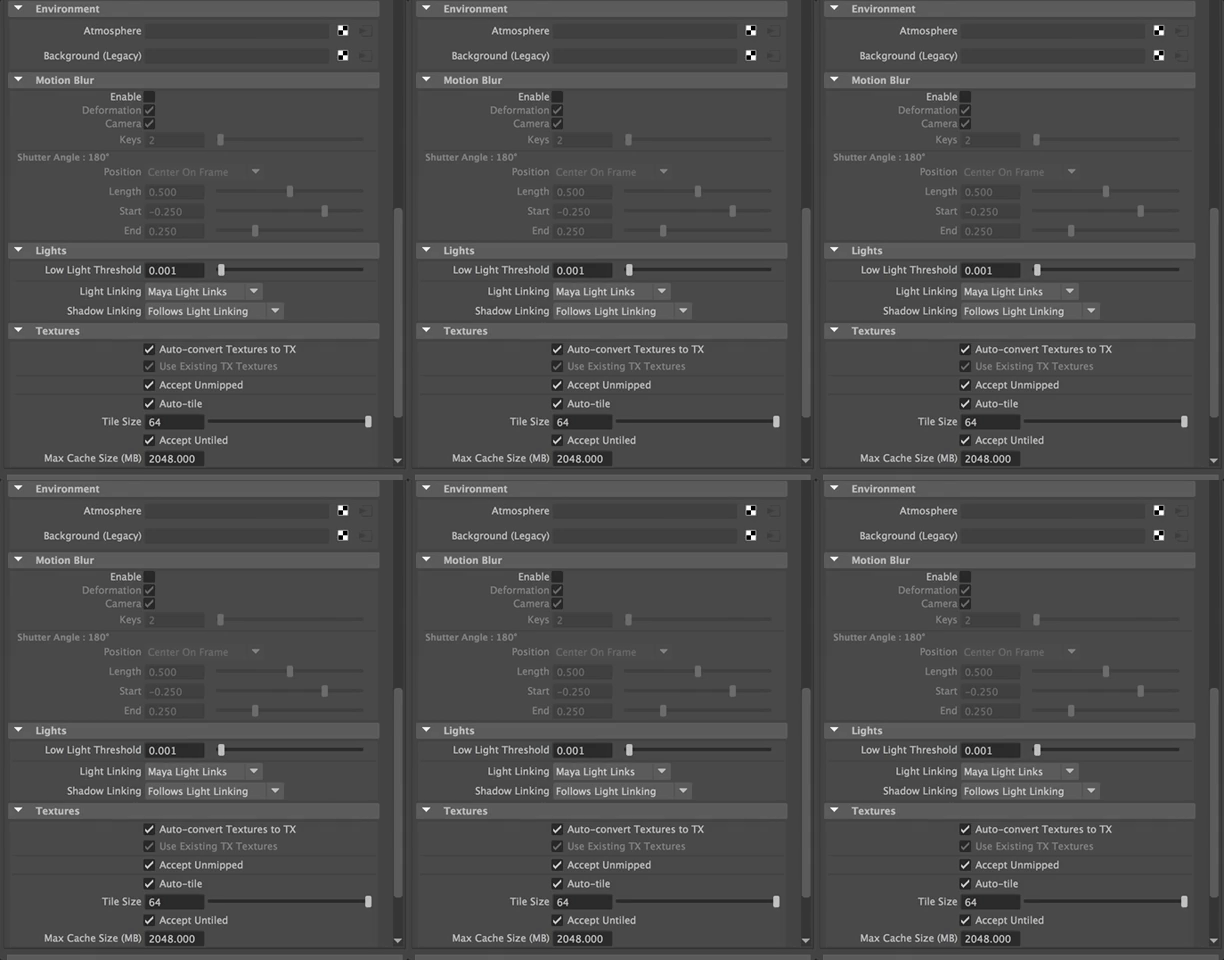
Motion blur (off by default), Lights (where you can set thresholds for the lowest amount of light you want to render in the scene, and Textures.
Arnold uses a .tx format for textures. This setting automatically converts texture files you upload to a .tx format.
We can look at the other Arnold tabs later, but mostly, you can leave them as they are.
You can close the Render Settings Window.
Let's play with lighting and rendering...
Open the scene: roomforlighting.ma
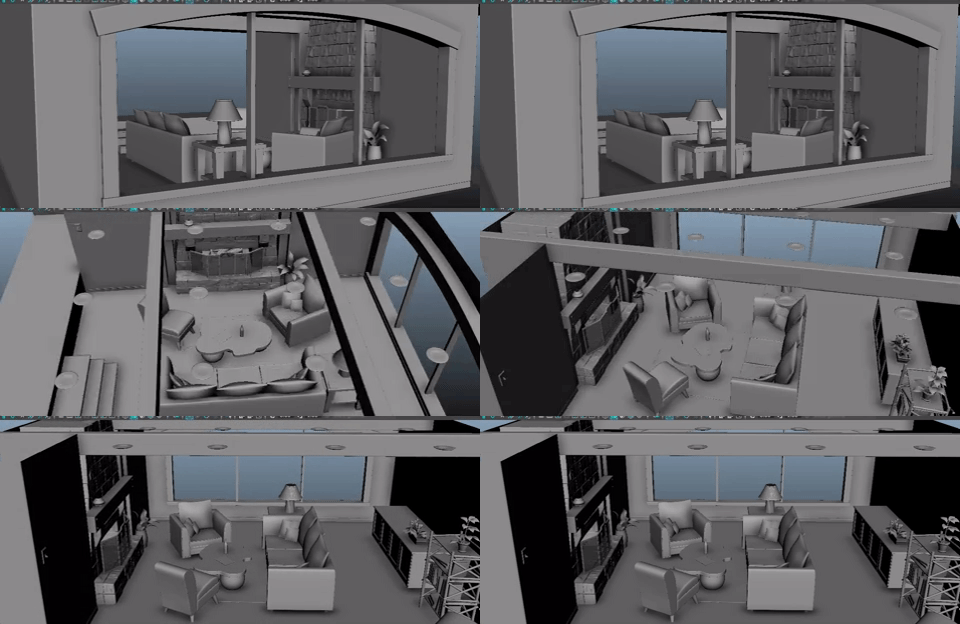
The SkyDome Light
Render (You can hit the play button in the Arnold Shelf, or go to Arnold>Arnold Render View in the Main Menu using the Marking Menu by holding the space bar down.
Remember to turn on RunIPR
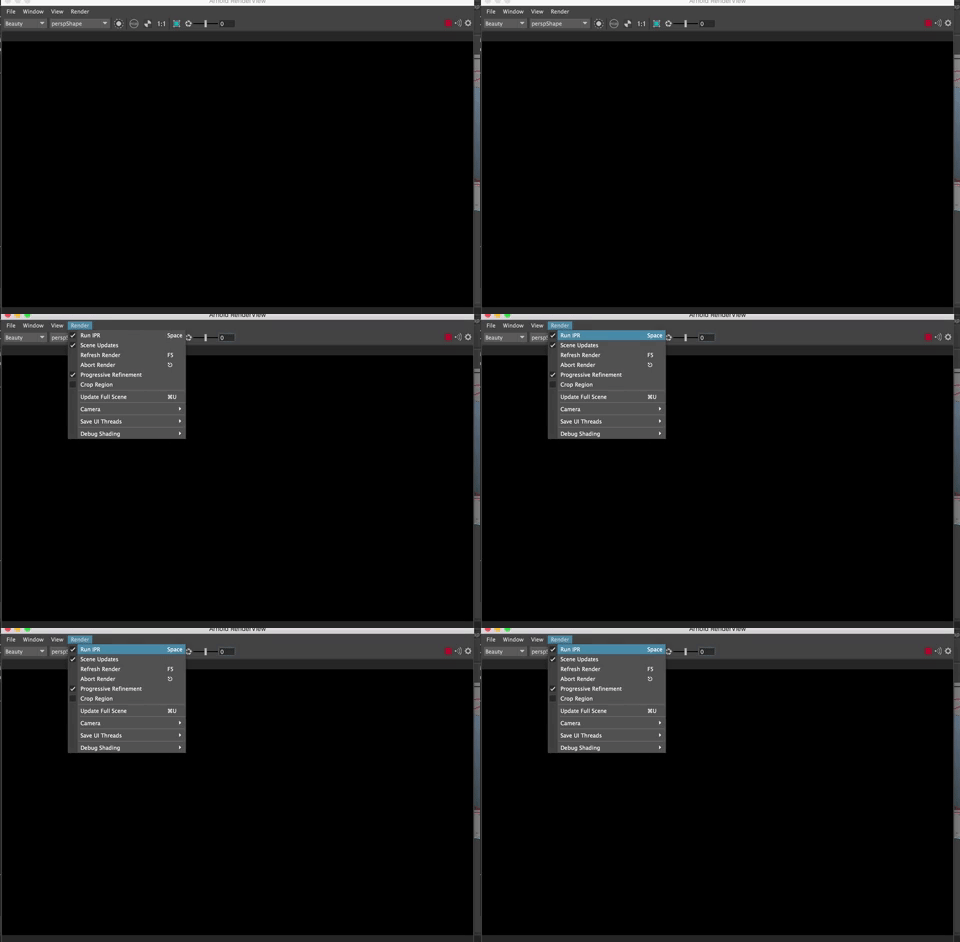
Your room starts to show and for one single light source, it actually does a nice job, but it is very noisy (black spots throughout).
You can adjust sampling to fix it, but better is to add area lights.
Save this image in the Render Window by clicking on the little camera in the lower right corner.
##aiPortalLights Portal lights are important to use if you are doing an interior scene.
You put portal lights at all the windows and skylights to tell Arnold that these are the places where the light will come through into the interior, and nowhere else.

They are placed at the windows, just outside the window, scaled to fit the window/skylight as closely as possible.
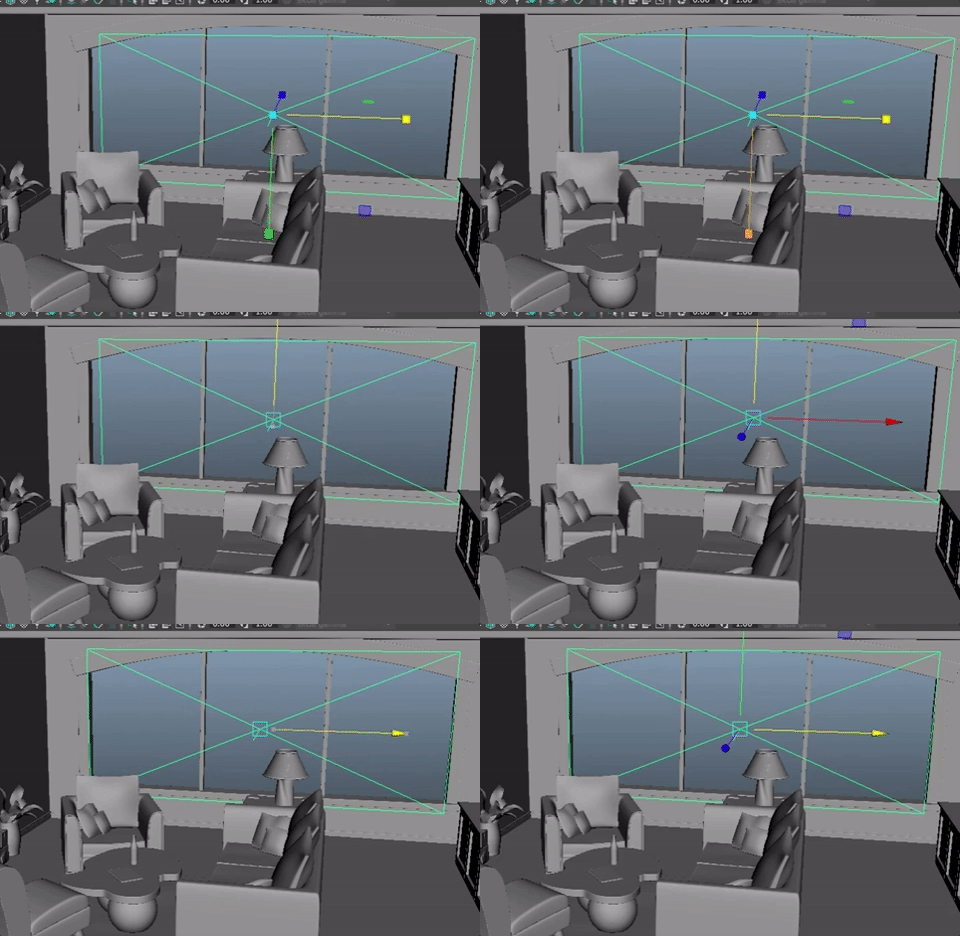
aiAreaLights
Arnold area lights (aiAreaLights) are beautiful lights that are great for both key and fill lights in an interior scene
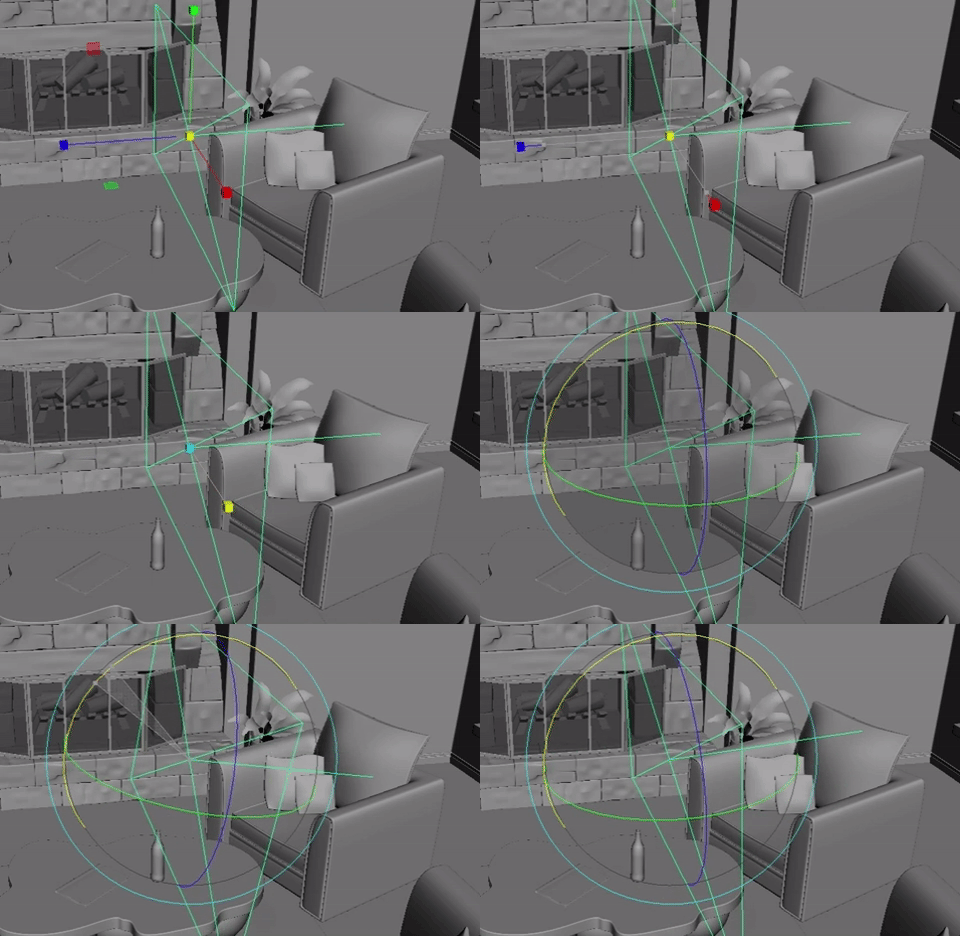
Scale it up and move it up into the scene.
You will notice there is a line coming from the plane of the light, this shows the direction the light is shining.
An area light is a shape (usually a rectangle) but it can be a disc or a cylinder in Arnold) that casts lots of parallel light rays into the scene. Area lights are quite nice for a ray traced scene as they cast some realistic shadows.
The size of the area light determines the size of the area light is emitted from, so scale is important.
A cool trick I like when setting lights, is to look through the light to see what the light "sees" and shines onto to.
With the aiAreaLight selected, In the Viewport Menu, go to Panels>Look Through Selected
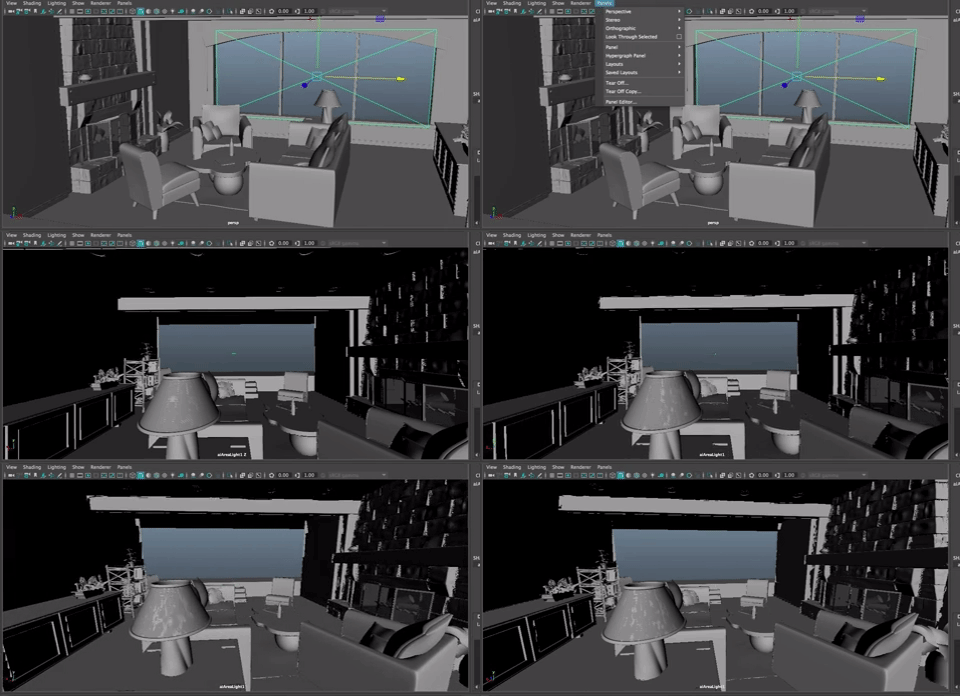
You can set the light by looking through it to see what is being lit.
Your room may be upside down. You can fix that by rotating the area light 180 degrees in z. Then you can adjust from there more easily.
Create>Camera
You can set up cameras for your five images. Go to Create>Camera.
Rename it ShotCamera1. In the ViewPanel, be sure you are looking through ShotCamera1

Make sure you are looking through the camera. You should see Shot1 at the bottom of the ViewPort. If you don't, go to Panels>Perspective>choose the camera you want to look through.

Save a Bookmark for this camera (In the ViewPanel Menu go to View>BookMarks>Edit Bookmarks and Click New. Name your view. You can add this view to your custom shelf, if you'd like by choosing that option.
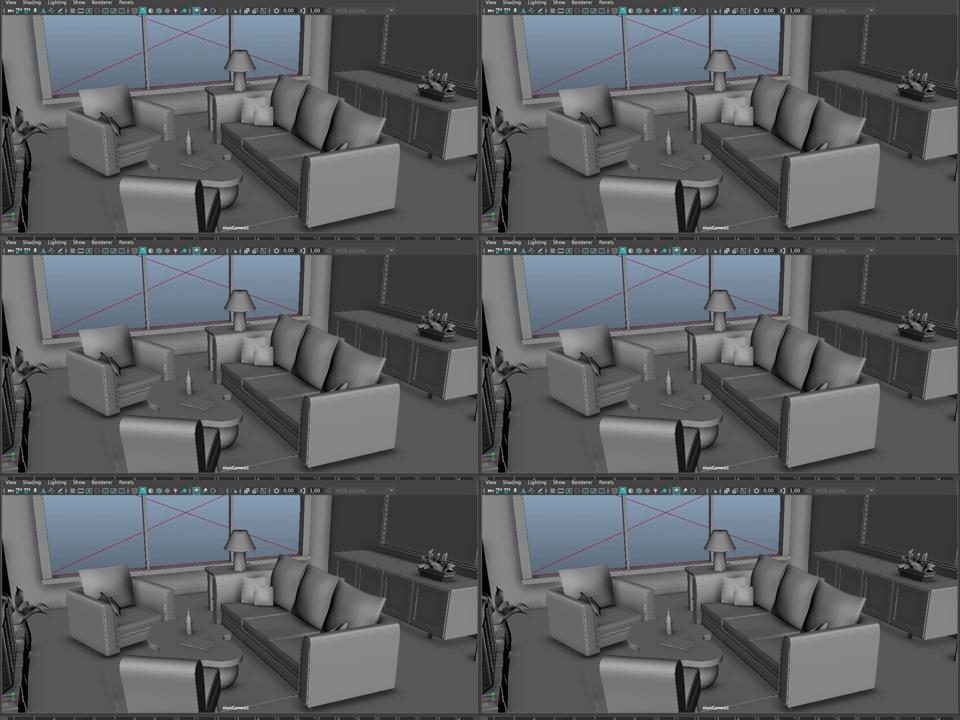
Try rendering. (You can hit the play button in the Arnold Shelf, or go to Arnold>Arnold Render View in the Main Menu (hold the space bar)
Remember to turn on RunIPR

Set the camera you are rendering through
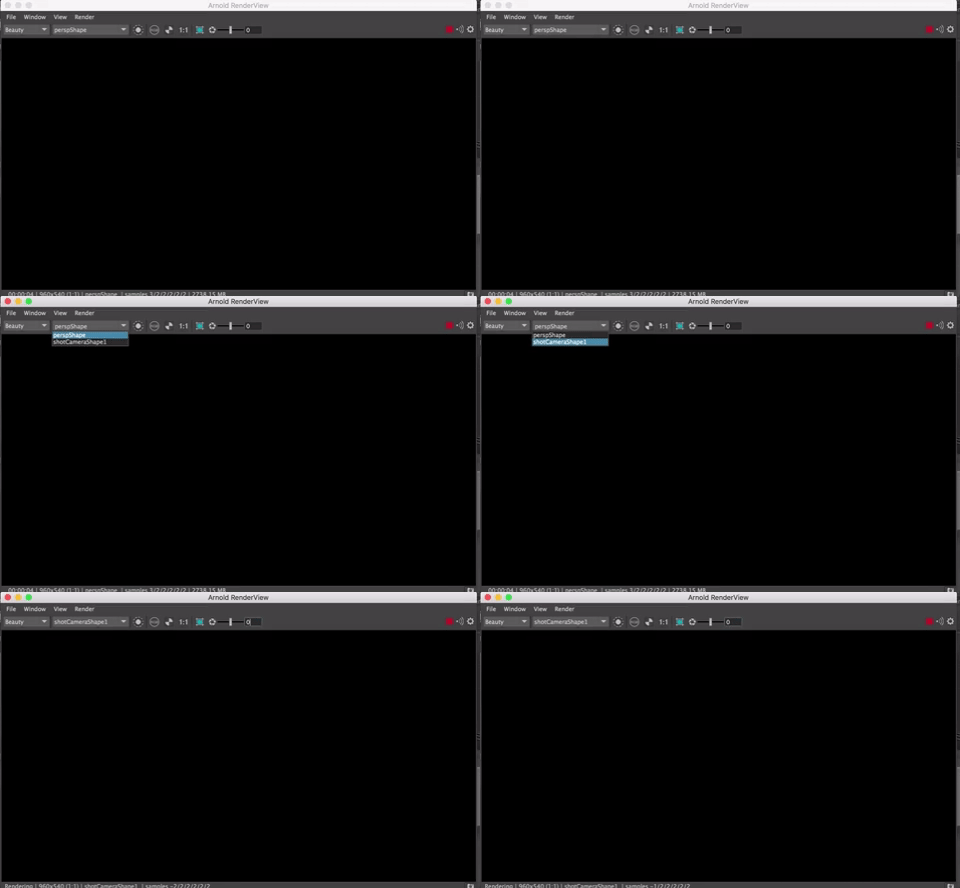
You won't see anything.
This is because we don't have any light in the room yet, but let's work on that.
Let's work on interior lighting using Arnold to render and a mix of maya lights and arnold lights.
You can use the SkyDome with an EXR image applied to the Color attribute. An EXR image has a high dynamic range.
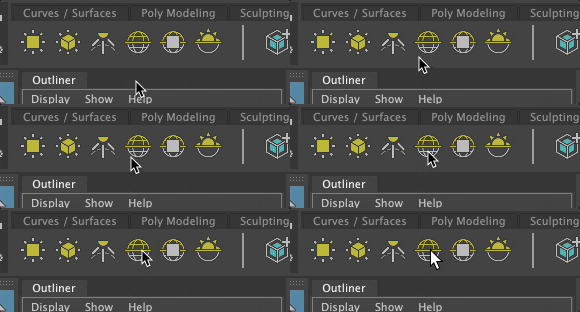
You can find the SkyDome on the Arnold Shelf
Or in the Main menu (Arnold>Lights>SkyDome Light)
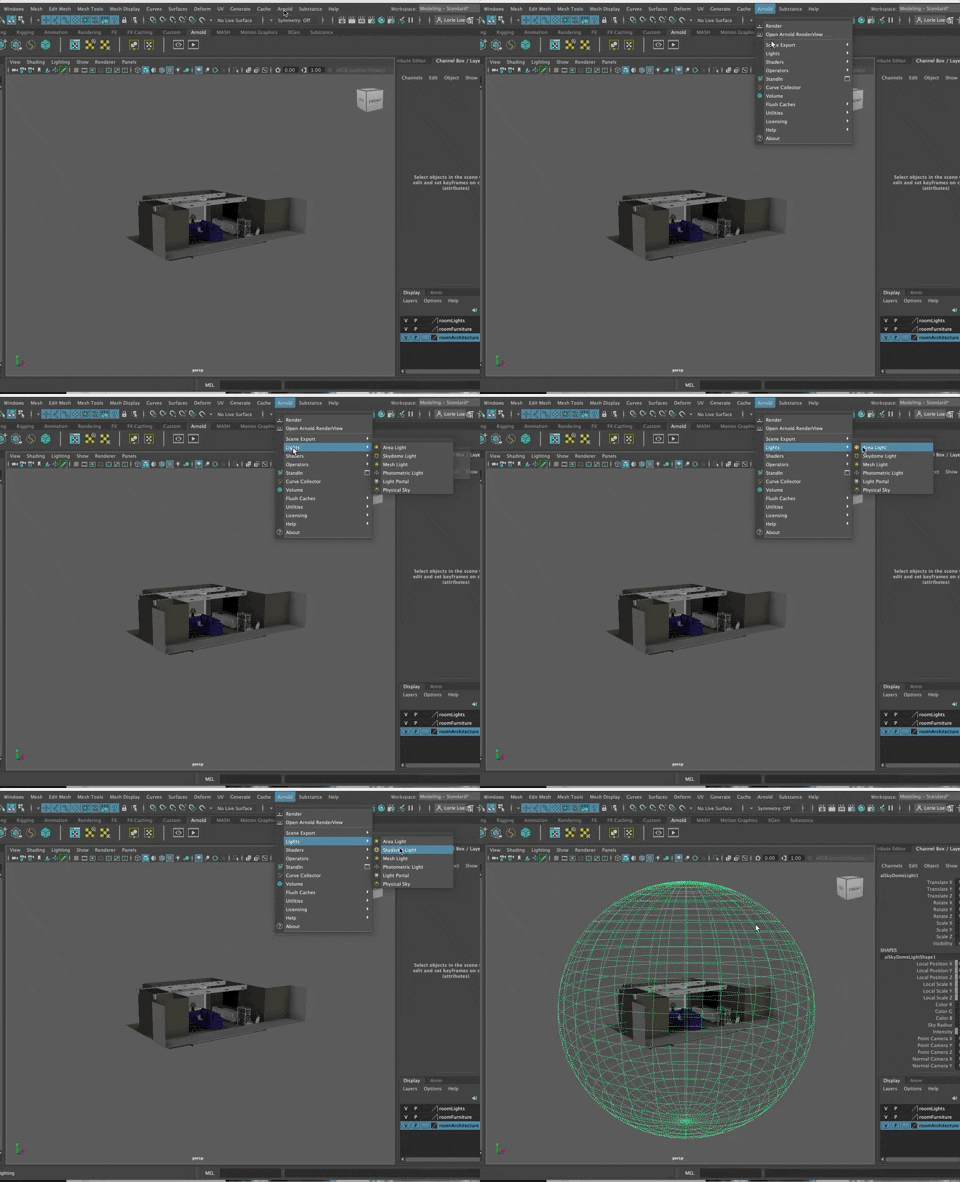
The Skydome light is a large spherical light around your scene, shining a flat white light into the scene from its surface.
Finding Images for the SkyDome
Open a web browser and go to https://polyhaven.com/
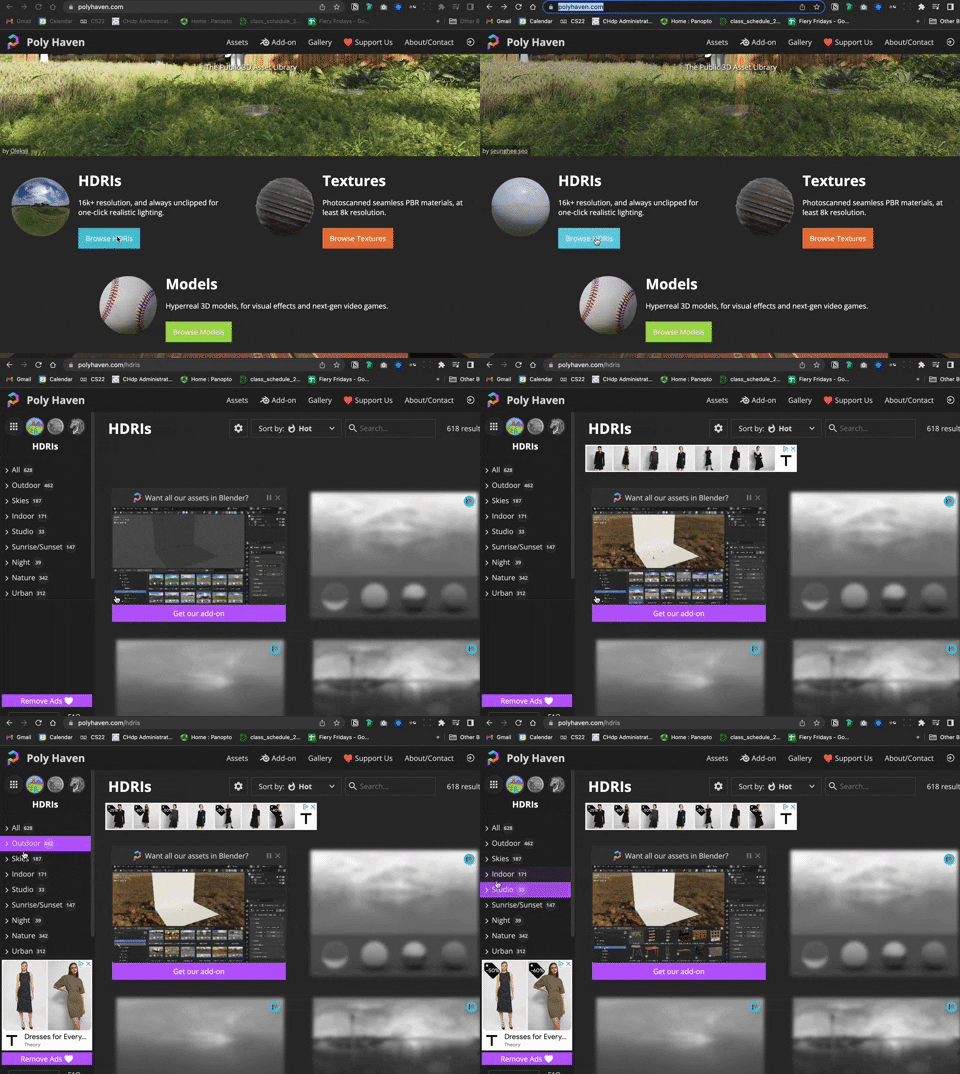
Navigate to the HDRI section. You will see the types of images organized on the left.
Choose the image you want by left clicking on it.
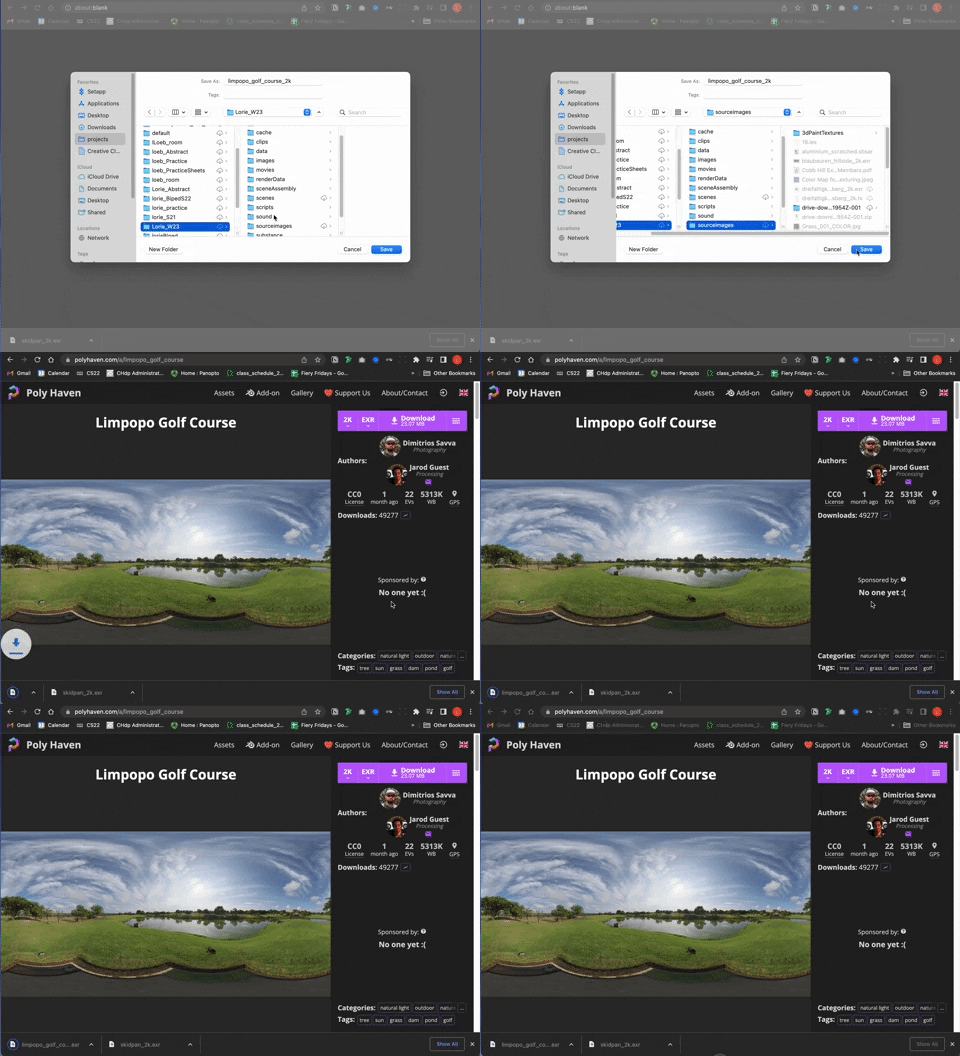
Choose EXR, 2K is plenty,

Download the file to your Project Source Images folder
Adding the EXR to the SkyDome
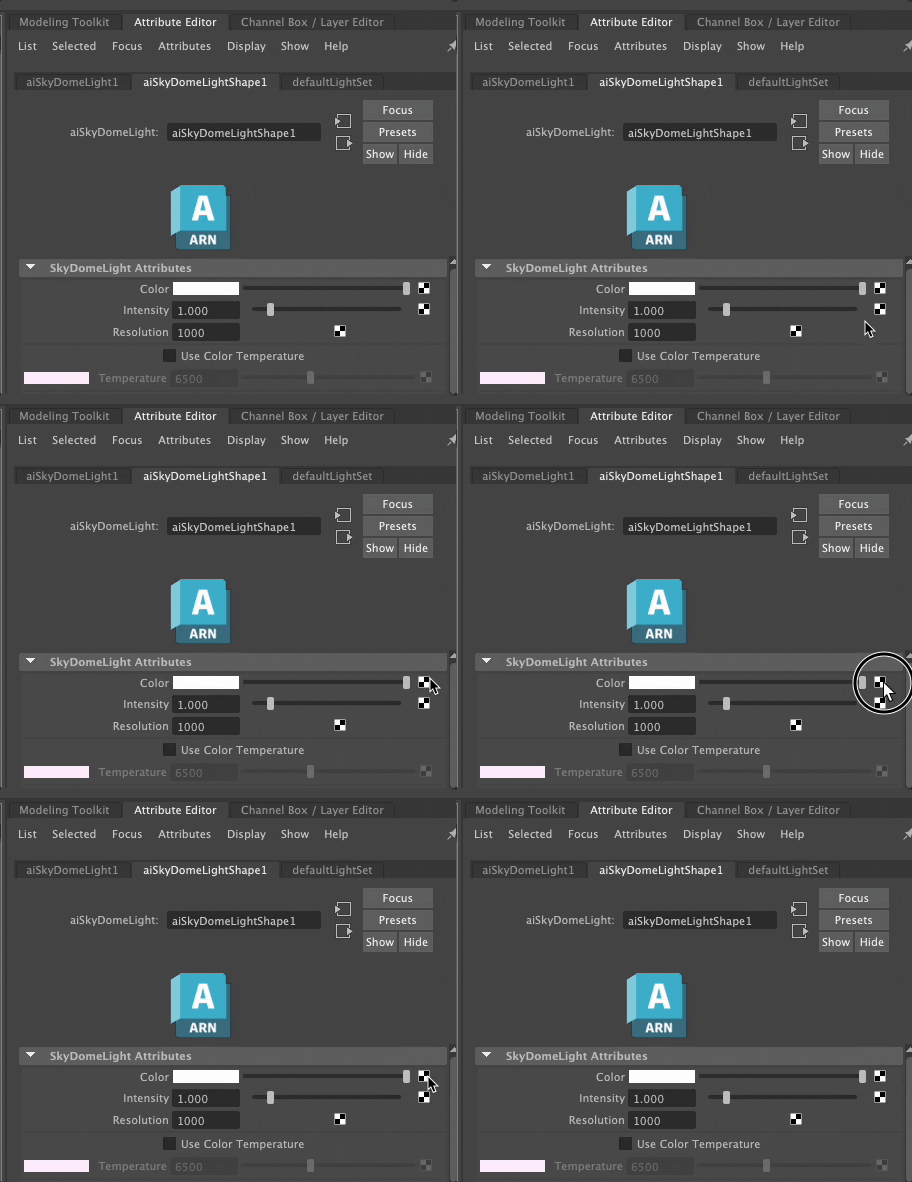
Next, in the Attribute Editor for the Skydome Light
Select the checker to the right of Color
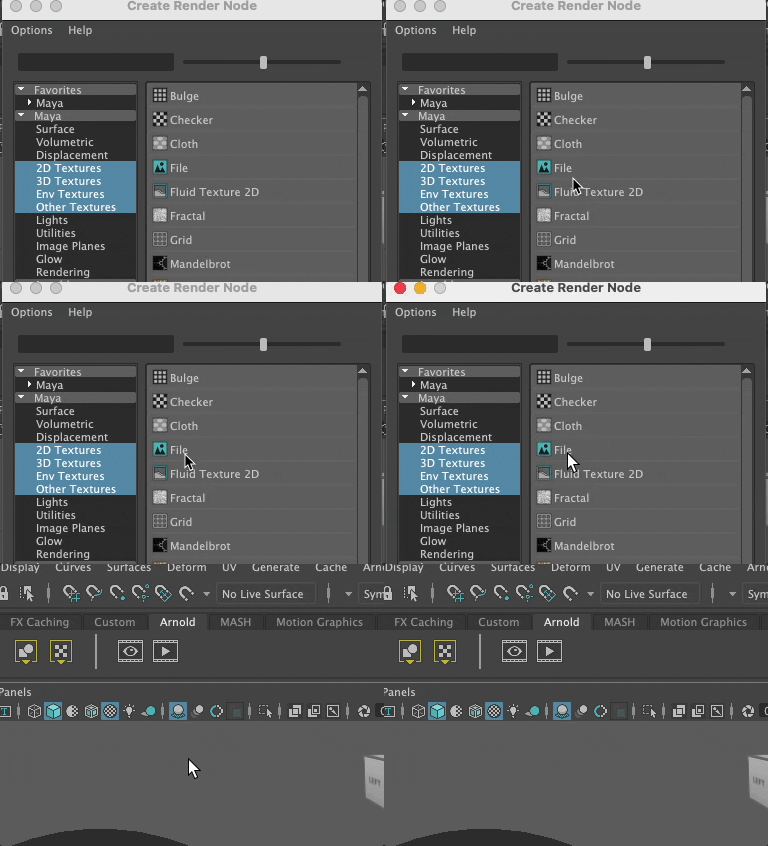
From the Create Render Node Window, Choose File
Back in the Attribute Editor, Click in Image Name (to the left of the file folder Icon) to select the EXR file. If you set it up correctly, it should go automatically to your project source images folder.
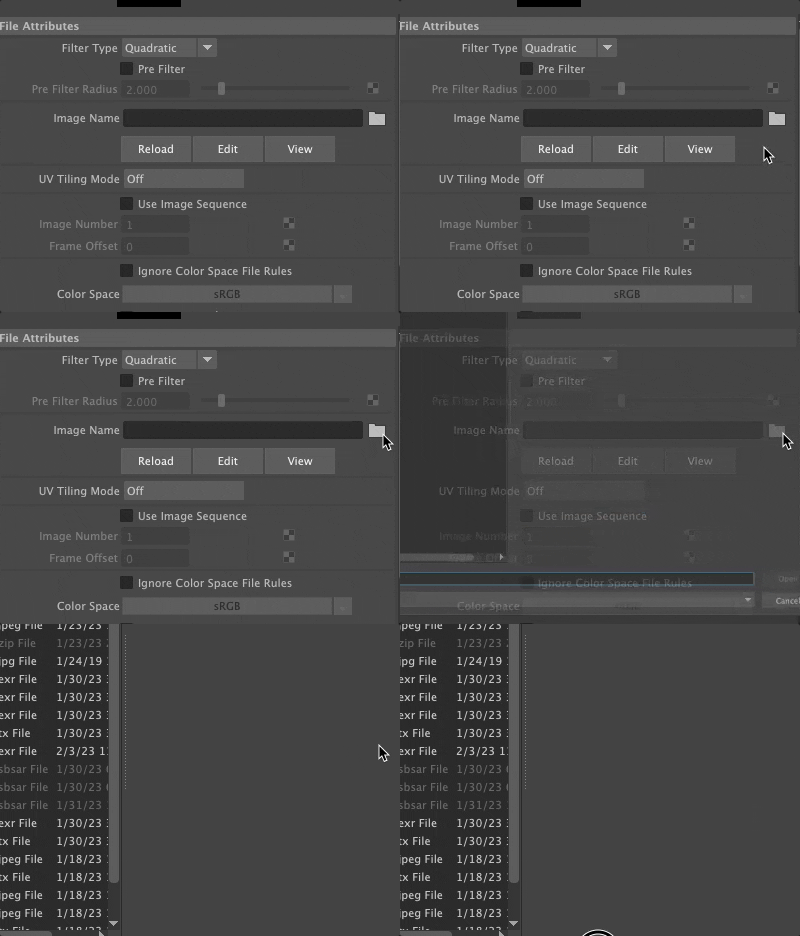
Select the EXR

The image is now attached to your SkyDome and the image itself is creating the light in the scene...the sun in the image is the sun in your scene, etc.

IMPORTANT
In the Attribute Editor for the Skydome,
- Set the Resolution to match the resolution of the EXR you chose. In this case 2K (2000)
- Up the number of Samples to 5
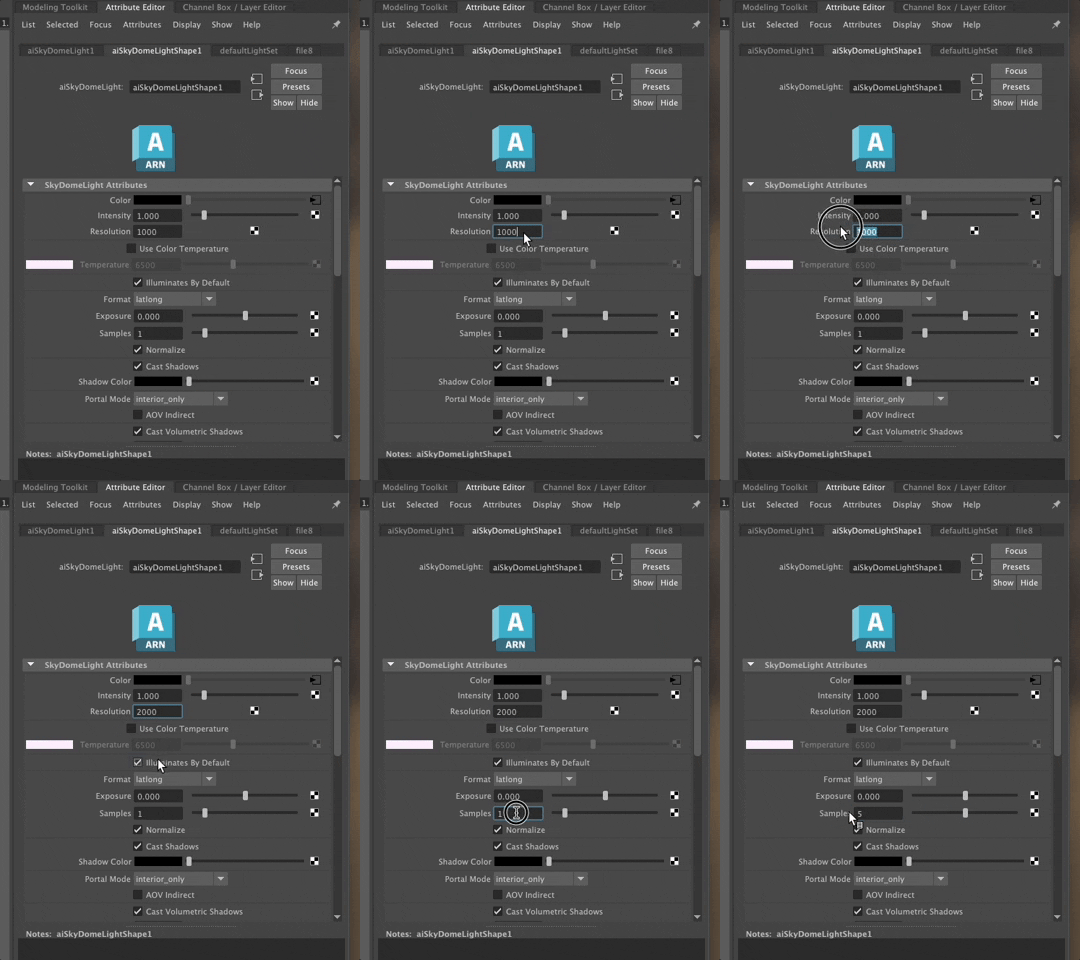
Rotate the skydome so the sun is shining as you would like it in the scene. Just be sure the horizon line is straight (unless you are trying to disorient the viewer).
Create Portal Lights for all the windows/skylights
Maya thinks everything is a window unless you tell it where the windows are. By creating Portal Lights you increase the quality of interior environment renders.
Create an aiPortal Light
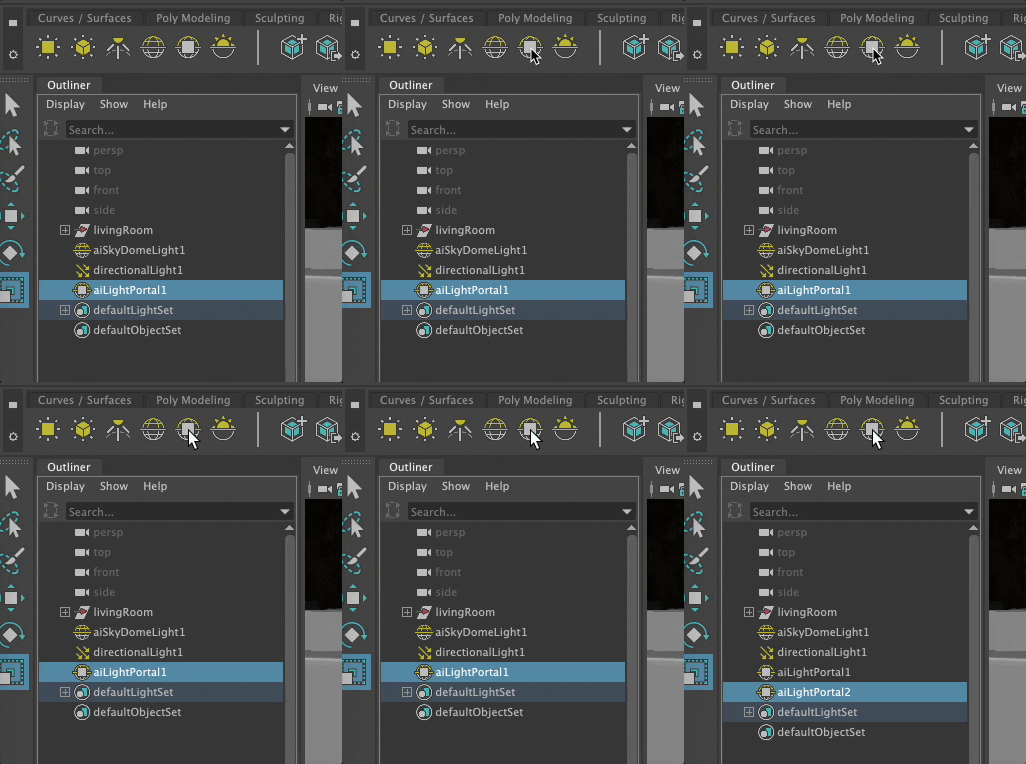
You will want one portal light per window/skylight
Scale up the portal light,
Scale it up
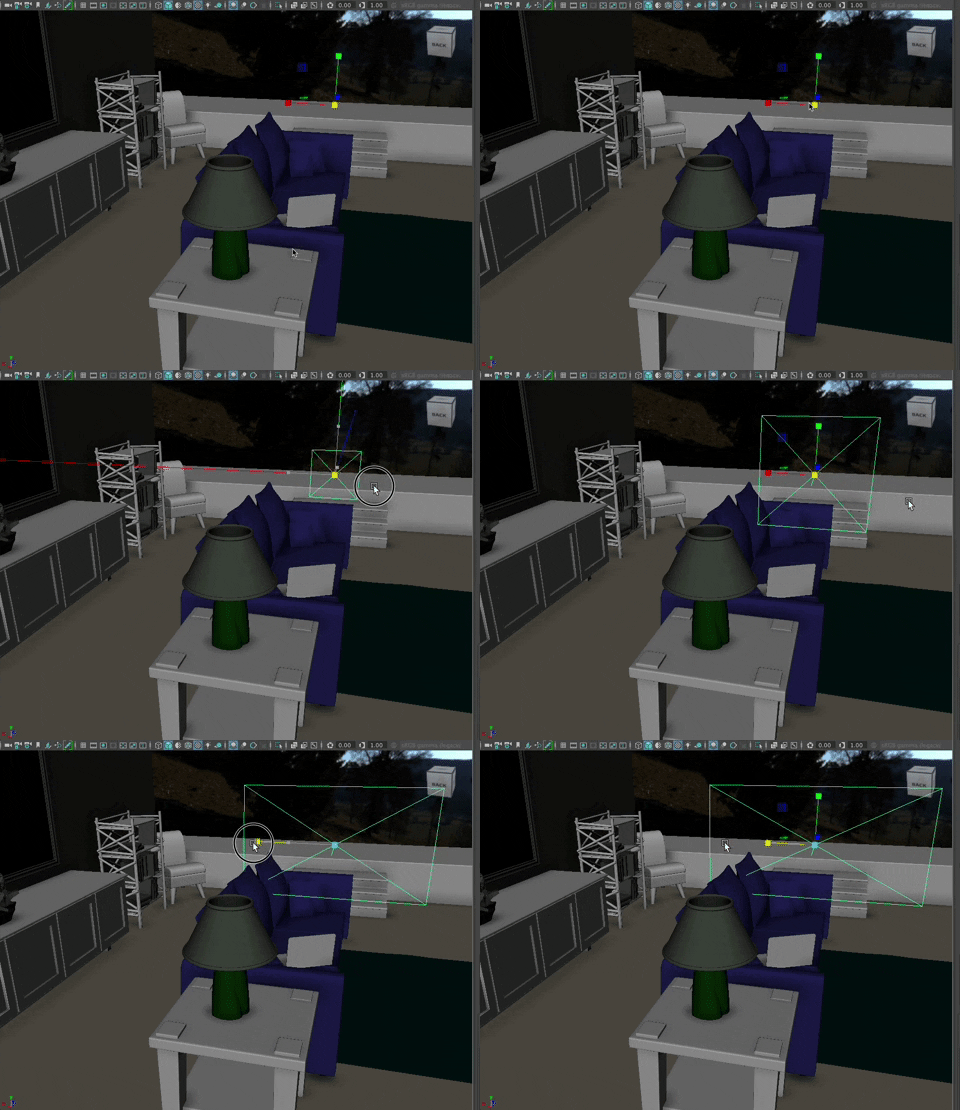
rotate it so it points inward (towards the inside of the room)
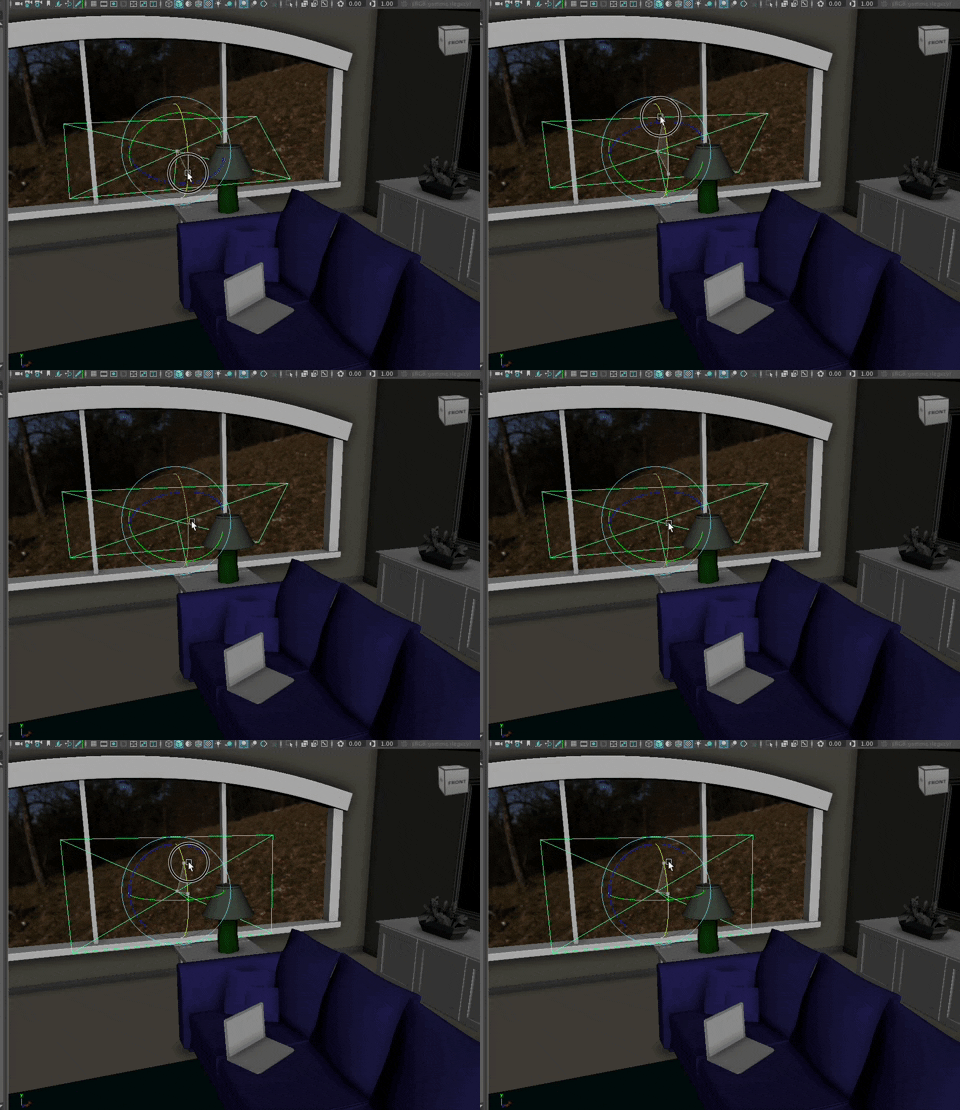
and move them to just outside each window, about the shape and size of the window (a bit bigger)
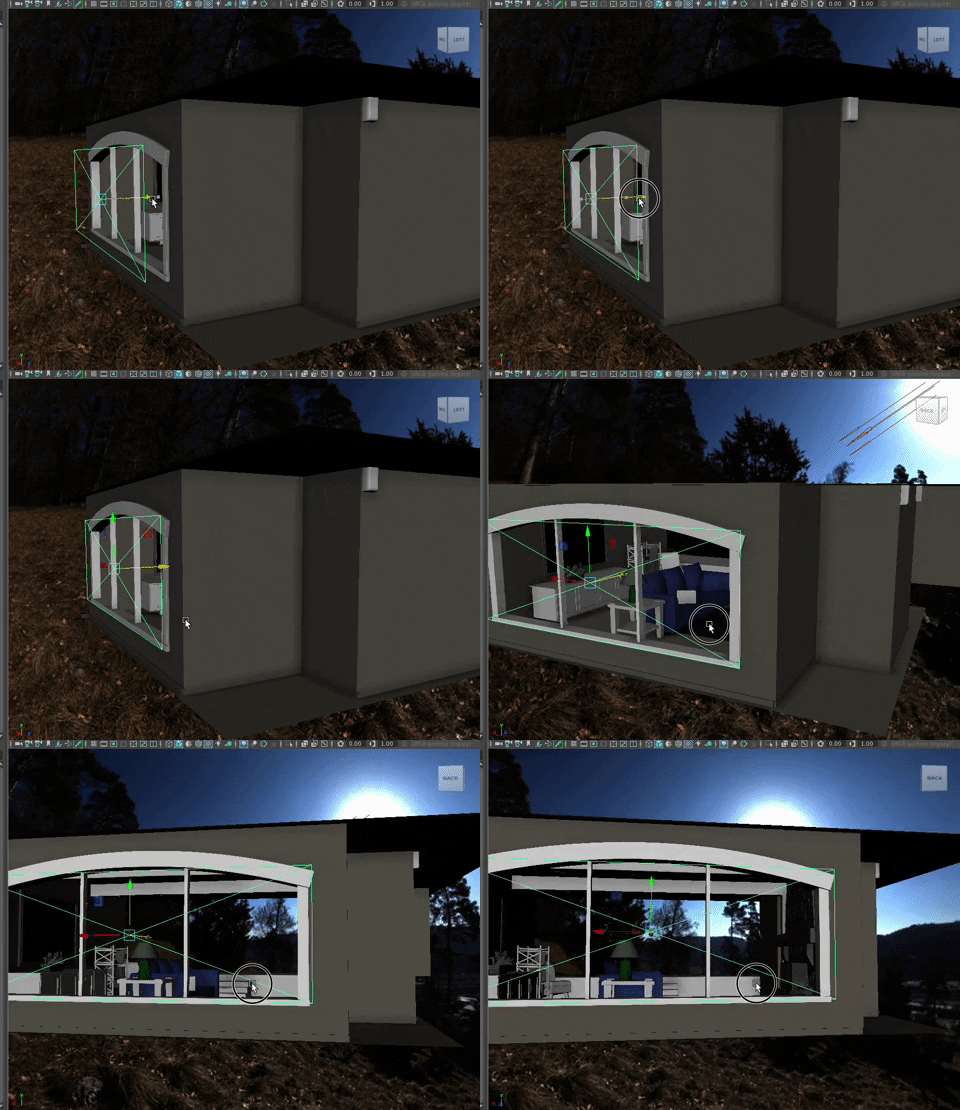
Remember: You need one per window or skylight or open door...
Create the Sun
To get some strong lighting that looks like sunlight coming through the windows, a directional light is a good idea.
Create a Maya directional light
Scale it up and move it up into the scene so you can see the direction of the arrows.
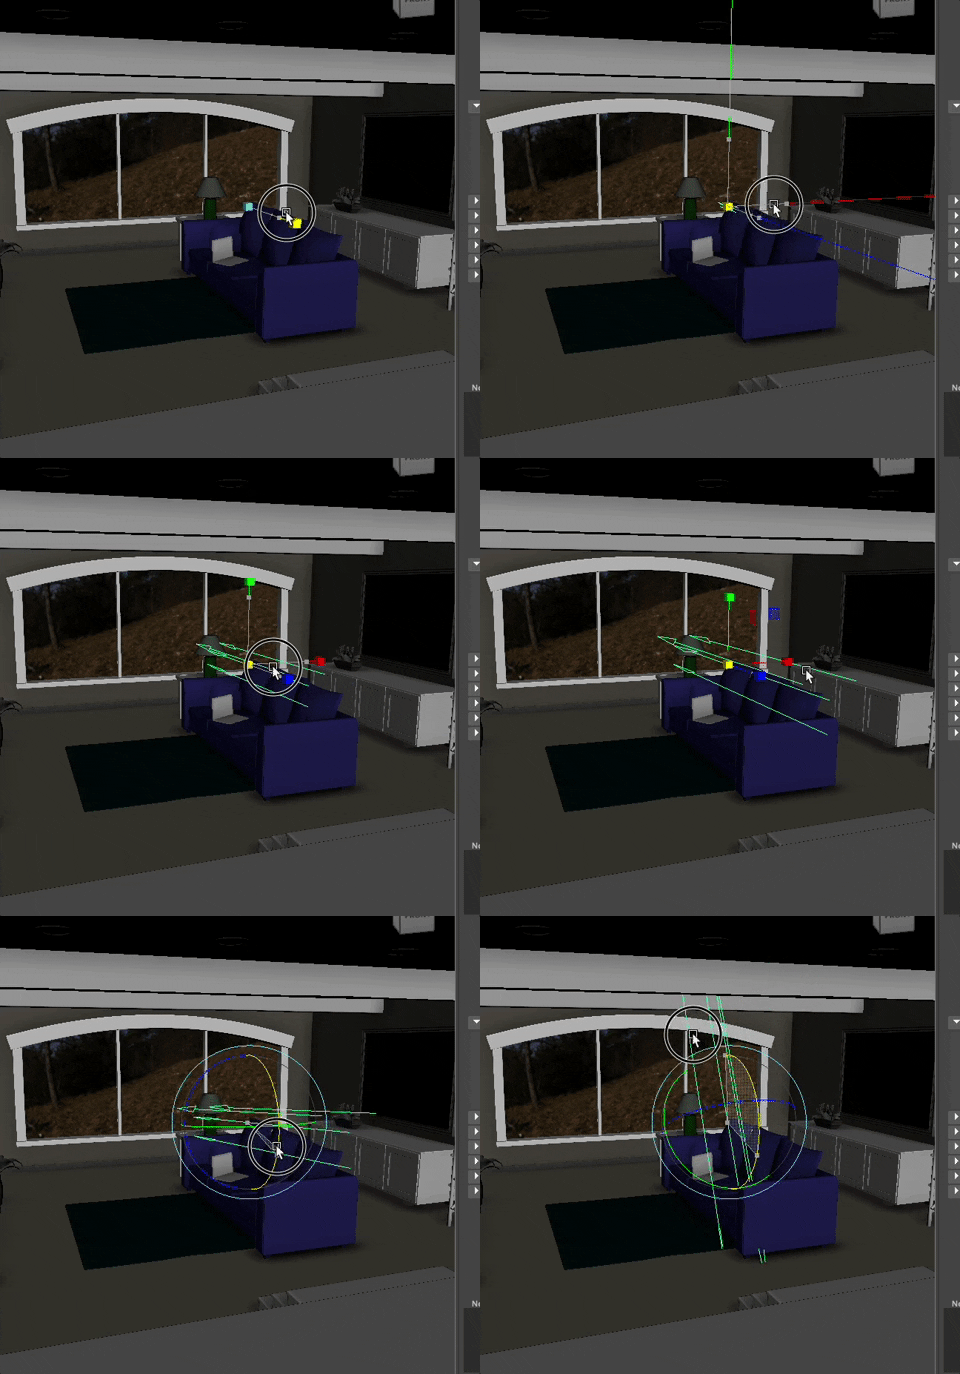
A Directional light is infinitely long and infinitely wide. As a result, it doesn't matter where you put it, it only matters the direction the arrows point.
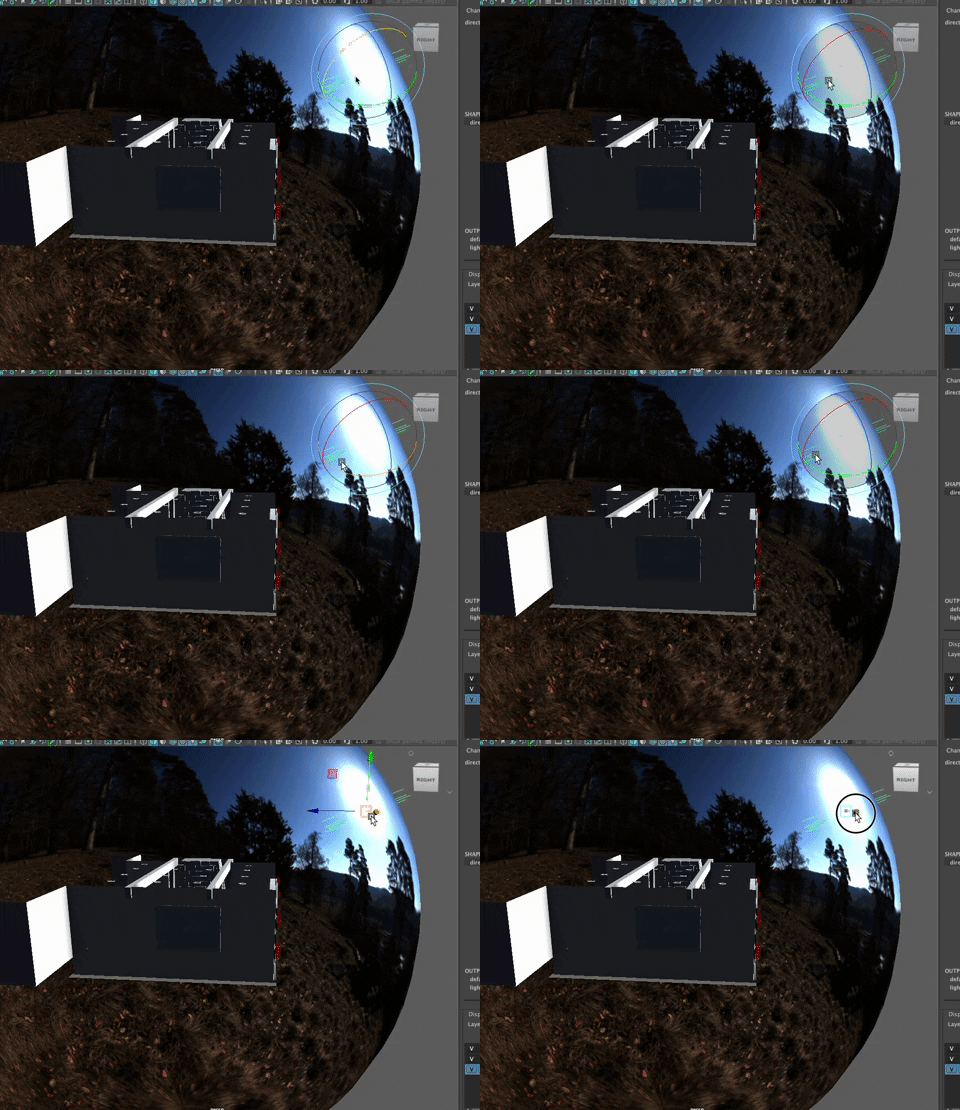
Move the Directional Light so that it mimics the sun in the EXR.
To see the light and shadow in the viewport, you can turn on lights and shadows, but clicking on the lightbulb and sphere with shadow in the viewport shelf
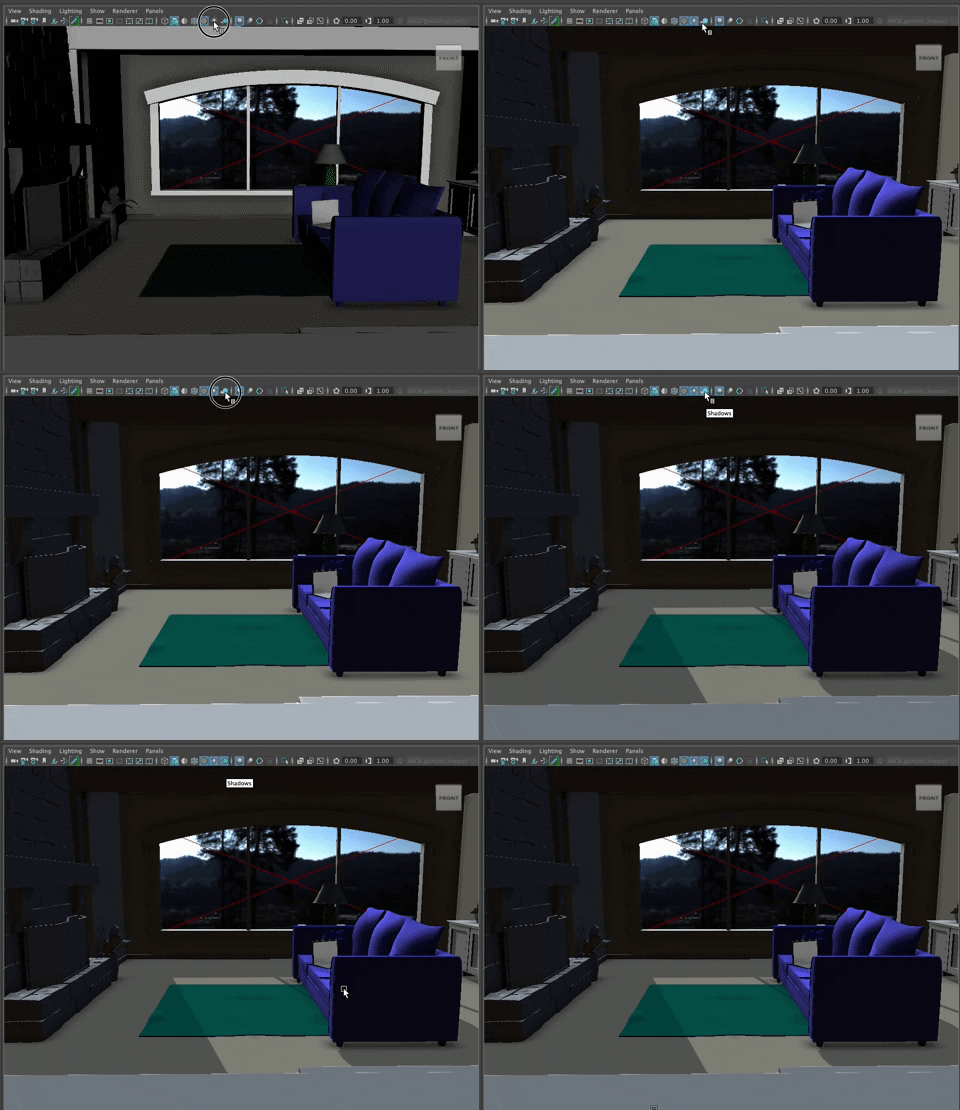
As you rotate the directional light, you will see the strong light and shadows. Play with the direction until the shadow of the EXR and the directional light match.
In the Attribute Editor for the light, In the Arnold Tab, turn on Color Temperature and change it to a light that mimics the sun- around 5500K for daylight, a lower number if it is dusk or dawn. You can find the numbers in a degrees kelvin table as explained here.
The directional light's shadow has a hard edge. To soften them, adjust the Angle Attribute under the Arnold Tab, changing it to a value around 3 in my scene works well.


Render the scene and adjust the directional light as needed, to be sure your key light sources (the image and the directional light) match as closely as possible.
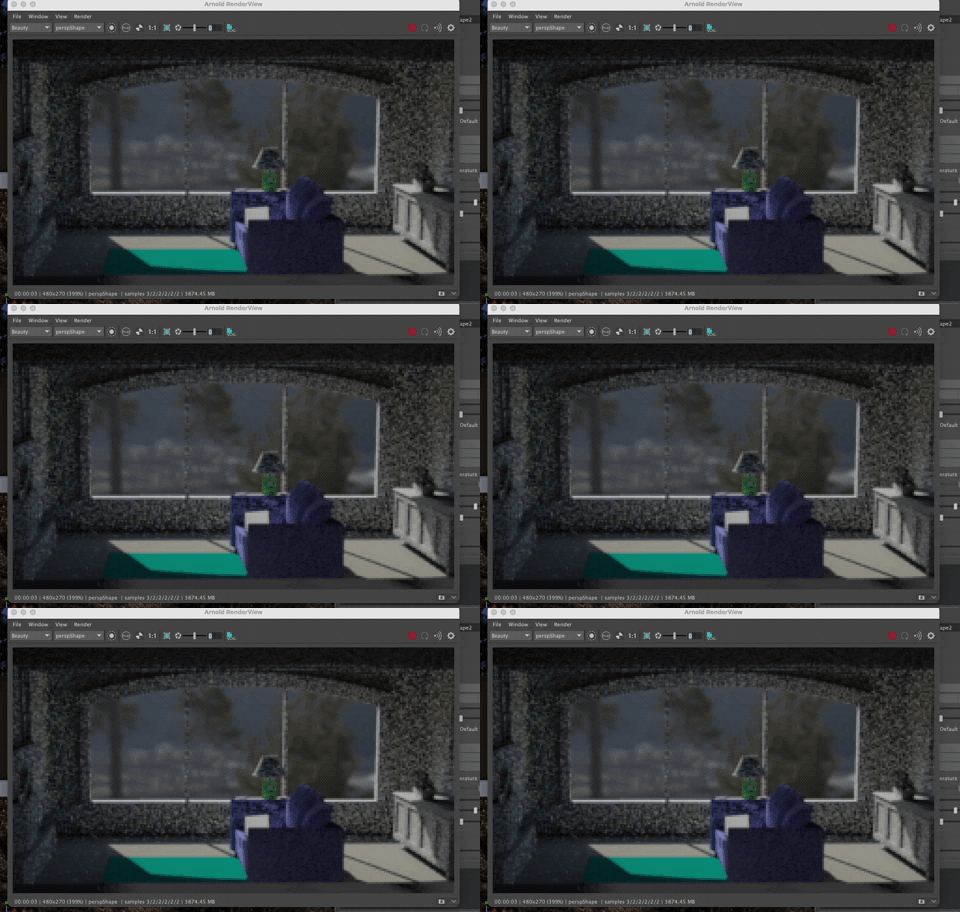
The render quality is poor..lots of rendering artifacts in the scene. That is ok. We will fix those later. For now, we want the scene to render quickly so we keep the render settings very low.
At anytime, if you want to focus on a smaller region of the scene, to see how it is updating (and speed up your interactive rendering) you can choose a Render Region
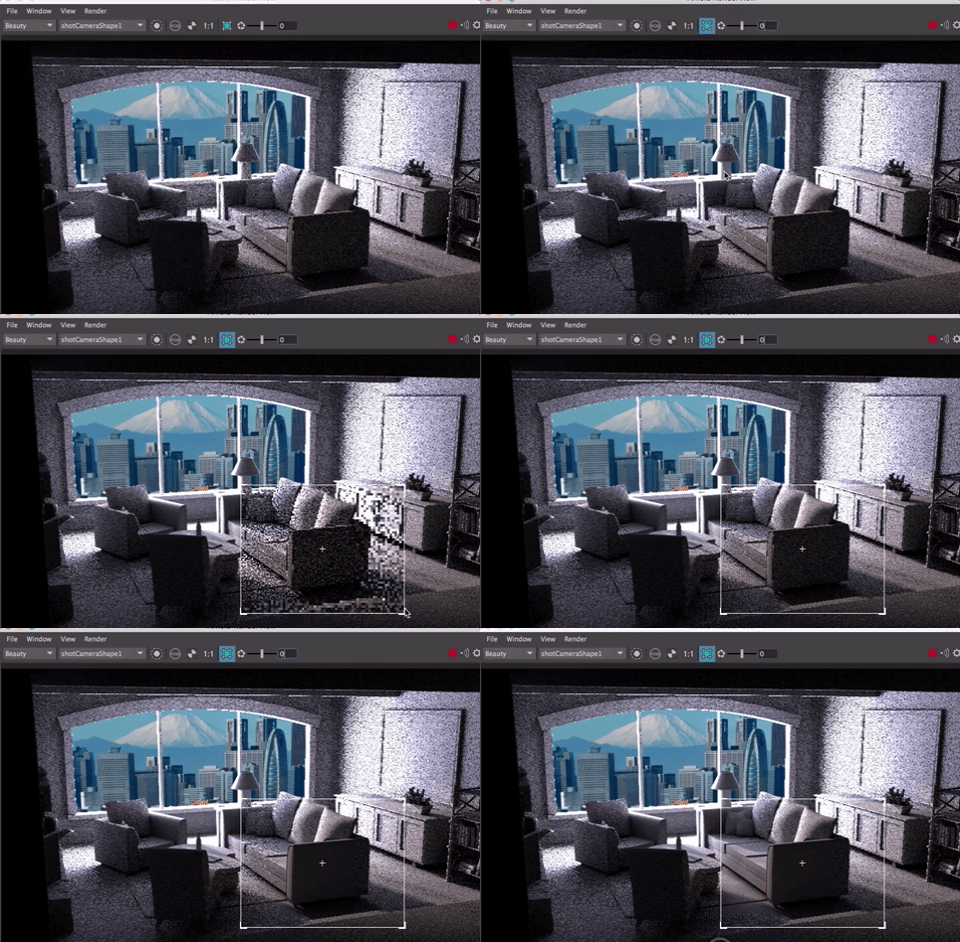
Rename the directional light to sunlight
You can stop there with the natural light and start adding lights inside your scene.
You could speed up rendering a bit by turning off a few settings in your Attribute Editor that aren't needed. For example, for the AreaLight(s) and the Sky Dome Light in your scene, you can turn off the Cast Volume Shadows option
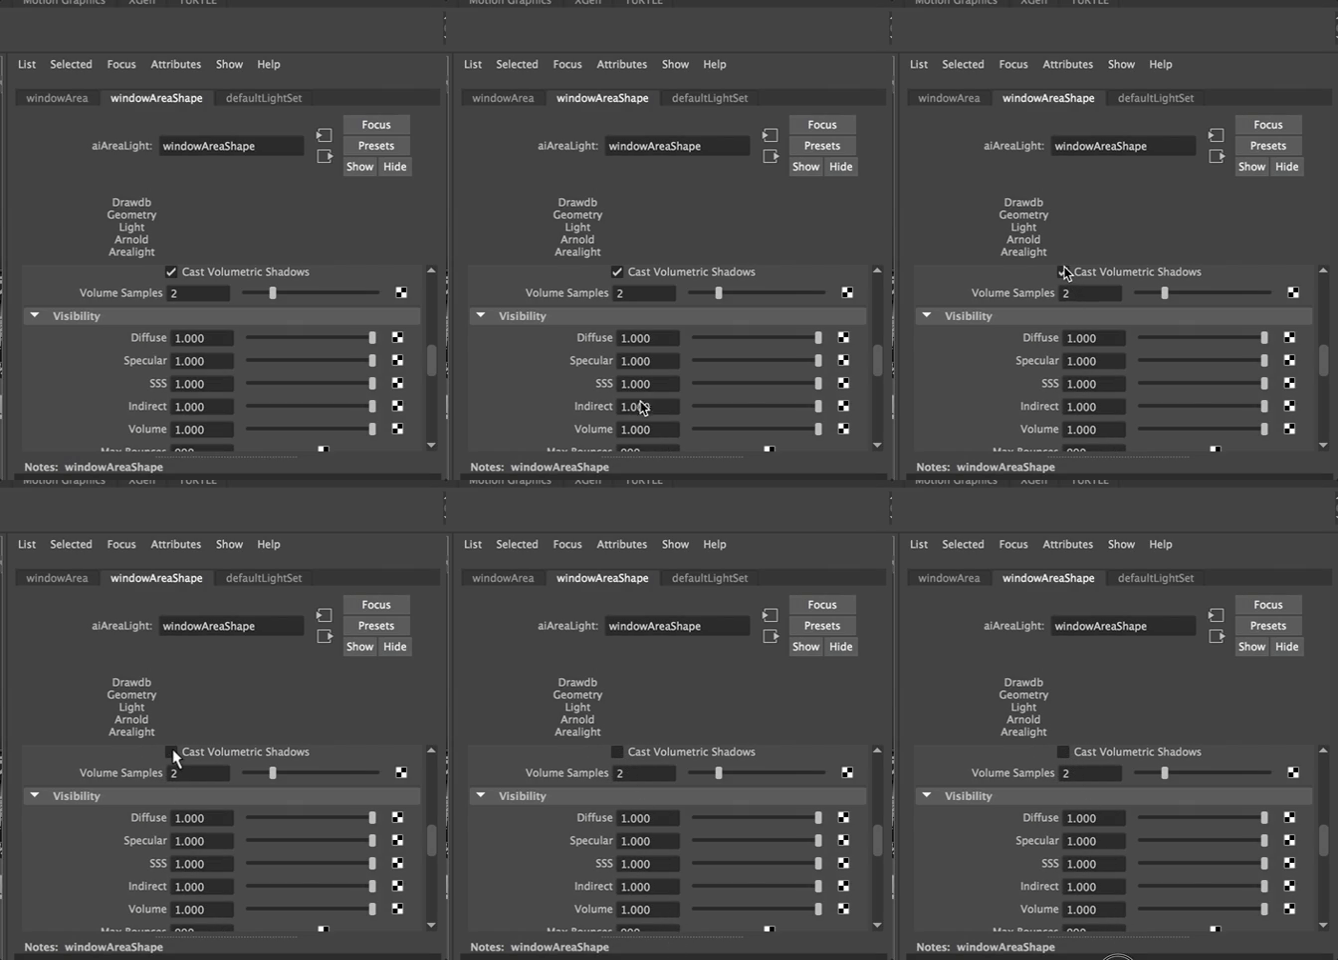
You aren't using them but Arnold is calculating this value. Anytime you can speed up your render time while you work, you speed up your overall working time. You can up the quality for the final render.
Adding fill and back lights
aiAreaLights are great for creating fill and back lights. Turn off all shadows from the lights (to avoid creating multiple shadows in the scene) and sparingly add fill lights to reduce contrast a bit.
Remember that some contrast is great as it helps create the sense of time and set the mood.
And Back light can be created either by placine aiAreaLights strategically behind objects you want to separate from the background. Put the light so it creates a small rim of light behind the object. It is great for making those objects you worked so hard on, seem 3D and stand out more.
You can also pull objects away from walls by putting light onto the background. This works well if the walls are white, for example. Use aiAreaLights but instead of aiming it at the object, you aim it at the wall behind the object.
Incidental Lights
You can make lights inside the room in a number of ways, and remember, in the real world, depending on how bright your daylight is, you either need the lights on, or you don't. Everything is relative to each other! I'll show you one way to do it. by creating a lightbulb inside the lamp by the table and turning that into an Arnold Mesh Light.
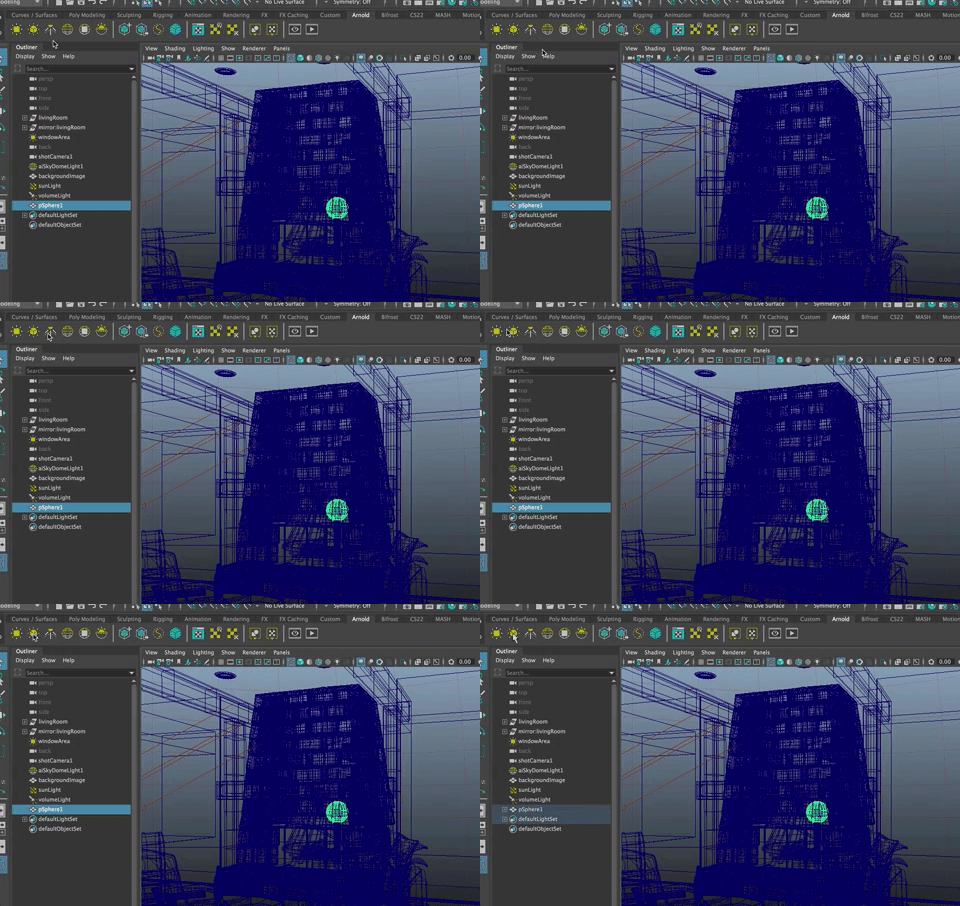
Since, in my lamp, the lightbulb doesn't show, I just created a sphere. If the bulb shows, you may need to shape it more. For the recessed lights I put in my scene, I can just use the fixtures themselves as the mesh lights. So it depends on what you have and how you want it to look.
For the lamp, I want a bright light inside with the shade creating a surface that limits the throw of the light itself and makes the light spill down onto the table.
Select your object and the choose the aiMeshLight
You don't see much affect from the mesh light yet.
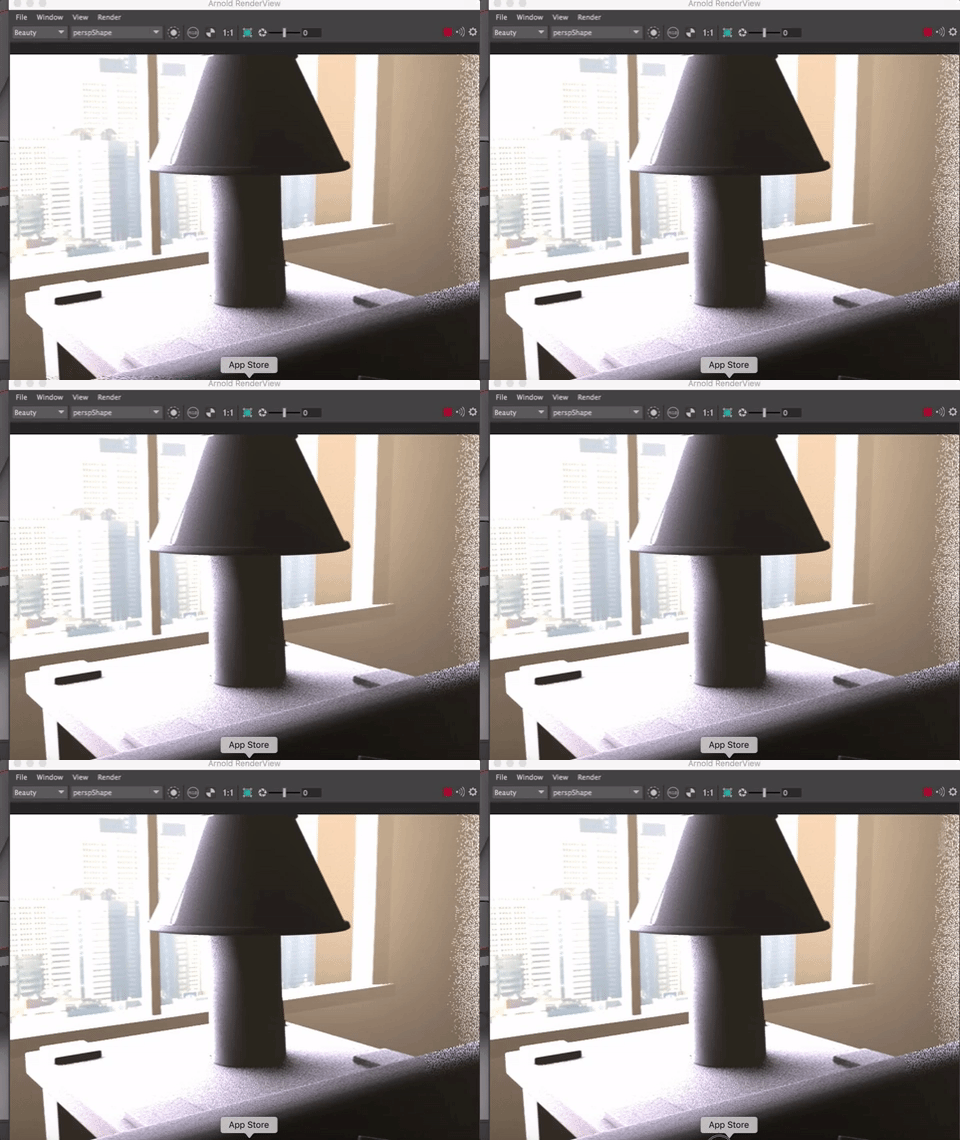
Increase the Exposure on the meshLight (renamed to LampLight) to a big number like 20, and then reduce that until it starts to look good.
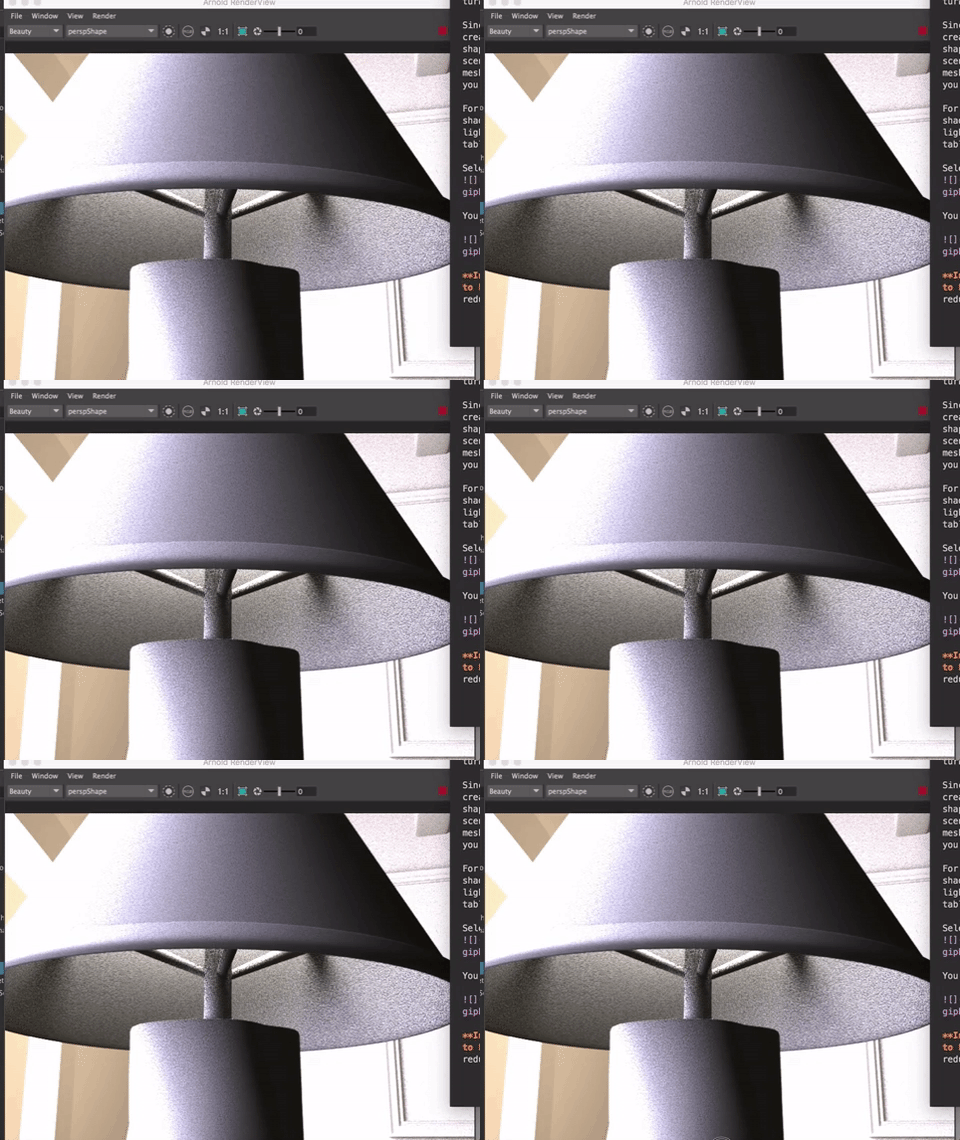
RENDER VIEW TRICK: TURN ON 3D MANIPULATION IN THE RENDERVIEW (WINDOW>3D MANIPULATION) AND THEN YOU CAN MOVE AROUND WITHIN THE RENDER WINDOW JUST LIKE YOU CAN IN ANY OTHER VIEWPANEL using the Option button and mouse!

To see the bulb itself, make it Visible in the MeshLight Attribute Editor:
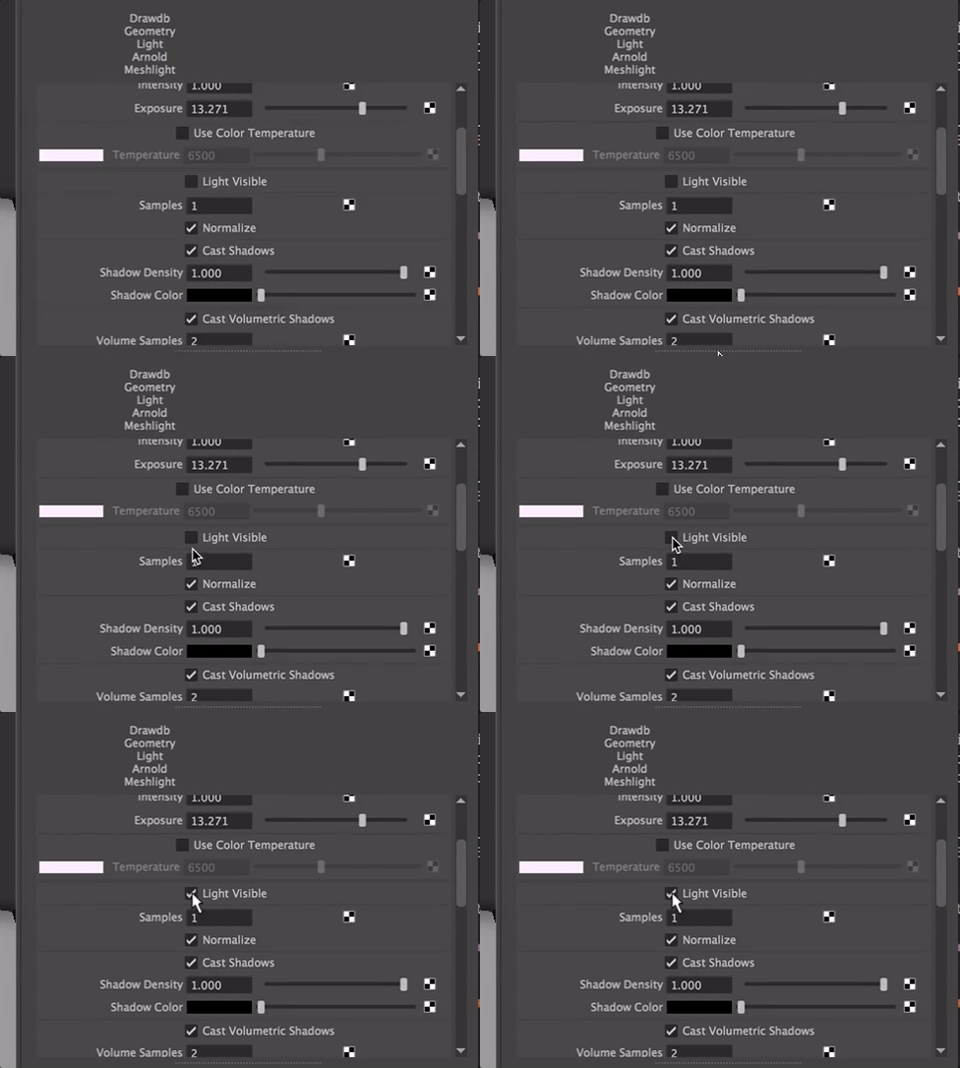
Using a Render Region makes sense here because the render times are slow.

As with any lighting, give the light a color. You can do that with the Color Attribute, assigning a slight orange tint or a green if it was fluorescent, or whatever color you want.
Up the number of light samples to increase the quality

You will quickly notice two things:
- The renders take longer
- The image is less grainy
Samples increase quality but slow things down. It is an optimization problem and worth playing around with as you start doing your final render. Remember, there is a huge difference between 3 samples and 4. Every increment increases both time and quality.
When you go back to your ShotCamera view, you will need to adjust the mesh light exposure to have it show. You may also notice the light from the bulb is being impacted by the volume effects you created depending on the exposure.
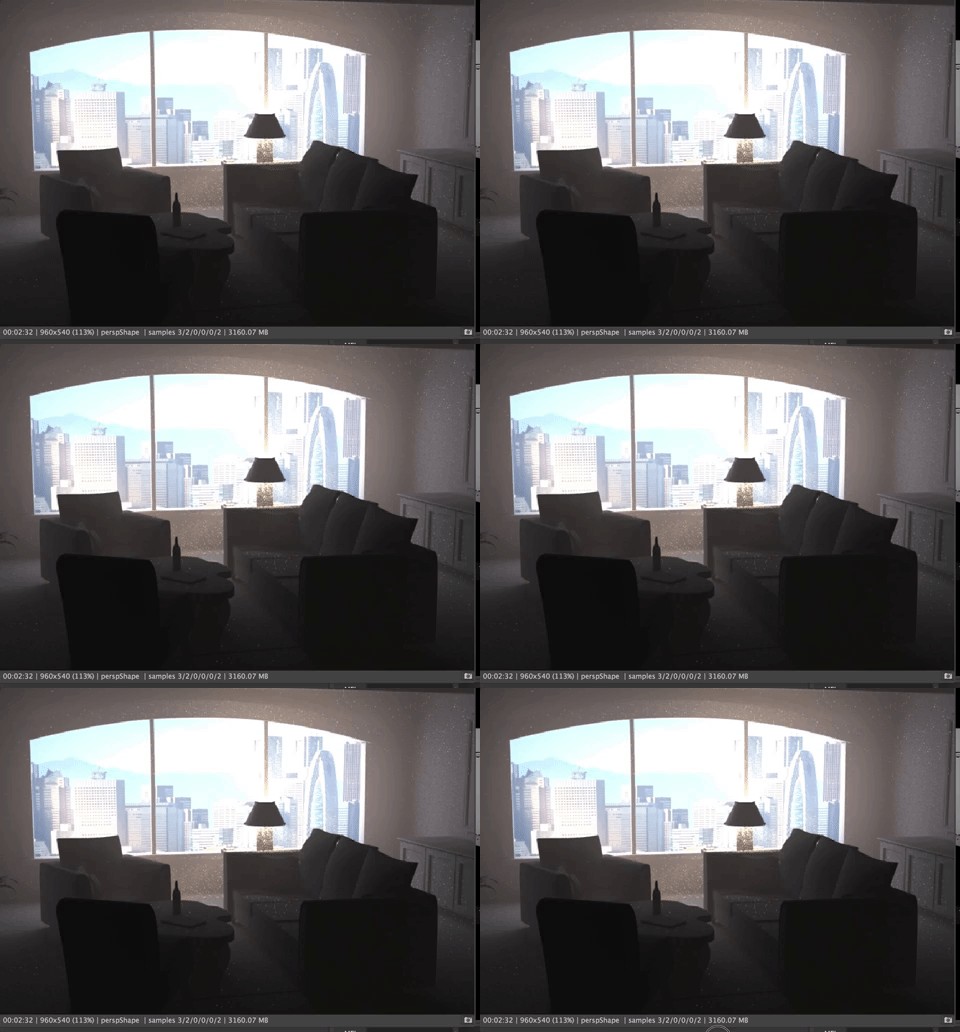
You can keep going with adding lights, using point, spot, or mesh lights as back ligths, or letting bounced light do the same thing. You won't want volume passes for most lights and can turn those off as you did for the Area Light.
Settings
When you are ready to render you final image, you need to turn up the samples. In the Light Manager, your samples for each light should be at least 3 or 4, 4 for lights with volume, most likely.
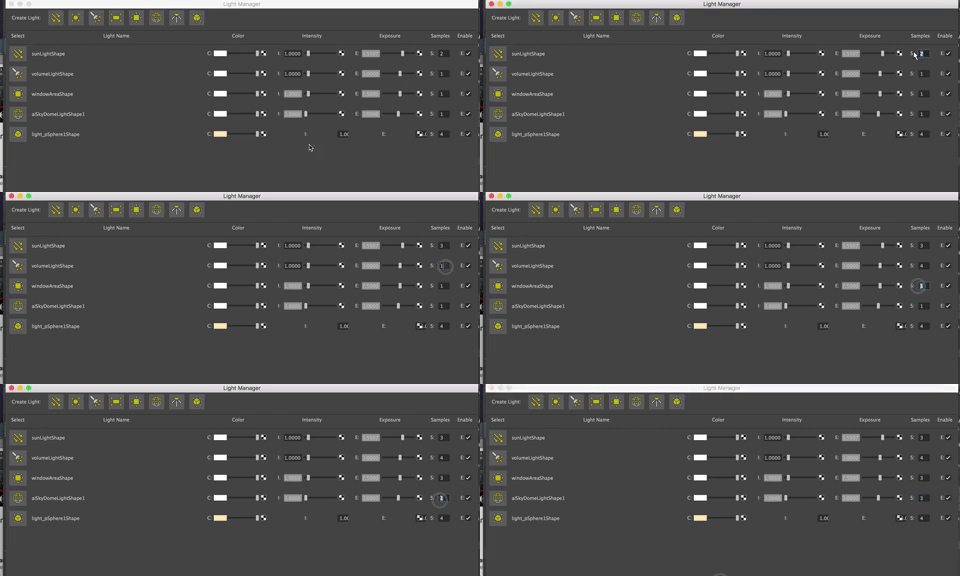
You probably want to turn up the Render Settings Sample Rate, too.
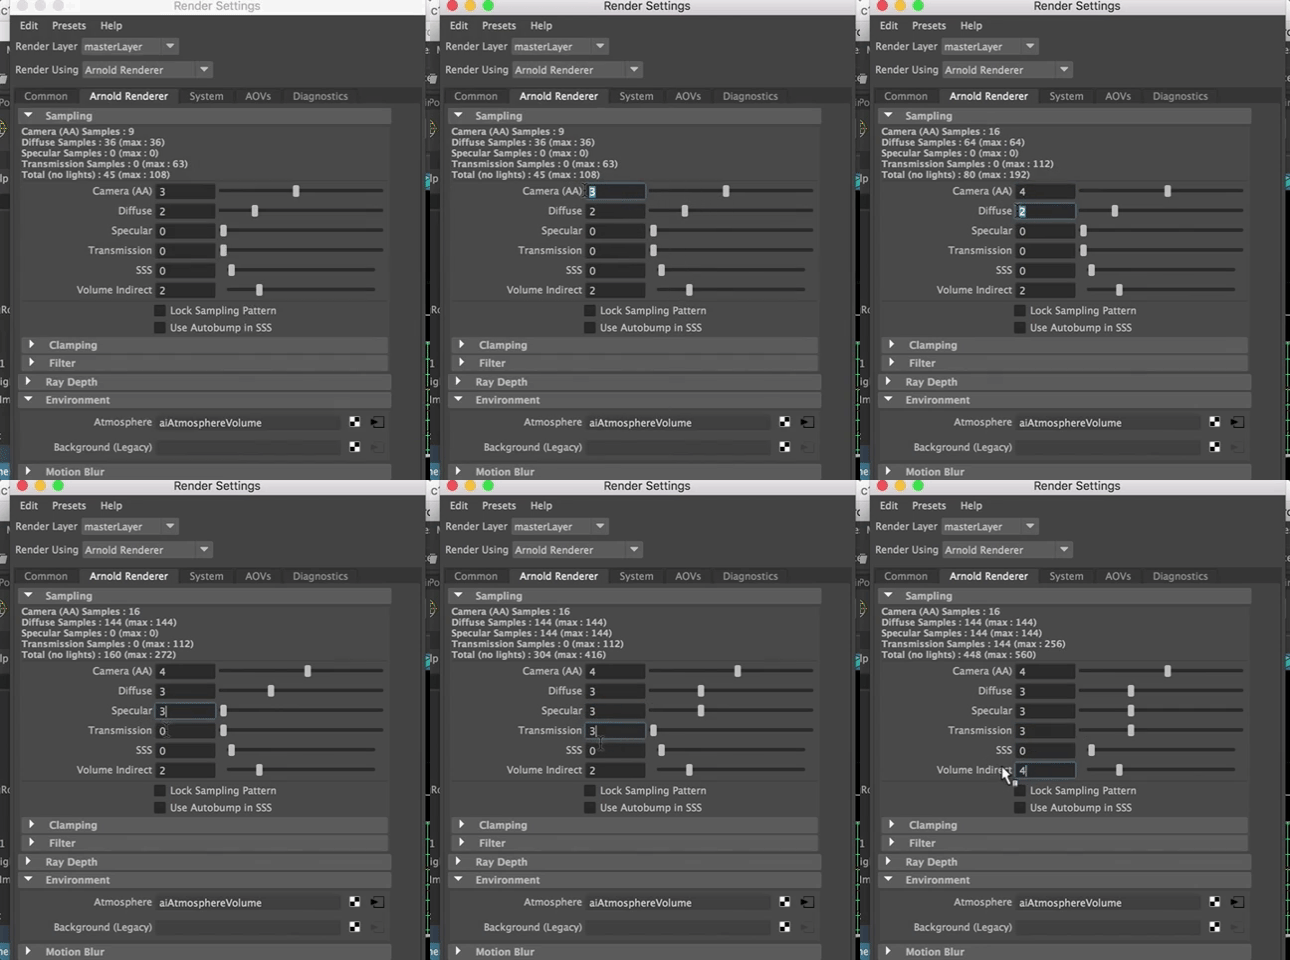
Of course many of these settings will depend on whether you have transmissive materials in your scene and whether you are using sub surface scattering. If you are, you may want to turn those settings up a bit. The higher the number the longer the render.
Turn off Interactive Render and Refresh the Render
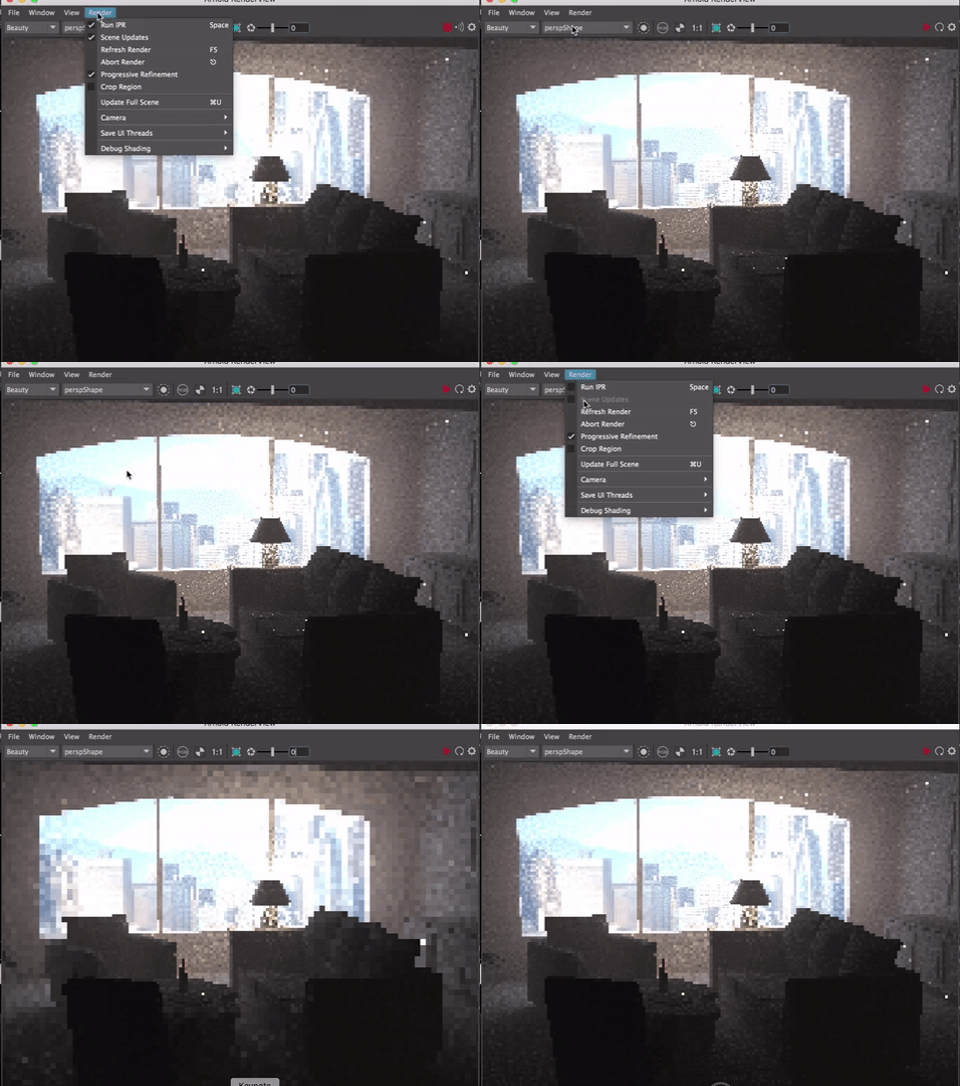
You will notice the renders take quite a bit more time.
You probably want to turn down your settting some as you start to set up your materials and textures. Keeping rendering quick will help you see changes and speed your production time. We can set things higer for the final render later.