Abstract Tutorial: nParticles
In this tutorial, we will begin to explore nParticles and how they can be used to make some very cool images. This tutorial is based on an exercise from Professor Mahoney.
Topics
- Emitters
- Solvers
- Fields
- MASH trails
nParticles is a powerful tool for create simulations such as water, that respond to physical stimulations such as wind, constraints, gravity. It works much like nCloth does but it uses an emitter. If you completed the nCloth practice, you will have used nParticles to create a play area filled with colored balls (like at a McDonald's play area).
Here we will create an abstract image like the one I made:

Exercise
Part A - Visualizing Particle Fields
- Create a new project called "yourname_Abstract" or something like that.
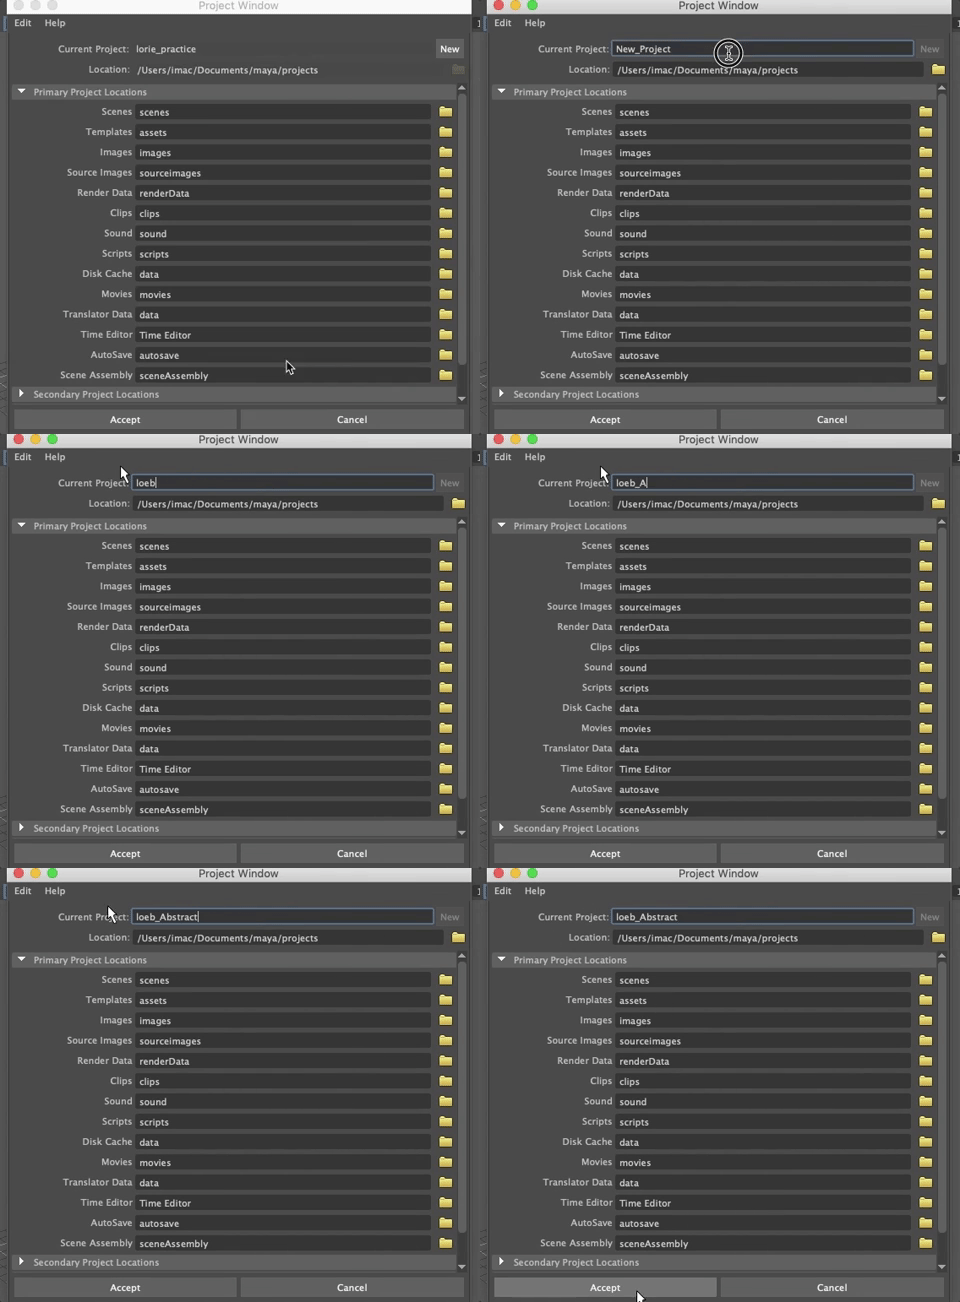
- Create a new scene
- Save the scene as nParticlePractice or something like that
- Create a physical sky
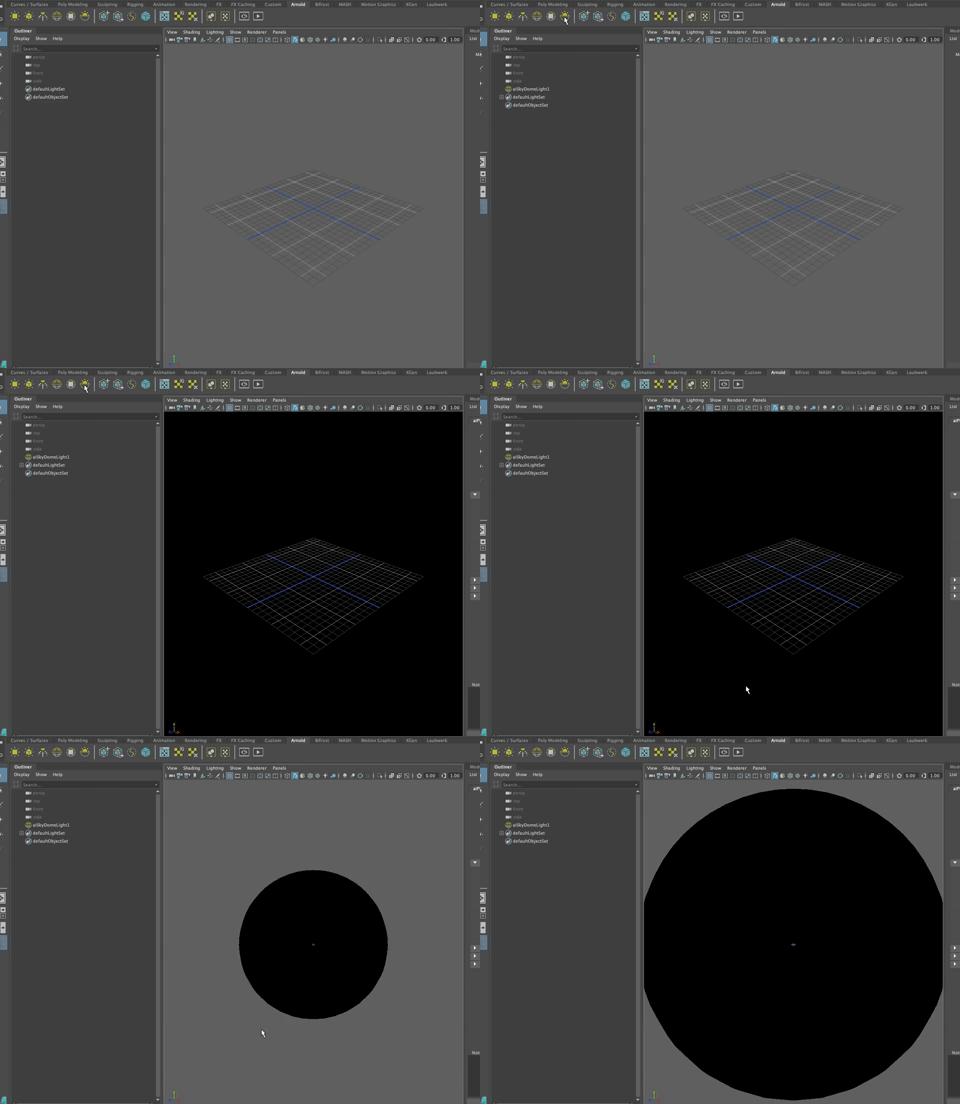
This will allow you to render. Physical Sun and Sky is a skydome with an aiPhysicalSky shader attached to it.
As you only want it for rendering, you can hide it in the viewport by going to the Viewport Menu and Show>Lights (uncheck it the same way you uncheck the grid).

Open the FX module and use the FX shelf
Create a particle emitter using nParticles>Create Emitter and open up the dialog box to reset the tool. Edit>Reset Settings and then hit Create
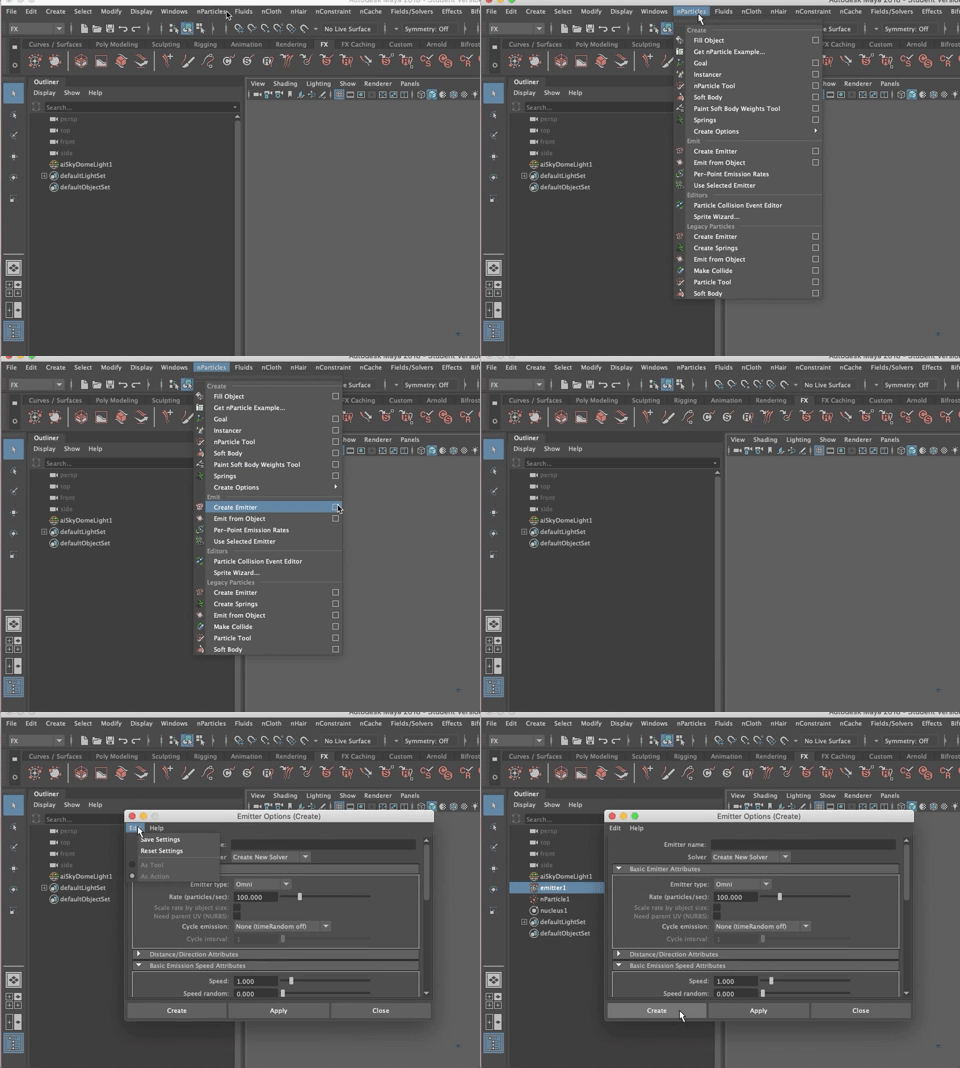
- You now have an emitter in your scene as well as a “Solver” called the nucleus
- There’s also an “nParticle” in your Outliner

The nucleus is the brains of the n suite (like nCloth, nHair, nConstraint) The nParticle representes the particles once they've been created.
Add frames to your timeline (maybe set it to 1000 frames)
As with all the simulations we’ve run in Maya, right click on the timeline and make sure Playback Speed is set to “Play All Frames”
Hit play and watch as your emitter creates new particles and they fall down responding to gravity

In the Attribute Editor for the nucleus,in the section titled “Gravity and Wind” there you can find the default gravity speed of 9.8m/s and the gravity direction -1 in the Y axis (x,y,z).
You can dissable gravity by setting the speed to zero or setting the vector to zero -
- Turn off gravity, rewind to frame 1, and hit play
Now when you run the simulation the particles shoot out, slow down and stop at some radius from the emitter - they run out of energy (might need to zoom in to see this)

- Open the Attribute Editor for the emitter
- The emitter type is Omni by default (meaning the particles scatter in all directions.
- Change the Rate (particles/sec)to 20,
- Rewind and run the sim again.
 Less particles per second, no surprise there!
- In the Attribute Editor, Scroll down and find the “Speed Attributes” and change that from 1.0 to around 5.0 to increase the speed that the particles are being emitted.

They shoot out faster and interestingly enough this makes the radius of the resulting particles larger - they have more energy so they can travel further
- Set the emitter Rate up to a large number (greater than say 600) and you’ll see that the sphere fills up but the particles never really die

We can change that.
- Click on the “nParticle” in the Outliner
- Notice that there’s a green box around all your particles -
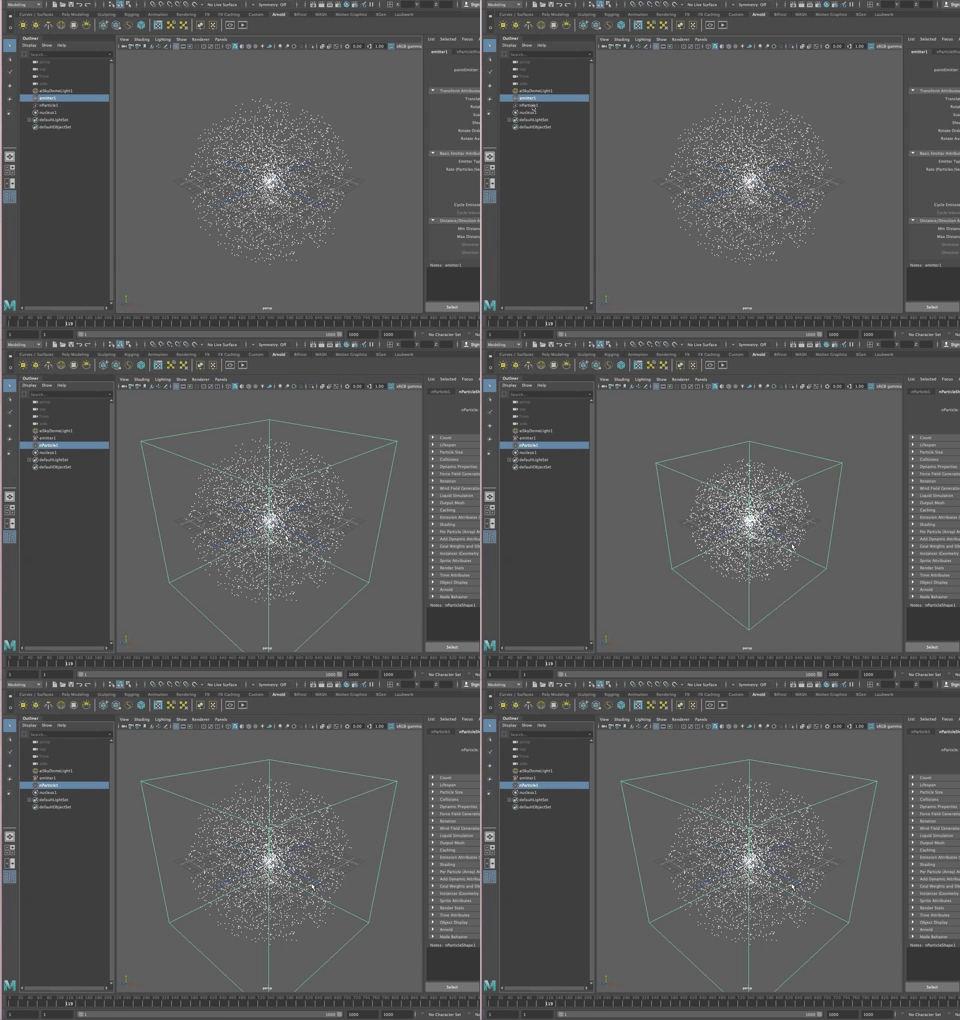 when you reset the playhead it goes away because there are no particles anymore, but it will show up if you click on nParticle again.
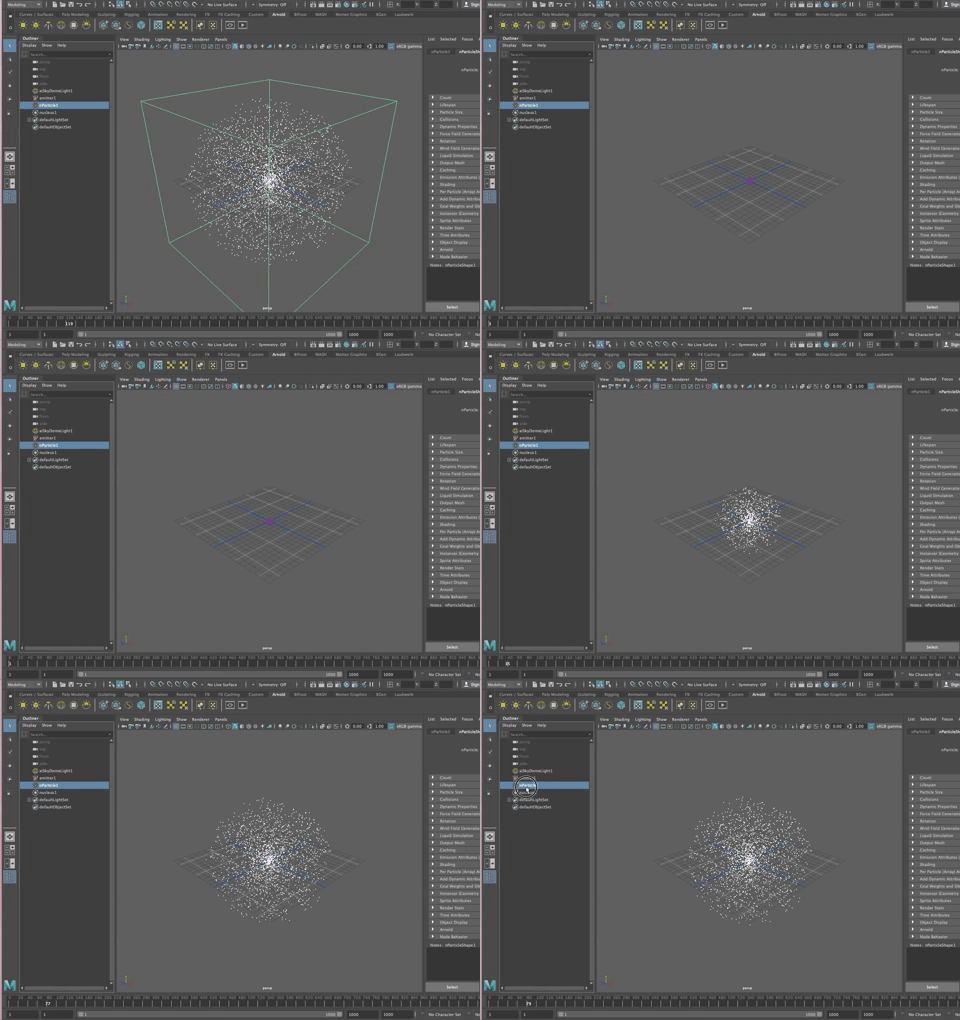
The green box is the bounding box for the simulation.
- In the nParticleShape node, in the Attribute Editor, you will find a section called Count and one Called Lifespan. The Count rollout tells you how many particles are alive in the simulation. “Lifespan” sets how long each partilce "lives". The default is “Live Forever”
This is why the particles never disappear (die out). You can change this setting but we will leave it at Live Forever for now
Let’s add some turbulence!
- Select nucleus in the Outliner
- In the Main Maya Menu (in FX module) go to Fields/Solvers>Turbulence>Options Box
- Reset the Settings
- Hit Create

- You will now see turbulenceField in the Outliner
In the Attribute Edior for the turbulenceField node, go to Turbulence Field Attributes and set Magnitue for a higher number, between 40 and 80, for example
Go back to the emitter and set the speed to about 1 and add random of about .7 to create some randomness in the way the particles are emitted.
Run the sim and then stop it once it’s interesting

- Increase Rate in the emitter node (basic emitter attributes)if the forms are not apparent.
- Rotate around to see a point cloud illustrating the turbulent field
Adding MASH
You could continue to play around with this by changing the size of the particles (in the nParticleShape node) or adding a collider (in collisions tab of the nParticleShape node) but let's have some fun by adding MASH into the mix.
Select nParticle1 in the Outliner In the Main Menu go to MASH>Utilities>Add Tails to Particles.

- You now should see a MASH_Trails1_Mesh node in the Outliner
- In the Attribute Editor, Set the Set Max Trails from 100 to 500
- Change the Trail Length to make it longer (something like 150 or 200)

- In the emitter1 node (in the Attribute Editor) change the emitter rate to around 250 particles per second.

- Rewind and hit Play to see what it does.
NOTE: You need to add some script to make this work!
Sometimes when you create mash trails it doesn't create a node for you so you don't see any trail, that is a pre-existing bug, here is the script to fix the bug (Thanks to Naman who wrote the script), all one has to do to use it is have the nParticle object selected in the outliner, and then drag the Script into Maya
Go to the Google Drive.
https://docs.google.com/document/d/1N4O5M4GaQnminyyo2E9etNW6ZYATei1g6toM1RTaCT8/edit?usp=sharing
Copy the code and paste it into the MEL script editor. (The code looks like the image below, but you can’t copy it, so go to the google drive to get the code, copy and past it)
When you have something you like, stop the simulation

To select the geometry, select the MASH_Trails_Mesh node in the Outliner

Add a material/shader (aiStandardSurface).
Add color, perhaps add a ramp shader to the color in the base, turn down or up the specular weight, and/or add emission to the material. Have some fun. Look at it rendered.
Try rotating round to see the sky or ground differently. Turn back on the lights in the viewport and rotate the sky if you'd like.
You can adjust the sky so that it is noon or sunset by increasing and decreasing the elevation as shown
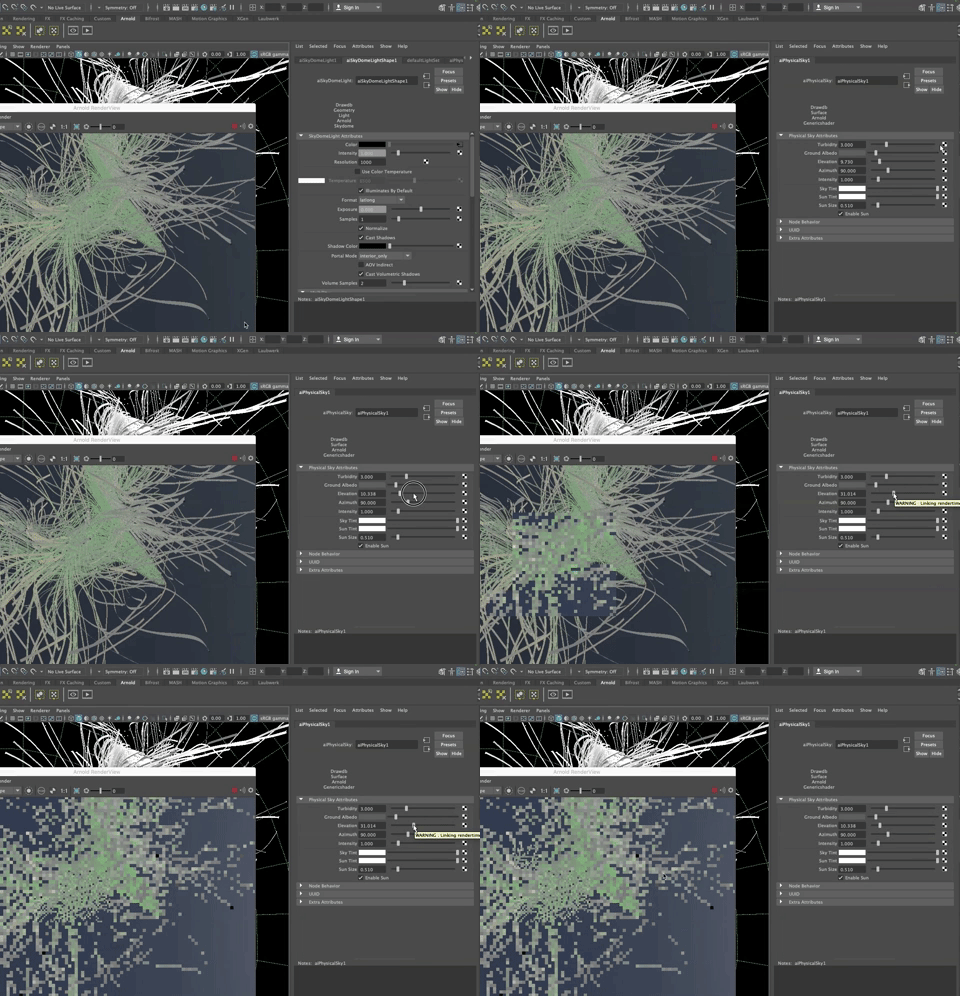
Have some fun with this.
Keep Going
Add a collider same as we did with nCloth (nCloth>Create Passive Collider)
Select the nucleus and add different forces such as a “Vortex” (bump up the magnitude to see the effect) Realize that you can move these forces around and adjust their falloff!
Try creating a NURBS or Polygon Mesh and then nParticles>Emit from Object to create a surface emitter
If the code snippet doesn't work for you, here are a few fixes others have found: notes from Professor Mahoney
Go into the node editor, open up connections for the MASH_Trails
Create a Mesh node
Connect MASH_Trails->Output Mesh to Shapenode->In Mesh
A polySurface will show up in the outliner for the Trails.
There's a problem with the trails remembering all previous iterations of the trails being run, and thus creating weird shapes.
Annie found a fix for this, again in the node Editor Connect Time (an input node to Nucleus and Emitter, etc) to Mash trails like this - Time->Out Time to MASH_Trails -> Time

