Tutorial: Creating the Eyes
Loeb
We need to build eyes that will blink and move as we’d like them to.
There are, as you can imagine, lots of ways to make eyes. Here is one good way to make an eyeball using a NURBS Sphere and also has some simple, cartoony eyelids that are easy to make and animate.
- Put your character geometry in a layer that is invisible and referenced.
- Begin by creating a NURBS sphere.
- Scale it so it is the size you want for your character
- Hit 3 to see the smoothed version.
- Rotate the sphere 90% in X so the pole faces the front.
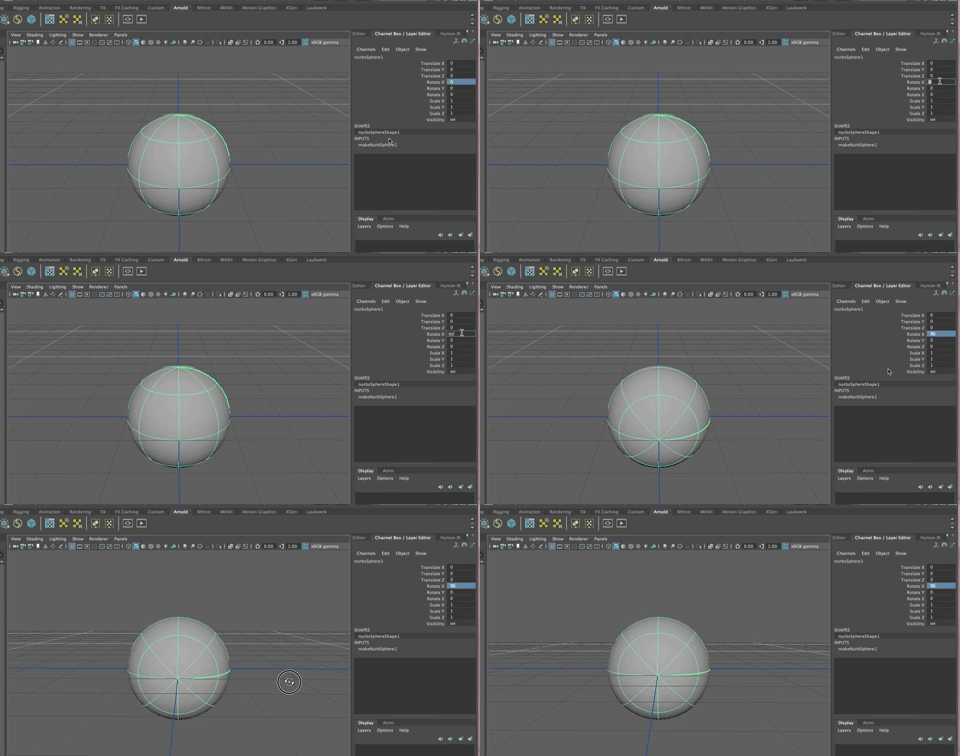
- Rename NURBSsphere to eyeBall
- Right click and choose Isoparm to add an isoparm around the front edge (Isoparms are like egdes for NURBS)
- Click on the Isopartm around the front of the eyball and drag it towards the center of the sphere pole to form the shape that will be the iris/pupil

- In the Surfaces Menu, Insert Isoparm

- Repeat to add two more Isoparms around the iris

- Then in Right click on the eye geometry and choose Hulls.
Select the front, inner two hulls

and, with the move tool, push the hulls back into the eye.

- Go in to Control Vertex Component Mode
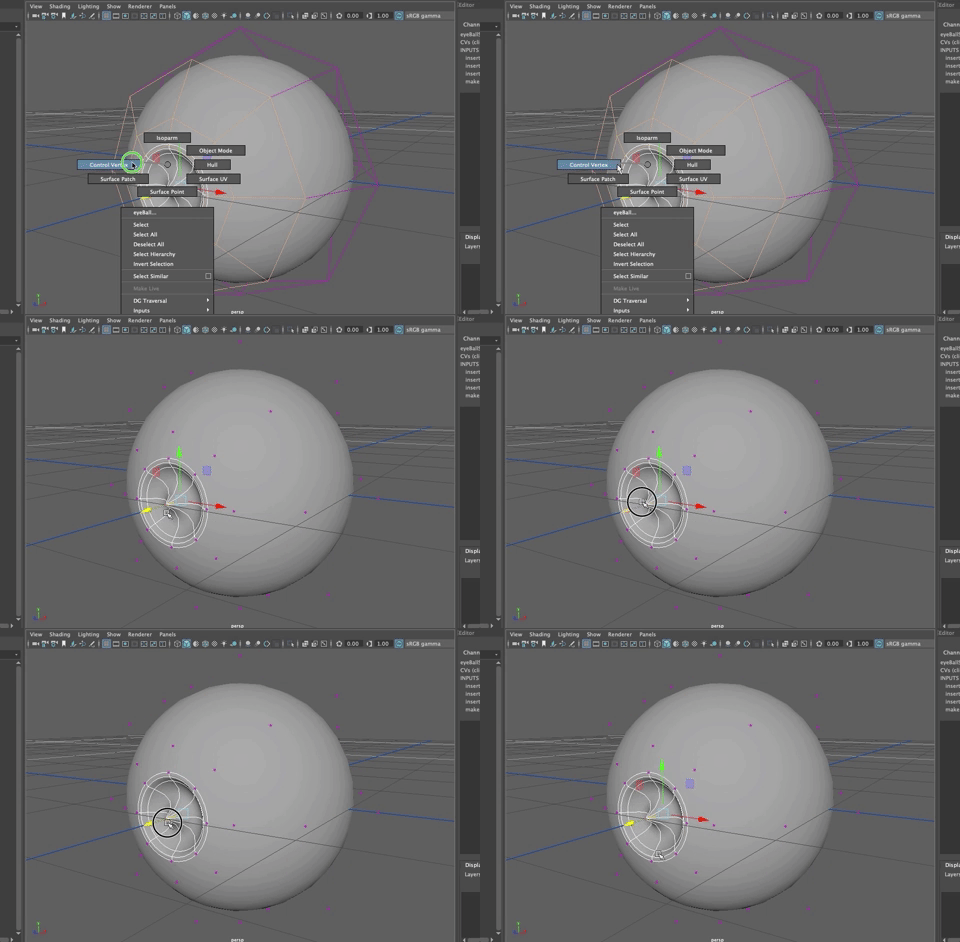
- Then select the vertex on the pole, being careful to only select that one vertex, and push it back as shown
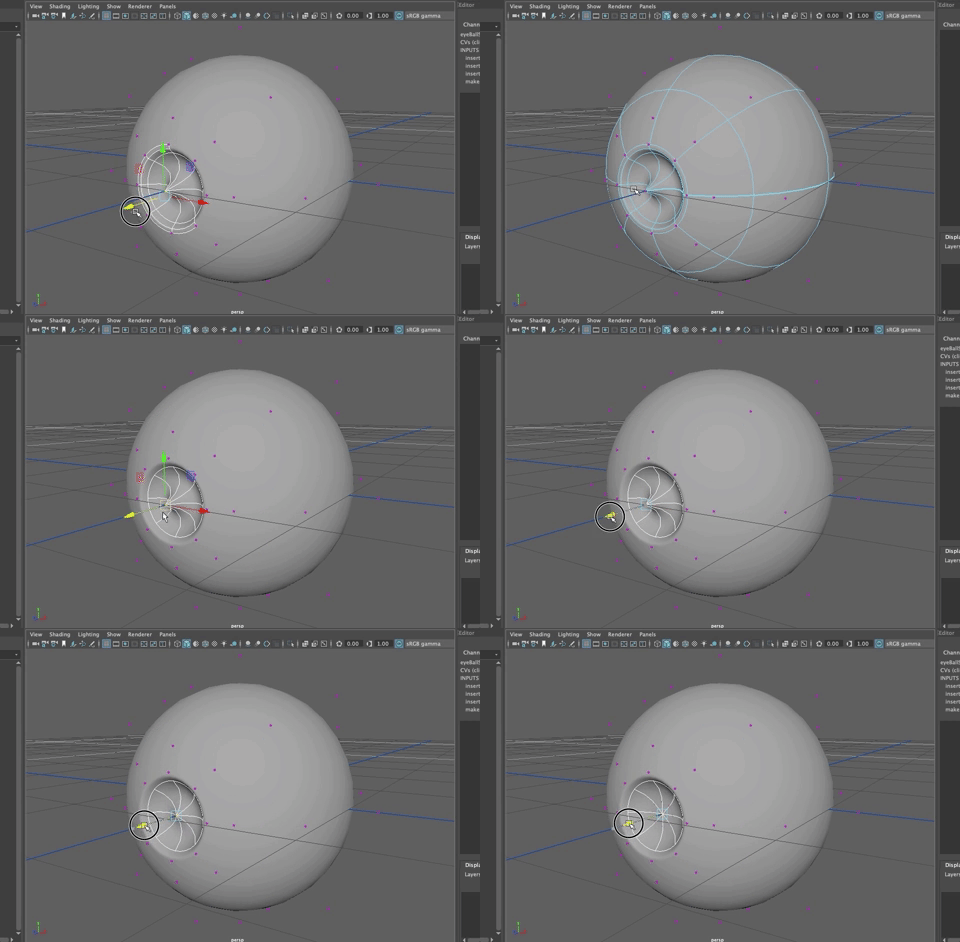
- Next, right click and choose Isoparm.
- Click and drag the inner isoparm into the center area,
- Surfaces>Detach
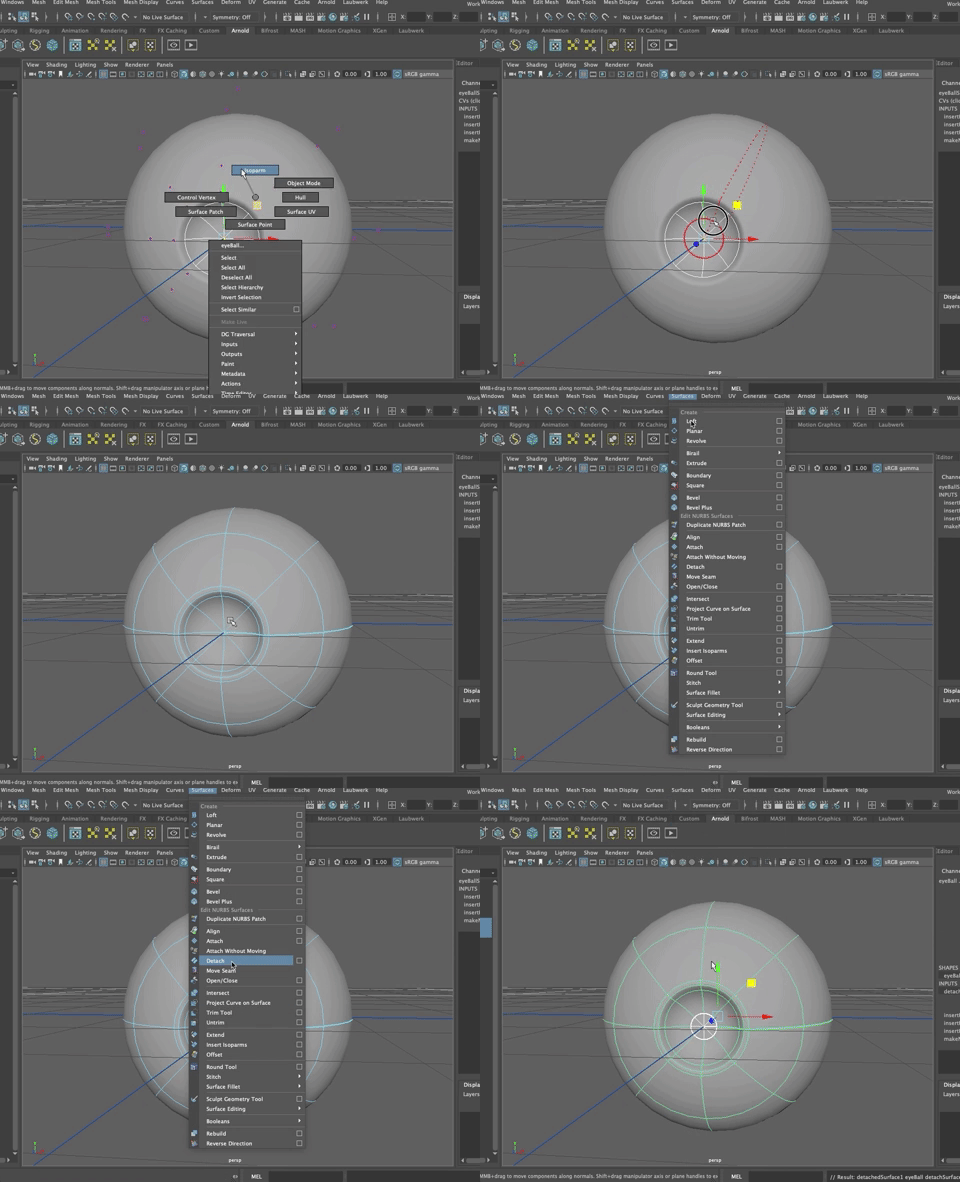
- With the center area selected as shown above, go to Modify>Center Pivot (Option + c)

- With the move tool, push the Pupil back into the eye and then Scale it up a bit as shown so that it is bigger than the opening so the back of the eyeball doesn't show if the eye is tilted.

Parent the pupil to the eyeball
Rename the pupil Parent it to the eyeBall (MMB drag it onto the eyeBall in the Outliner or select the pupil, shift select the eyeball, hit "p"

For the Eye Lids:
- Create another NURBS sphere for the eyelid. NURBS are nicely rounded and great for eyes.
- Hit 3
- Scale the NURBS sphere up a tiny bit so it just covers the eye as an eyelid would.

- Rotate the sphere 90% in Z and -90% in Y. This puts the seam right at the front of the eye where the eyelids would meet.
Freeze Transformations (Options + f)
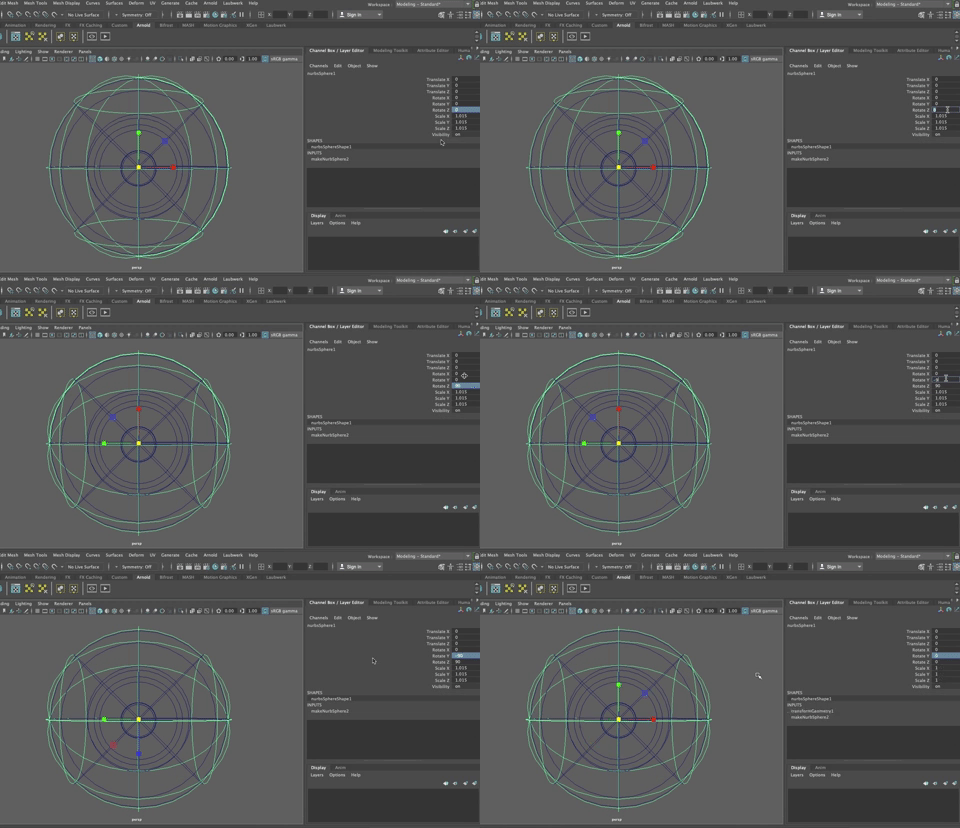
Rename to eyeLids
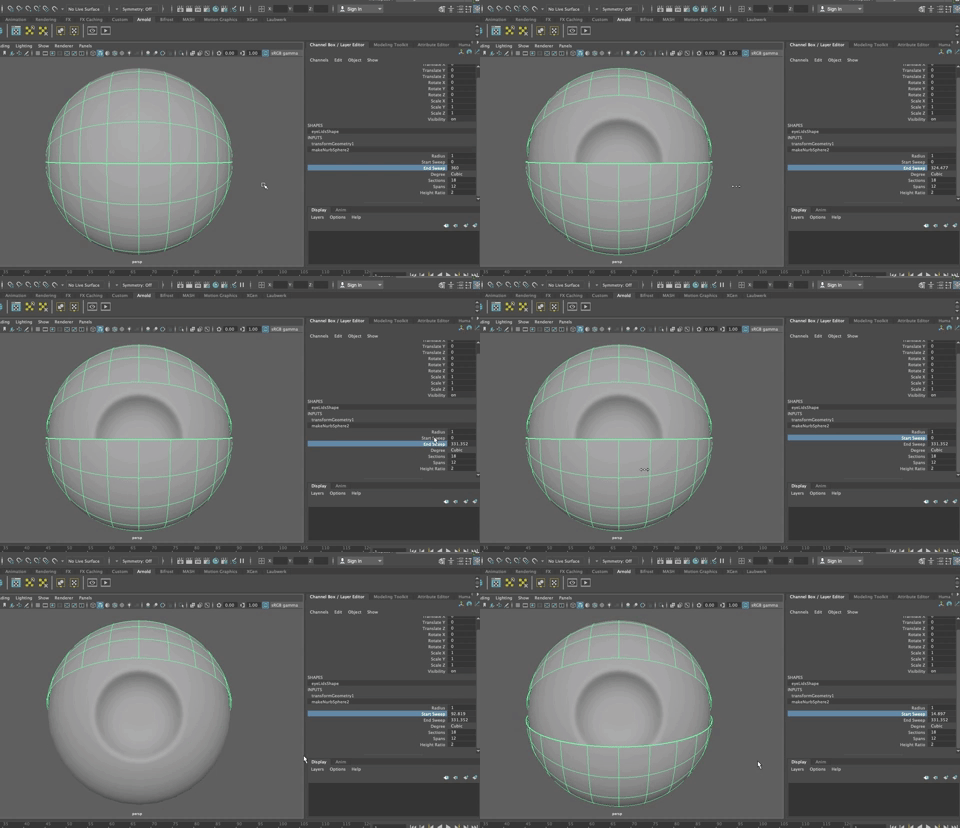
- In the INPUT node, increase the number of Sections tov18 and Spans to 12.

The Start Sweep and End Sweep in the INPUTS node can be used to open and close the eyelid.
- Group the eyeball and eyelids together (Command + g)
- Center the Pivot on the Group (Option + c)
- Rename it to eyeGroup_L
The overall eye shape is probably not quite right. It can be deformed with a lattice.
- Select the eyeGroup
- Deform and in the Create section, choose Lattice
- In the Options box for the lattuce, set the divisions for 4, 4 and 4.

The Lattice isn’t big enough,
- so in the outliner,
- choose both parts of the Lattice (the ffd1Lattice and the ffd1Base)
- And scale the lattice up in size.

- Select some lattice points (right click on the lattice)
- and move some points around to deform the general shape of the eyeball and lids as needed.


If you select the eye and move the sweep angle of the lids, the lids still move nicely with the new shape.

- We’ll leave the lattice in place but make it invisible by going to View in the View panel menu set and uncheck deformers.
Once you get the geometry shaped as you want and lined up in the head, You will want to duplicate the geometry for the right lid, eyeball and group.