Ambient Occlusion
Ambient Occlusion is an important rendering detail that helps create a realistic lighting effect by calculating how the light will spill onto surfaces that are deep vs shallow. Ambient occlusion is a shading/rendering technique that calculates how each point in the scene is exposed to ambient lighting. In other words, if you imagine a how light falls off from a source, the ambient occlusion is an indirect lighting method that tries to predict how the light spills onto the creases and interior surfaces of the object. It helps to darken folds that are tucked deeply away from light and brighten areas
Important:
Any object with a Substance Material (from Substance Source or Substance Painter) already has an ambient occlusion layer.
You will only make an Ambient Layer for any other geometry (with a material other than Substance, such as a straight AiStandard Surface Shader, a lambert, a blinn, etc.
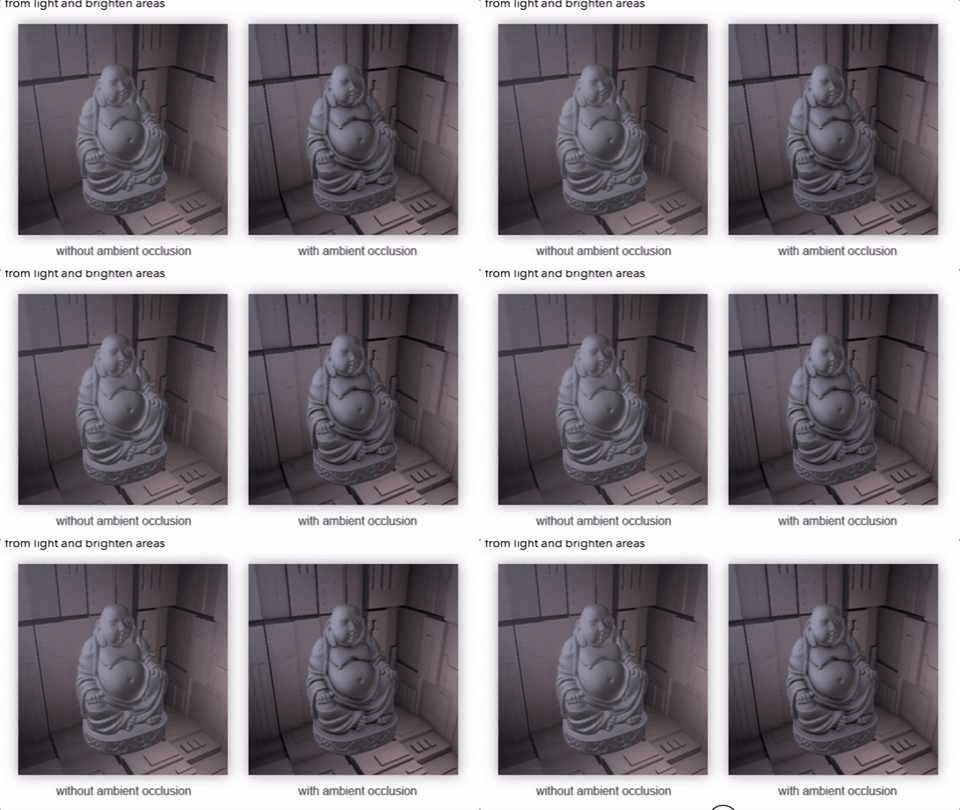
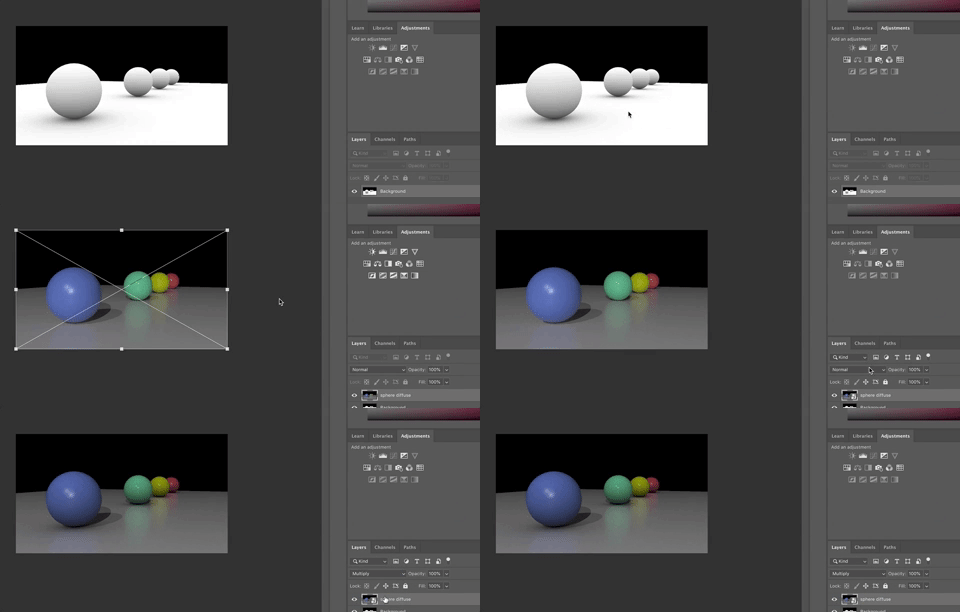
You will create an Ambient Occlusion layer and shader by creating a Render Layer in the brand new Render Set Up window in Maya and doing a Shader Override to put the aiAmbientOcclusion material onto the objects in your room. Then you will render out that layer, and use Multiply in Photoshop to combine the AO layer and the diffuse layer you already rendered.
Here is a step by step process:
Open the Render Set Up Window by clicking the icon to the right of the Hypershade icon

Or use the Main Menu (Windows>Rendering Editors >Render Set Up)
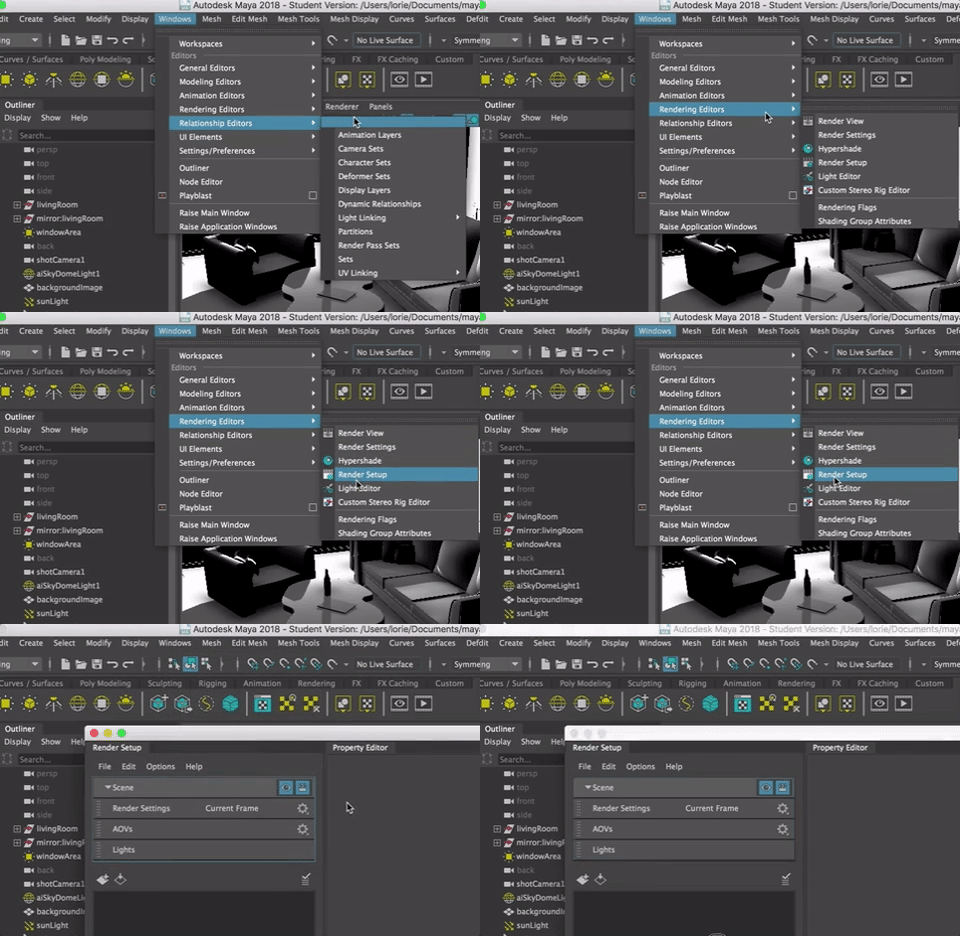
This is a cool new tool for setting up your rendering.
Create a New Render Layer

Rename it AO or Occlusion or Ambient_Occlusion

Right Click on the Layer and Create a New Collection

In the Outliner, select the geometry you want to apply Ambient Occlusion to This is all the objects in your scene that are part of the interior architecture, the furniture, rugs, lights--as long as they DO NOT have Substance Materials on them, since those automatically make an Ambient Occlusion map.
MMB drag them into the collection you just made.

Right click on the Collection and Create a new Shader Override
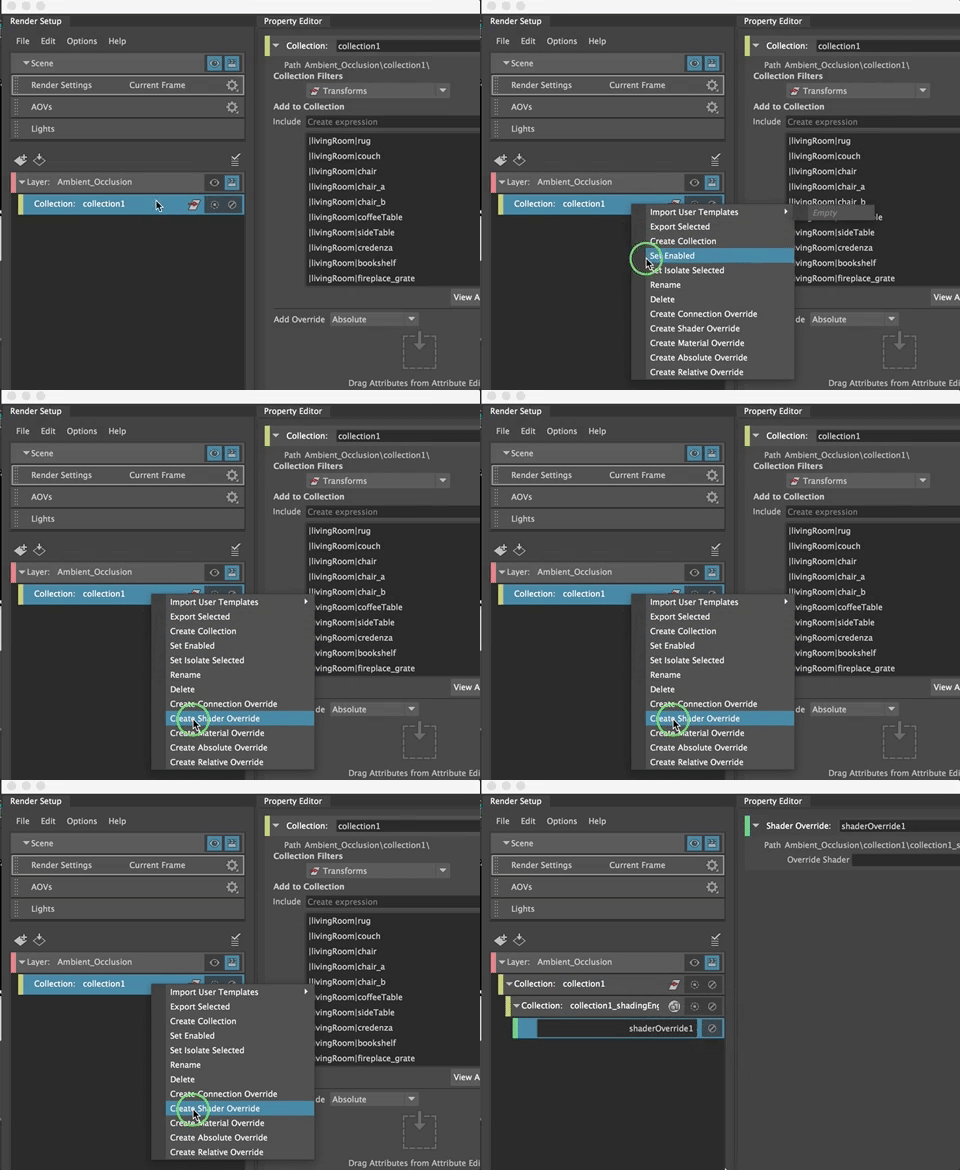
Click on the checkerboard to the right of the Shader Override in the Render Set Up window and then Create an Arnold Shader that is aiAmbientOcclusion

Now you can adjust the Ambient Occlusion attributes. Generally, the default is fine, but you can actually use this to alter the image quite a bit.
(Details on attribute settings for Ambient Occlusion can be found here: https://support.solidangle.com/display/NodeRef/ambient_occlusion)
You could render out the entire scene with the ambient occlusion layer by clicking on the Scene and making sure it is visible, or, better still, you can render out the ambient occlusion layer separately by activating it.
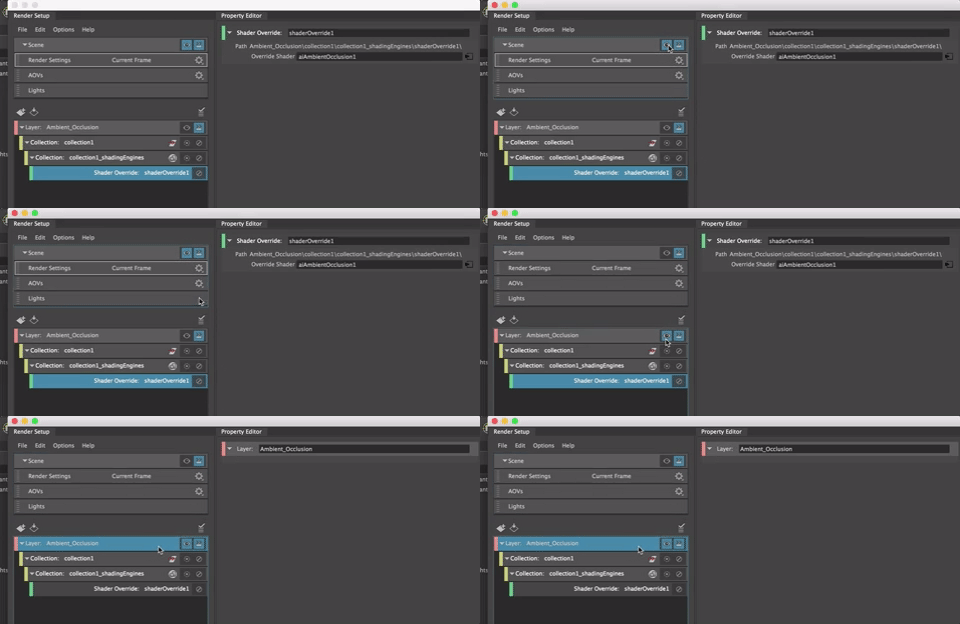
If you looked at your Render Settings, you will see you have the Ambient Occlusion Render layer active

**Then you can render out the Ambient Occlusion Layer following the steps for rendering the image.
In Photoshop
- Open both the master and Ambient Occlusion layers in one file.
You can open one and then LMB drag the other into photoshop.

- It will give you some Read options for the OpenEXR format and choose As Alpha Channel.

- You may need to adjust the master layer a bit first to fix any color or exposure problems you see.
- Be sure the AO pass is below the diffuse layer in the Photoshop layers. You can drag them to change the order.

- In the Layer Editor, Use Multiply to see both layers

You can adjust the transparency of the AO layer if it is making your image too dark.
and Save as open EXR, png or jpg or tiff image (be sure to turn off the Alpha Channel and any transparency.
For more about image formats: https://www.photoup.net/differences-between-file-formats-raw-dng-tiff-gif-png-jpeg/